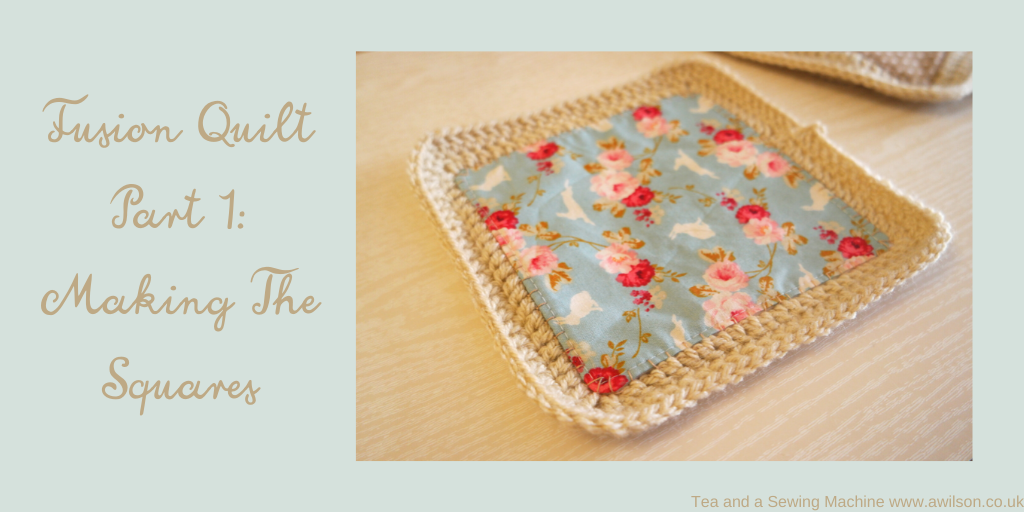
One of the things that I’ve had on a Pinterest board for a long time is this.
It’s a fusion quilt, which basically means that you make quilt squares then crochet them together, so it fuses sewing with crochet.
Every time this quilt pops up again, or when I see it there on my Pinterest board, I’m reminded of how pretty it is and how much I like it!
I’m not one for making quilts. I’ve only ever made one pram sized quilt when my eldest was a baby, although I’ve started a few!
A fusion quilt is different. Because you make the squares, then crochet them together, I think there’s enough variety to prevent boredom from setting in. Also the crochet part is the sort of thing that can be worked on for a few minutes at a time.
So this week, still having a desire to make pretty things, I started making my own fusion quilt!
I should say that the original on Pinterest doesn’t have a tutorial with it, and I’m not trying to copy it but make my own version.
Another raid on the fabric pile behind the bedroom door turned up some pretty fabric in colours I wanted to use, and some fleece fabric for the back of the squares. I also found some yarn for crocheting the squares together.
Obviously I couldn’t crochet straight into the fabric squares, and sewing fabric with yarn was going to cause some problems, so I used embroidery thread to edge the squares in blanket stitch. I was then able to crochet into the embroidered stitches.
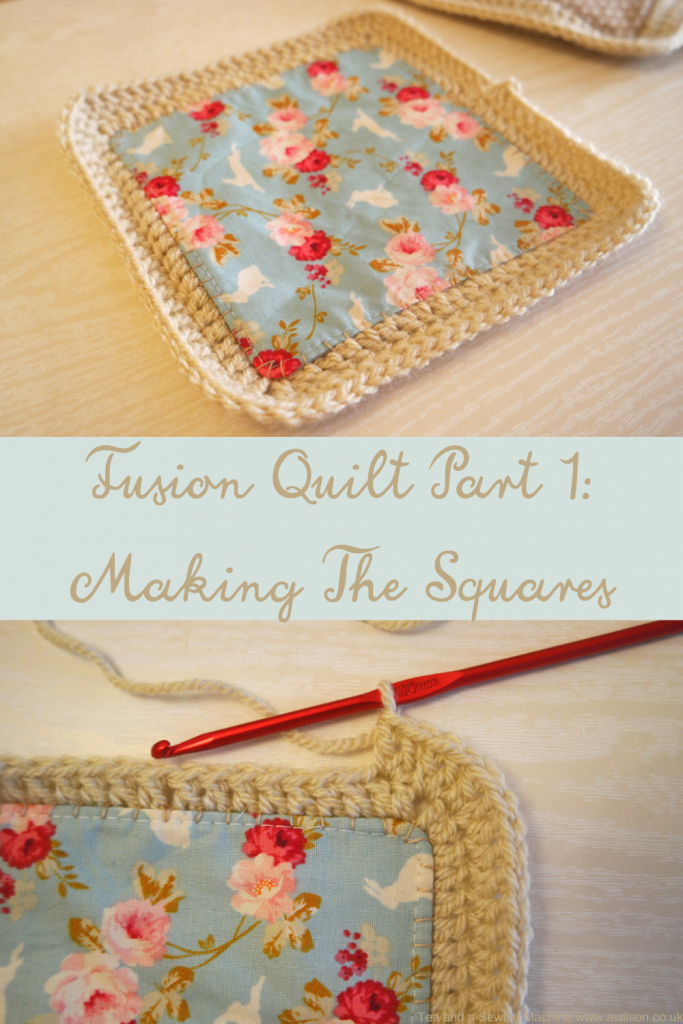
Making The Squares
You Will Need
Cotton fabric. This is a good project for using up bits left over from other things. If you don’t have enough to make a whole square, you could make quarter squares and sew them together.
Something to back the squares with. I used fleece fabric. Quilt batting would also work, but you would probably need to make extra cotton squares for the back too.
Embroidery thread. Something like cotton perle is better that the stranded sort.
Yarn and a crochet hook. A neutral colour is probably best, but you can use what you like! I used a beige colour in DK with a 4 mm hook. A lighter yarn would probably achieve a lacier look.
Cutting Out The Squares
One of the advantages of this kind of quilt is that you can make the squares quite large if you want to. It’s great if you tend to get bored with longer projects as you’ll be able to finish your fusion quilt more quickly!
I cut my squares 12 cm x 12 cm (4 3/4″ x 4 3/4″).
If you wanted to make some quarter squares to make larger squares of this size, you would need to cut them 7 cm x 7 cm (2 3/4″ x 2 3/4″).
The backing needs to be the same size.
How many squares is up to you, but bear in mind that they will need to make a rectangle. 24 is a good number to start with. You can always add more later.
Sewing The Squares
Take one cotton square and one backing square.
With the right sides together, sew round the edge leaving a gap for turning out.
Trim the seams and cut off the corners.
Turn out and pin the opening.
Using a long stitch on your sewing machine, top stitch around the edge of the square.
I forgot to take photos of this stage, but I made the squares in the same way as these reusable cloths. There are some step photos in this post if you need them.
Blanket Stitching The Edges
The blanket stitches allow you to have something to work the crochet stitches into.
To sew blanket stitch, sew a loop so that the loop is on the front of the square.
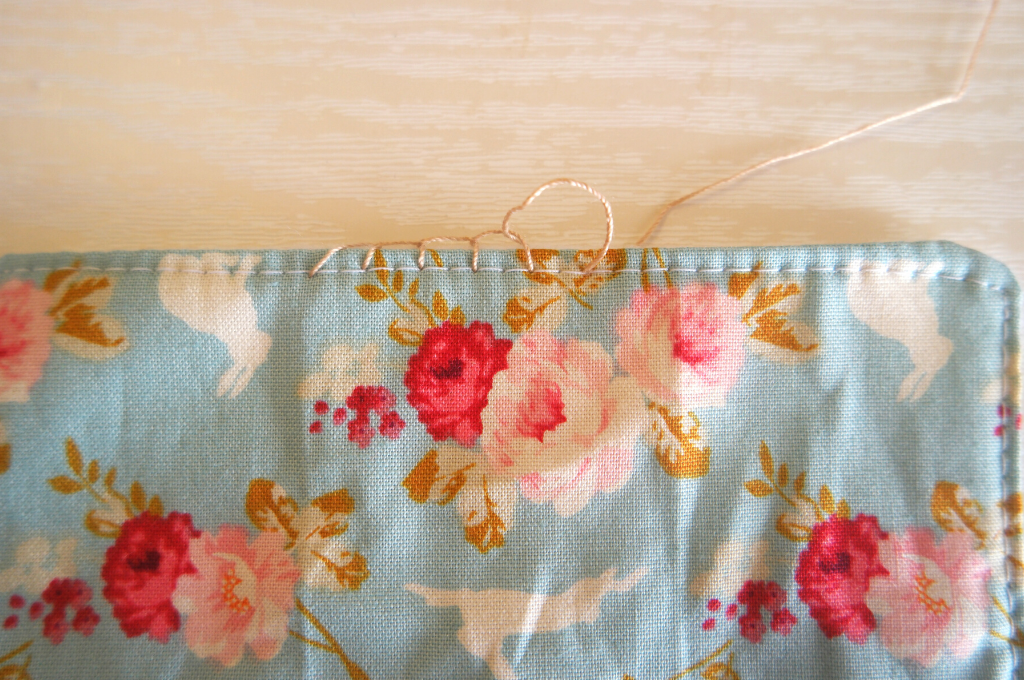
Then pass the needle through the loop from the back to the front. Pull it taut. The top of the stitch should sit on the edge of the square.
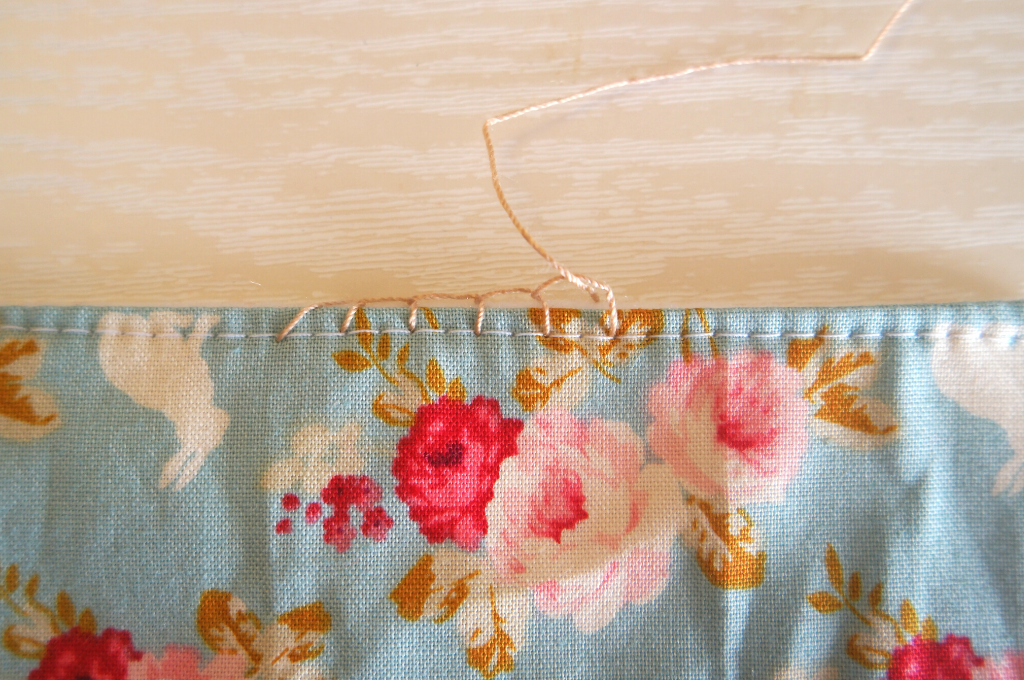
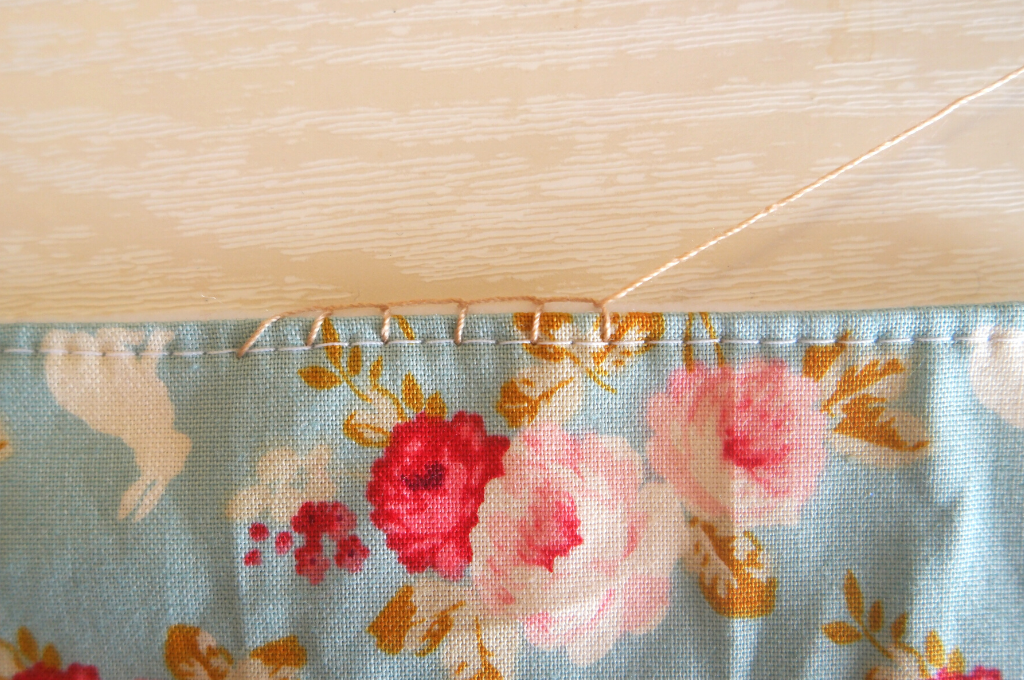
Now make another loop by passing the needle through from the front of the square to the back.
Take the needle through this loop, from back to front and pull it taut. Keep doing this until you get to a corner.
I used the top stitches as a guide to get them all about the same size. This also means that if you are finding it difficult to get the needle through the fabric, you can reuse the holes made already by your sewing machine.
Corners
This might not be the proper way of doing corners, but it’s the way I did them!
When you get near a corner, make the next loop directly underneath the corner.
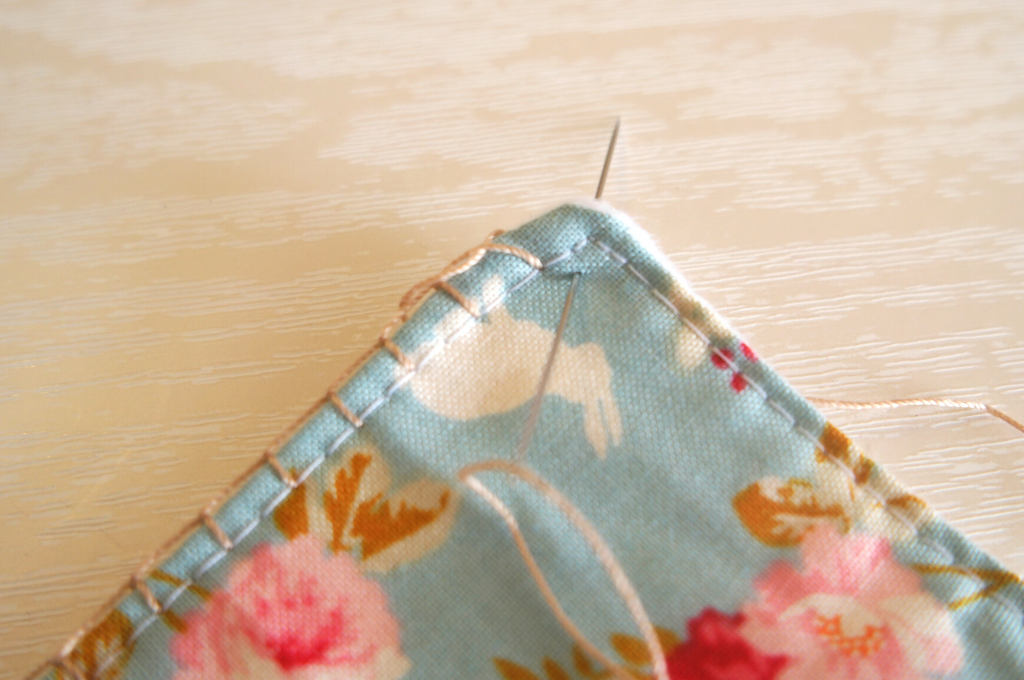
Pass the needle through and pull it so that the end of the stitch is at the corner.
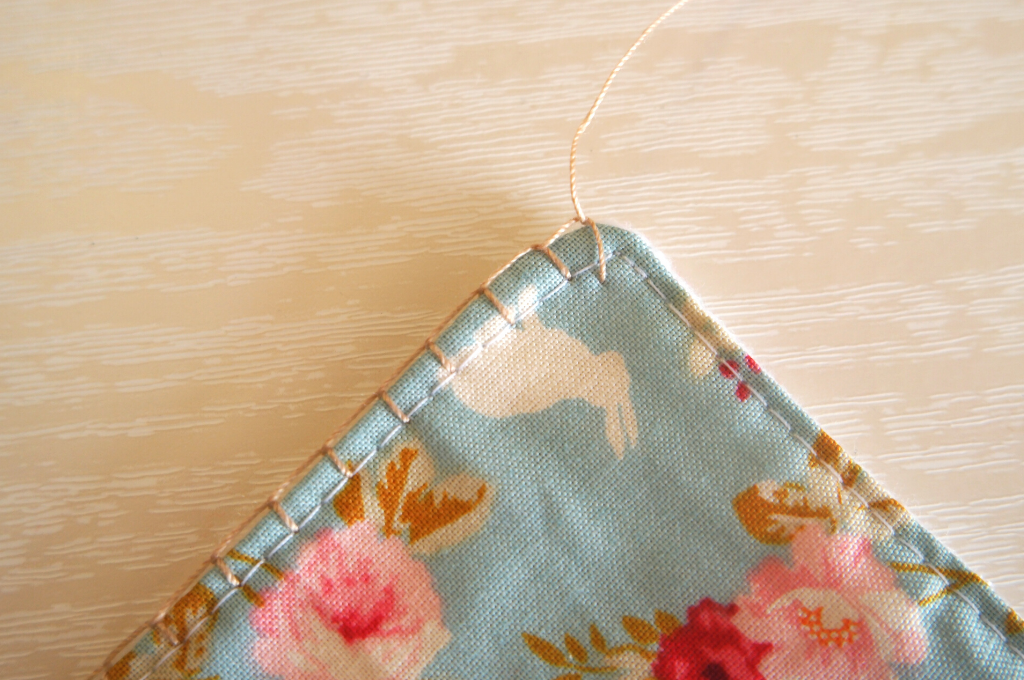
Now make the next loop by passing the needle front to back in the same place.
Pull the thread through again so that the end of this stitch is on the next side of the square and about the same length as the previous stitch.
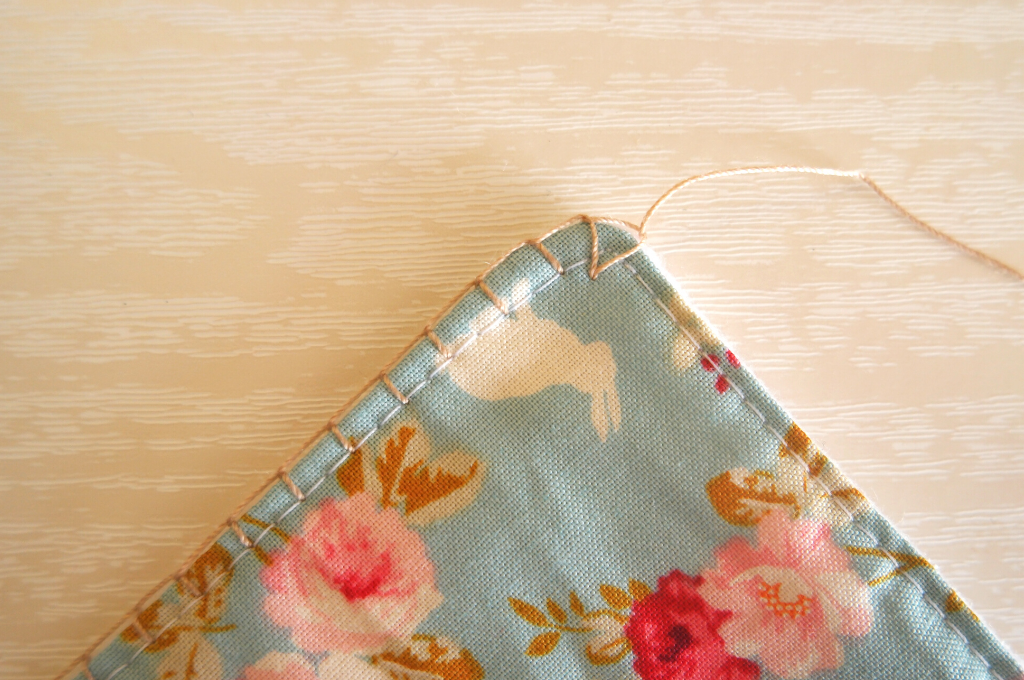
Then continue until you get to the next corner.
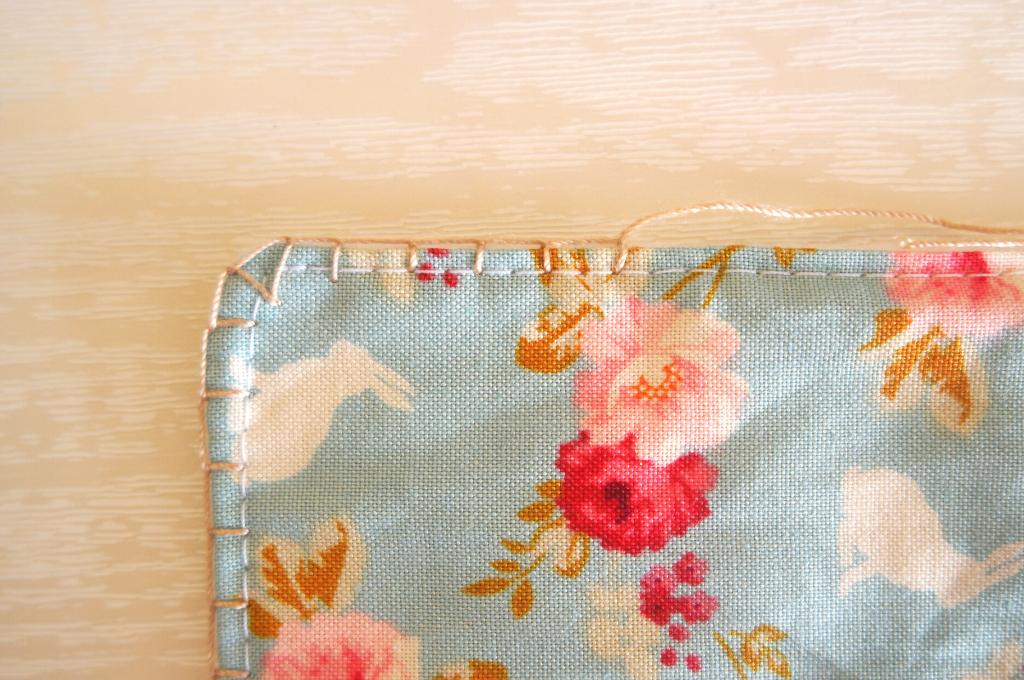
Keep going until you’ve got all the way round. When you get to the last stitch, thread the needle through the loop of the first one and tie the ends.
If you are particular about things being very neat and accurate, you’ll want to make sure that you have the same number of stitches on each side of the square.
I haven’t done that. I’m not too worried about the joins at the corners looking messy because I have a plan for those!
Crocheting Round The Edges Of The Square
Please note that being English, I use English crochet terms!
Round 1
Into one of the blanket stitches, join the yarn and make 3 ch.
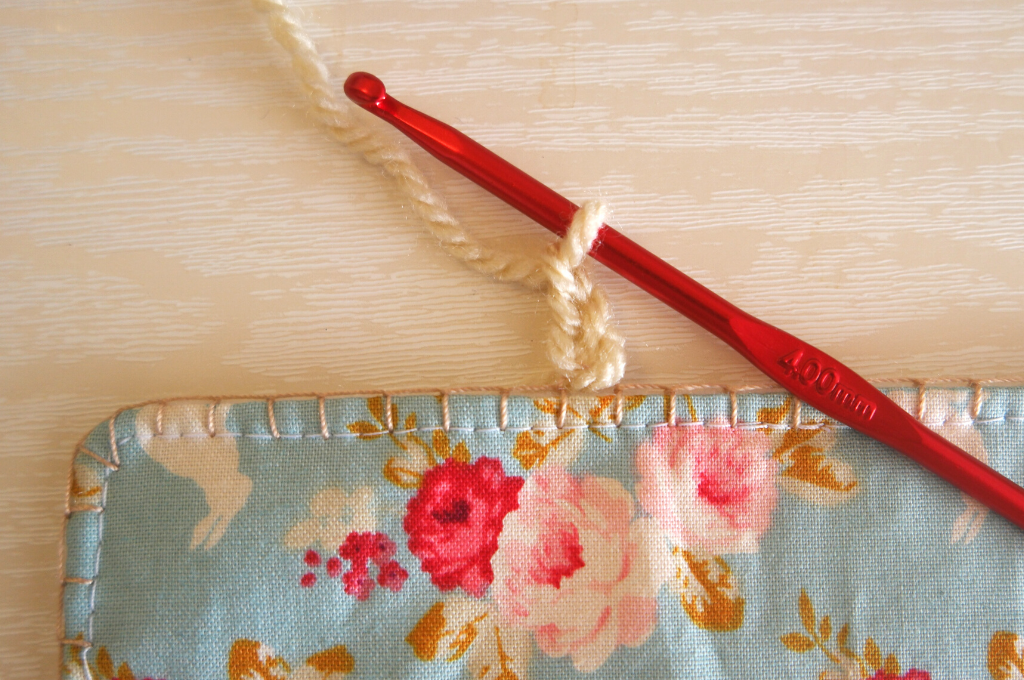
Tr into the next stitch, and subsequent stitches until you get to the corner.
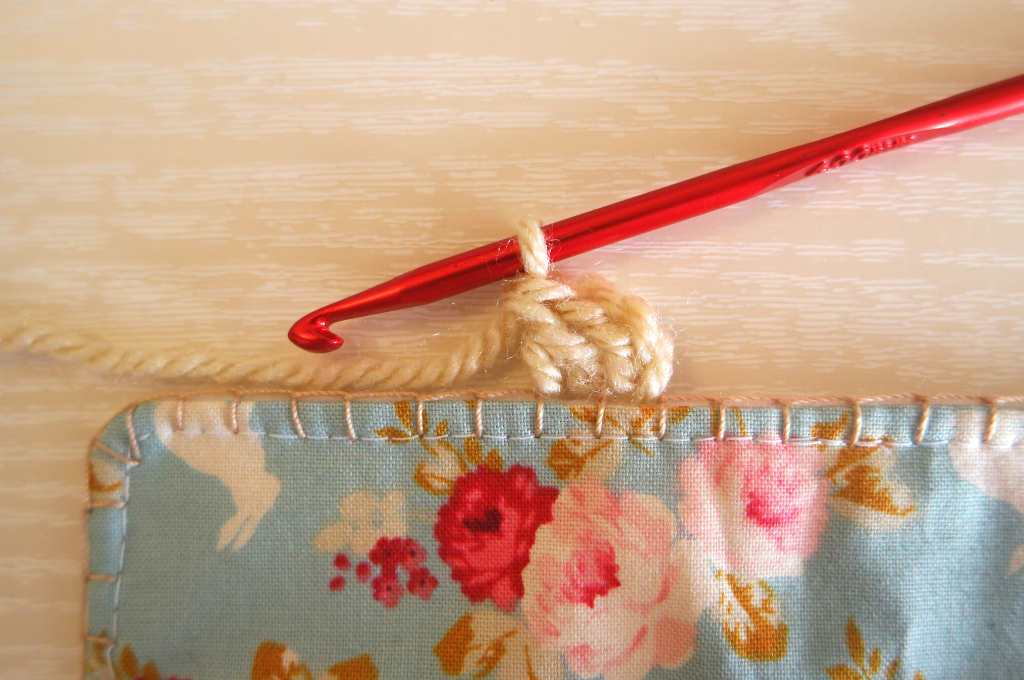
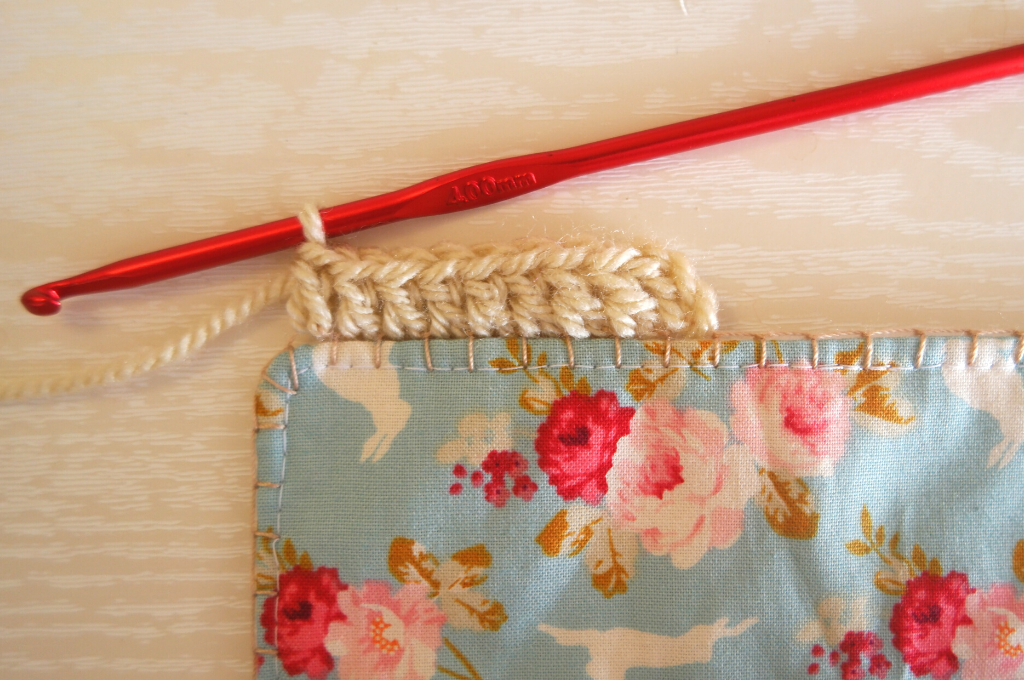
Into the 1st of the 2 corner stitches, tr twice.
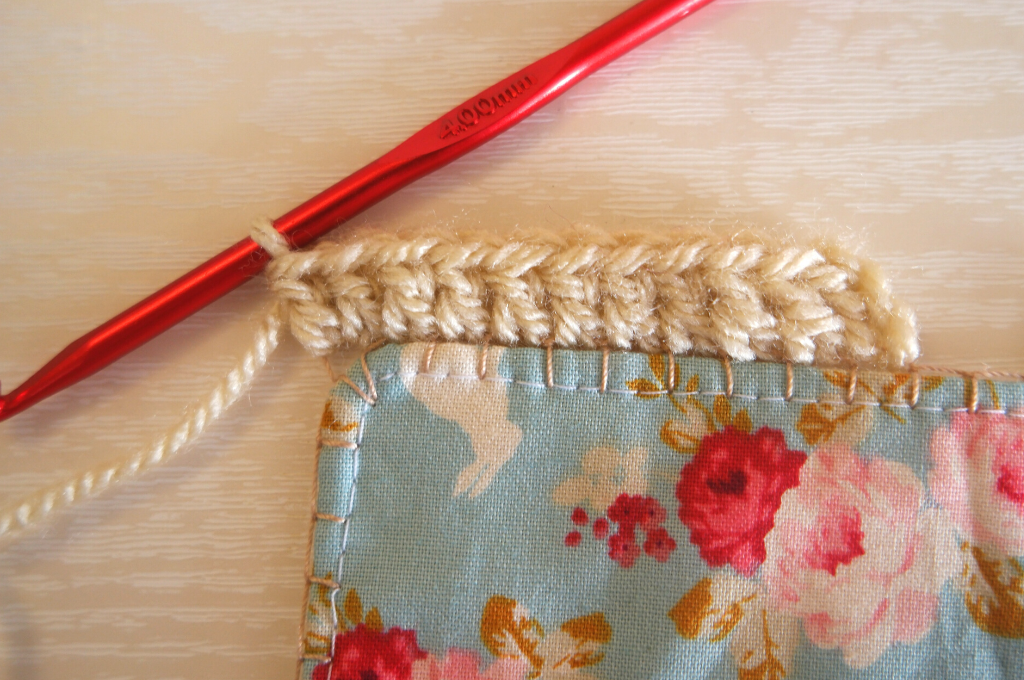
Then 1 ch, and 2 tr into the next stitch.
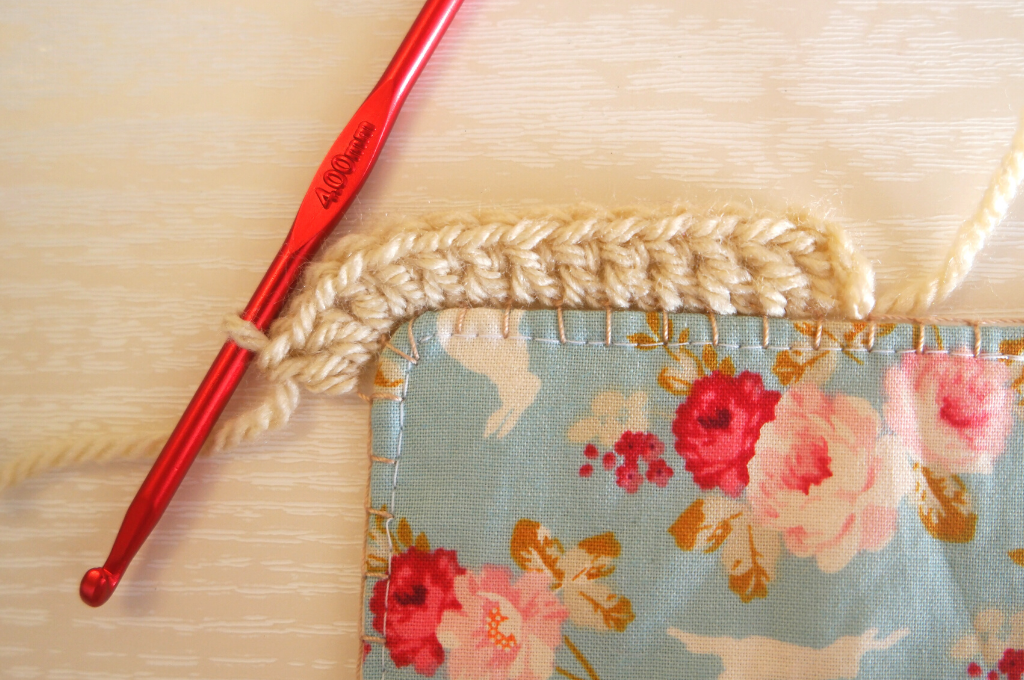
1 tr into each of the following stitches until you get the next corner. Crochet round each of the corners in the same way.
When you get back to where you started, join it with a ss.
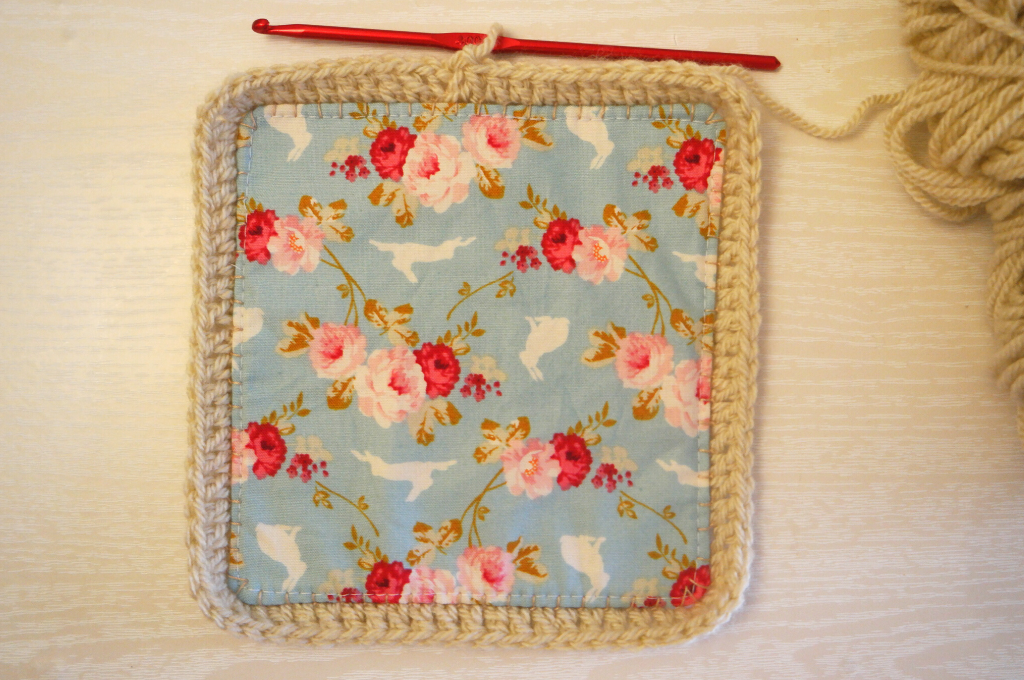
Round 2
3 ch, then tr into each stitch until you get the the corner.
When you get to the first of the 2 trebles crocheted into one stitch, crochet 2 trebles into the space between them. Then 2 tr into the ch sp, then 2 tr into the next 2 tr.
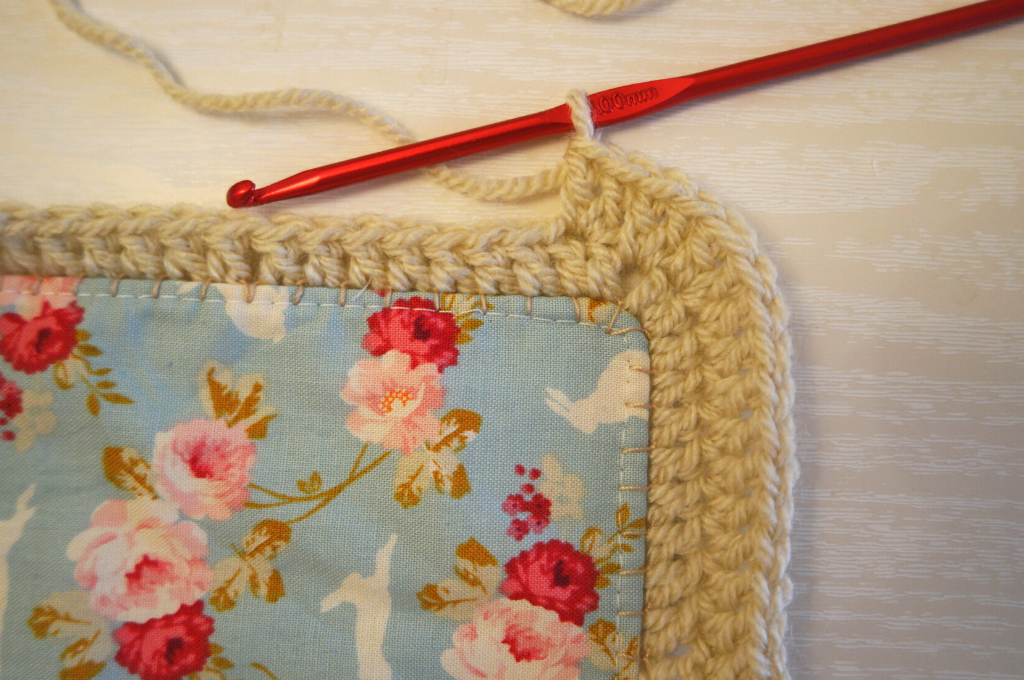
Continue with 1 tr into each stitch until you get to the next corner. Work each of the corners in the same way as the first one.
When you get back to the start, join with a ss and tie off the ends.
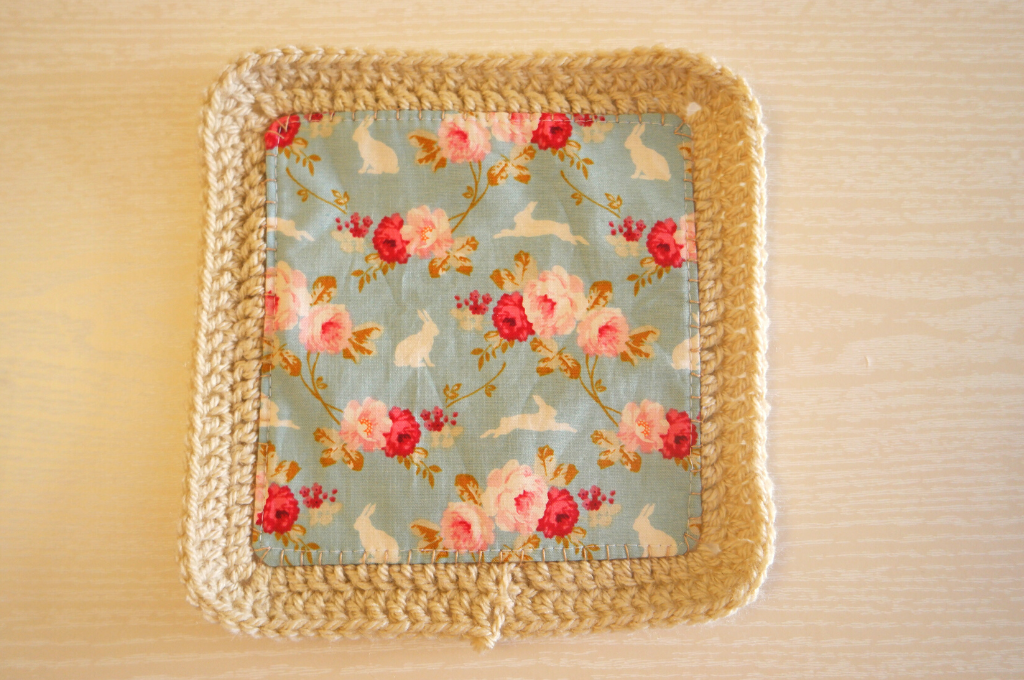
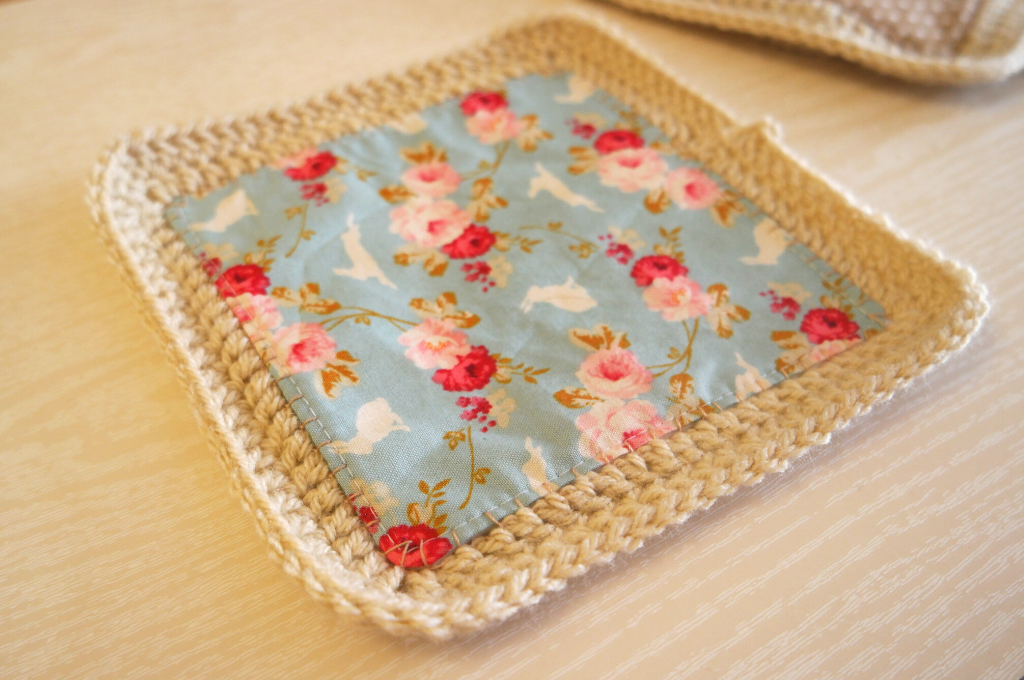
So far I’ve completed 3 squares, with another 2 ready to crochet.
As I have the attention span of a gerbil, it is possible that I won’t finish my fusion quilt! But I feel good about this and I’m hoping to get it done over the next 2-3 weeks, and , so watch this space!


I really like how you explained it
Thank you x
I remember a quilt made this way but the difference was the use of a small sharp knitting needle and measuring out where to put holes and with washable markers and put holes in the marks with the knitting needle now there are cutters that do this and goes quickly
Good idea!
Is there a part 2? I’d like to see what it was you had planned for the corners of your squares where they joined! Would love to see the finished project💗
Hi Tori, I planned a part 2, but as of this moment the squares are still in the pile of unfinished projects. I’m sure it will be lovely when I’ve finished it!
Thank you for the detailed instructions I have cut the squares out , front and back plus batting a few years ago and never known how to put them together. Now I know and might tackle it early next year
I was asked to crochet a blanket using some of the teenage son’s baby clothes items that she saved for him and the mom wants to give to her teenage son for his birthday. So how would I go about doing this? If anybody has some ideas I would very much appreciate them.
Hi, you could make squares in the same kind of way that I did for this blanket. So you could cut squares the same size from the clothes, if his mum is happy for you to cut them up, then crochet the squares together.
😊
Hi Anna,
I loved your fusion quilt idea. I’ve just got my fusion quilt finished last month. I’d collected scraps of fabric over the years and sewn them up. When I had enough, I decided to turn my project into a fusion quilt after seeing your post. It took a while but I’m so pleased with the results. I’d run short by four squares, so added in four which I crocheted with words on them. When the quilt was finished, it was big enough to cover the top of a Queen Bed. 🙂
So thank you Anna ☘️💚☘️
I’m so glad to find this quilt idea! Thank you! I have hundreds of vintage handkerchiefs that would look lovely in this quilt! I have other projects lined up to use the hankies, but I think this quilt would be the best way yet!!! Thank you so much for your instructions!!
Hankies are a genius idea!
This is a great idea – I have some beautifully embroidered (on line) place mats and coasters that my Mum did about 60 years ago – she even did a pulled thread hem stitch. I will never use them as they are but I can crochet so think I will do this with lightweight (Twilley’s 20) and make a runner for my chest of drawers. There are 8 place settings so should be enough.
This is beautiful I sew plus crochet. This would be so much easier for me since I’m a slow crocheting. This will be a nice winter project.
I was intrigued by this project when I came across it. Just finished my own fusion quilt after a couple of years in the making. It took so long as I made my squares from scrap fabric I collected. It turned out bigger than I expected but I’m very pleased how it looks.
I love this project, as I’ve wondered whether it was possible to bring my hobby and my bestie‘s hobby together. My bestie and I are making this for our other bestie’s first grandbaby, due in June. I’m the quilter. Am I sewing a 1/4” or 1/2” seam around the squares?
That’s a lovely idea. The seams are 1/4″
I have never heard of such a thing, but looks like a lot have. Thank you for contributing.
I am combining embroidery with quilting, and trying QAYG, now English Paper Piecing. This is lovely and I have immediate ideas… I will assuredly start one. Mom taught me so many handcraft skills, mostly faded back as I worked long hours, raised kids, repaired house (dad skills), gardened, canned, etc. Now retired, COVID home, and loving going back to my upbringing. I honor my parents and grandparents and the time they spent teaching me life skills. My son has a home and family and crowed “Mom! I have life skills!” as his friends buckled under the expense of hiring it all out. It is the sweetest thing he ever said to me.
Question – When it comes time to crochet squares together, do you think it might be important to have the same amount stitches on each square?
Yes that would definitely make things easier
Thank you very much.
This will be my project for 2022
Wow. I have had this saved on Pinterest, as well. Thank you so much for the tutorial!! This just came up on my Google news feed today and I saved it. I have some butterfly fabric that would work beautifully with this pattern. Thanks for the nudge to get busy!!
It’ll be a nice project to start over Christmas as well. Have fun!
My brain isn’t working right now. So I need to ask about the yarn. What does the Bk mean? Sorry if it’s a simple question that I am just being dull about. 🥴
Hi Debbie, I couldn’t see a BK but if there is one, it will be a typo! It ought to say DK as in double knit, which you might also know as light worsted.
Hi,I made a fusion quilt in the summer, with left over fabric bits and am really pleased with the result. Thank you so much for the inspiration.
I am an old lady and have always wanted to make a pretty fusion quilt. You made this look so simple, so today I took “the bull by the horns” and went shopping for the supplies to make this quilt. (The hard part was selecting the fabric, there is so much gorgeous fabric on the market) Can not wait to get started and hope I finish before the Lord calls my name. Please post a picture of your finished project.
It is hard to choose! I would love to be able to show you a picture of the finished quilt, but it’s still at the squares stage!
This is lovely, have you joined them together yet. Looking forward to seeing how it looks. I’ve got my squares ready but not sure how to join them once I have crouched around!
Not yet! This is a good tutorial for joining squares if you want to get on with yours https://attic24.typepad.com/weblog/joining-granny-sqaures.html
I’ve been wanting to try this for years ! My sister gave me a book with a very similar quilt in it must be nearly 40yrs ago ! Hadn’t thought of not using wadding/batting but have just bought some beautiful quilting fabric and soon as I can get some wool and suitable backing I’ll be off
Thank you for the fresh idea ! Good luck with yours !
what a good idea to combine the two
Isn’t it? I wish it had been my idea!
Merci pour le tuto , c’est un projet qui me plait beaucoup et j’aime votre choix pour le tissu !!
Christine
Thank you! It’s pretty isn’t it? I was so happy to find a big piece of it in the fabric pile!
Oh my, this is beautiful. I don’t crochet but have drooled over a few of these on Pinterest. They are the ultimate in prettiness. x
Me too! You’ve given me an idea too, so watch this space!