 I just love to read and, since Husband bought me a kindle for a couple of years ago, I read even more. It is fab. I have also managed to get out of the trashy thriller rut that I had found myself in.
I’m now onto my third kindle. The first one broke after I stepped on it. It turns out that the screens are not so robust. I am a rather chunky human, but I didn’t even nearly put my whole weight on it. Boy 1 has my second kindle as I now have a paperwhite so I can read in the dark, yay!
Unfortunately the paperwhite is a bit bigger than the original kindle so the case I had was too small. Also it seemed best to give the case to boy 1 along with the kindle as it lives in his bed along with his buses.
I realised I needed to make a new a case a couple of weeks ago when we got to church (the Bible on kindle is not nearly so heavy!) and I had to carry my precious book collection across the car park in the rain. Thankfully I had some lovely ripstop fabric left over from my Tardis bag, so I set about making a waterproof cover for it.
How to Make a Quilted Waterproof Kindle Case
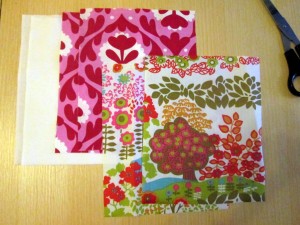 ripstop fabric 2 bits 18 cm x 24 cm
Cotton fabric for lining 2 bits 18 cm x 22 cm
Batting 2 bits 18 cm x 22 cm
Extra cotton fabric 2 bits 18 cm x 22 cm. This will go between the batting and the rooftop so it doesn’t matter but it needs to not be visible through the rooftop. I used white cotton.
1 button
About 15 cm of bias binding. You could also use elastic or ribbon.
A seam allowance of 1.5 cm is included in the measurements.
1. Cut your fabric. The measurements I have included are for a Kindle paperwhite. If you are making a case for a gadget of a different size, remember to allow a generous seam allowance because the quilting process might result in bits that are slightly smaller.
2. Layer up the pieces for quilting. Put one piece of batting onto a piece of plain cotton and lay a piece of lining fabric on top of the batting to make a batting sandwich. Pin together.
3. I’m no quilting expert, but this is how I did it! Starting at the top of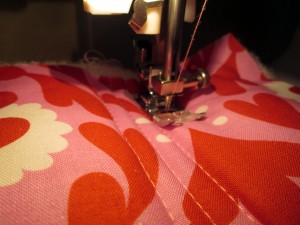 one of the short edges and half way along, sew down the sandwich in a straight line using long stitches.
4. Turn it up the other way. This to prevent distorting the fabric and ending up with a thing that looks wonky. 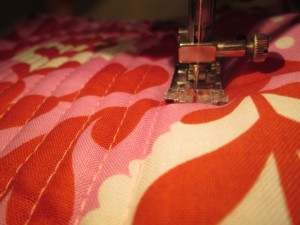 Line the edge of the presser foot up with the row of stitches you have just completed. Sew another straight line parallel to the first one. Keep going until your batting sandwich has lots of rows of stitching all about a cm apart. Make a second batting sandwich and repeat.
5. Trim the now quilted batting sandwiches so that they are neat. This is to reduce the chances of getting into a muddle, not because I 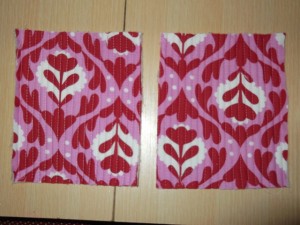 am a neat freak! Keep checking with your gadget that the bits are big enough and that you are not cutting too much off.
6. Pin together with lining pieces inside. Sew around three of the edges, leaving one of the short sides open. Check that your gadget fits inside, then trim seams closely. That’s the snuggly, quilted lining completed!
7. Using the lining as a guide, pin or tape your exterior pieces with right sides together. If pinning, be sure to only pin in the seam allowance as the holes will show!
8. Sew around three of the edges leaving the short, top edges open. Check that the lining fits inside snugly, then trim seams and turn right side out.
9. Put the lining inside the ripstop outer. Match up the side seams. Fold the top edge of the outer down over the lining. Fold the raw edge under and sew.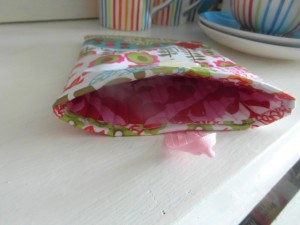
You may have noticed that I did not fold my raw edge under. This is because I got into a muddle. Thankfully ripstop does not fray.
10. Almost there! Sew a button to the front of the case near the top. 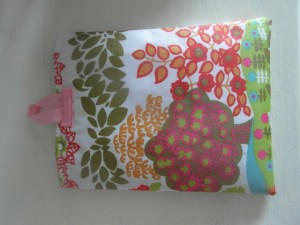 Work out how much bias binding you will need for the loop and attach to the back using a second piece of tape.
11. Put your Kindle in its snuggly waterproof case and wait for an opportunity to take it out in the rain! Just don’t drop it in a puddle and then step on it. 🙂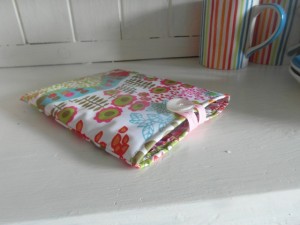


Leave a Reply