Tips For Using Digital Sewing Patterns
Often when I make clothes for myself using sewing patterns, it doesn’t go so well.
Even this coat that I made a few years ago had some issues, although I considered it a success and I wore it for a number of years until it became too big.
Sizing issues, having to do things the “right” way rather than the easiest way, technical difficulties with things like collars and getting bored with all the steps have all caused me a certain amount of irritation when I’ve made things with patterns!
It was my frustration with patterns that lead me to attempt to make my things for myself without using a pattern. This ultimately resulted in me writing 3 ebooks, Sewing Clothes Without a Pattern, A Basic Guide to Drafting Pattern Pieces and Designing and Making a Dress From Scratch (you can find out more about my ebooks here!).
Anyway, I decided that I wanted to make a top for myself. I considered drafting the pattern myself, but there’s a lot going on at the moment with my boys and things at home. My energy is limited, so I decided to have another crack at using a pattern.
My friend Paula recommended Colette patterns ages ago, so I had a look to see whether they had anything suitable.
There was! It’s this top, Elmira. It was just what I was looking for!
I had a good look on the internet but I could only find it as a digital pattern. I’ve never used a digital pattern before, but I’ll give most things a try and I really liked the top!

Hang On, a Digital What Now?
A digital pattern is a pattern that you buy online and it’s delivered to your computer. You then open up the file and print it out yourself at home.
It’s a brilliant idea.
You can start straight away without having to wait for the postman or go traipsing into town.
You can buy patterns from Etsy or directly from people’s websites and feel good for supporting small businesses.
If you mess it up, or cut out the wrong size, or if your kids ruin it, or if your husband spills gravy all over it, or if you gain or lose weight and you want to make another one in a different size, you can just print it out again.
Unfortunately it’s also a minefield of potential problems, which I’ll come to in a minute.
I’ve successfully negotiated my way through the minefield to making a top that I like, that I wore on holiday with an orange tutu in a wood.

The instructions for making the tulle skirt are here. Go on, you’ll feel like a 4 year old at a birthday party every time you wear it!
Problems Using a Digital Pattern
The first problem I encountered was printing it out. My printer will usually print things in such a way that it will fill the page with whatever it is printing.
Most of the time this is fine, and as American paper sizes are different to British ones, I don’t have to worry about things looking weird or wrong.
Unfortunately with a pattern, this is a problem! It means that the size of the pieces that come out of the printer are a different size to the originals.
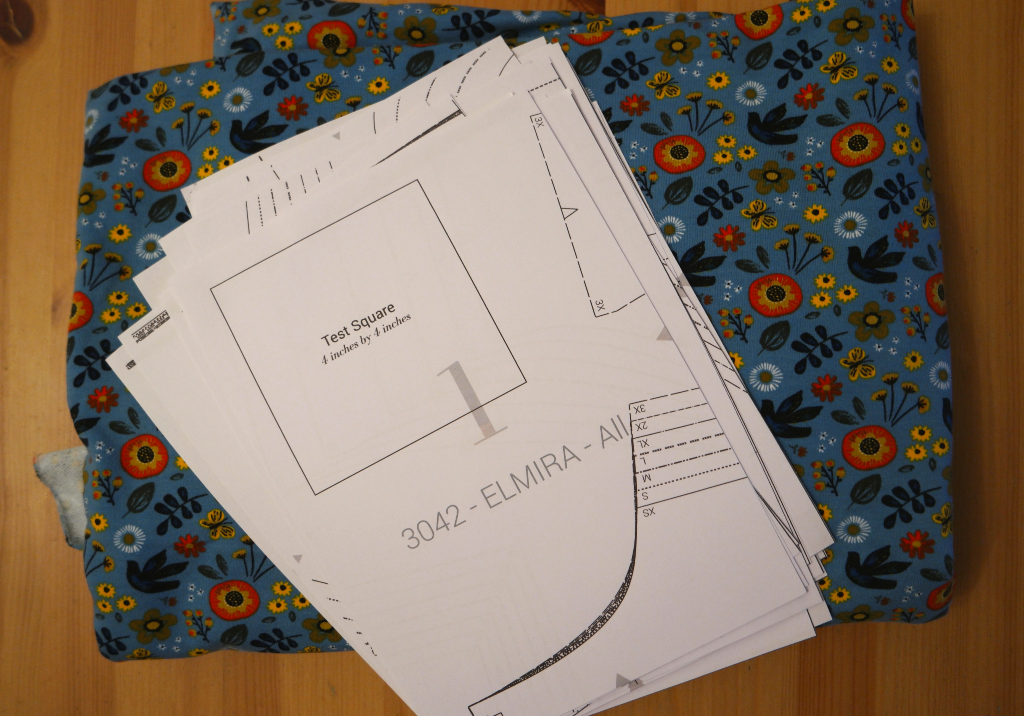
When the first page came out of the printer, thankfully I spotted that it had a test square on it. I wouldn’t have thought to check otherwise! I hadn’t I would have ended up with something that was the wrong size.
Problem number 2 was matching the lines. For some reason, the lines didn’t entirely line up! As somebody in Instagram suggested, I matched the lines rather than the pages, but there were still some problems. In the end, I decided to focus on matching the lines for my size as best I could, knowing that I would need to check the fit anyway.
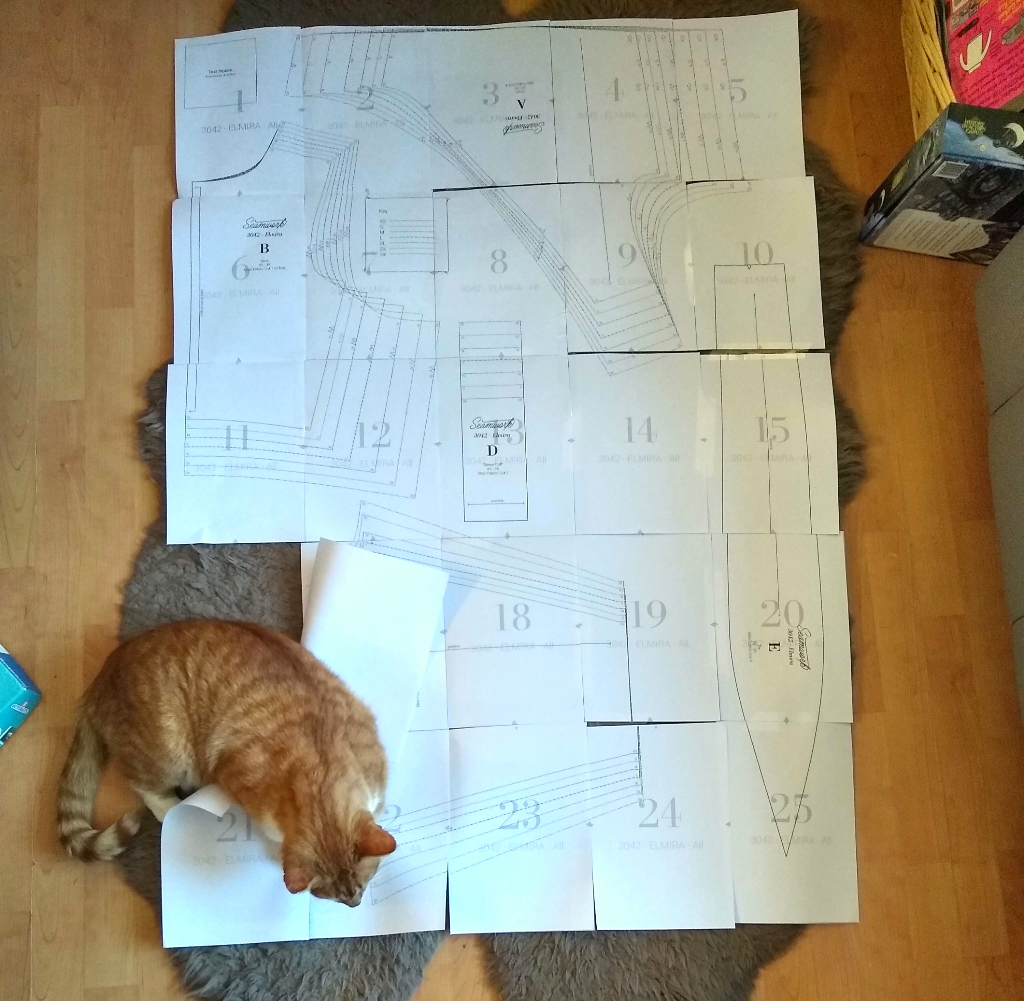
Problem number 3 was sticking it all together. If you live in a house that has at least one nice big room this is probably less of an issue, but I live in an oldish house that has small rooms, plus 4 kids, lego and various messes all over the place.
I did manage to stick all the pieces together on the floor of the front room, but if the pattern pieces had been any bigger I would have had a problem.
Problem 4 was this.

Problem 5 was cutting out the pieces and discovering that I’d not used enough sellotape on the joins, so that the bits were barely held together. This wasn’t too much of a problem while I was cutting out, but as I couldn’t do the pattern and cutting out parts all in one go, I had to fold it up and dump it on a chair until I could come back to it. That’s where there ended up being problems and things needed to be restuck.
So if you’re new to digital patterns, here are my tips for using them.
Tips For Using Digital Patterns
When you’ve bought your pattern, you’ll need to download it. Usually the link will either be in an email, or there will be a link to where you can download it.
Everything I download on my laptop automatically gets sent to the downloads folder. If you’re a windows user, you’ll probably have one too.
Once you’ve found the file, it might need extracting if it was sent as a zip or compressed file. Double click on it and it will ask you whether you want to extract it. Saving it to the same folder is probably easiest as you’ll be able to find it next time.
Open the files. Usually they are in pdf form. On my laptop, if I double click on the file it opens in Google Chrome. Otherwise, you could use Adobe Illustrator or Photoshop. You just need to have it open so that you can print it.
Tell your computer to print it. When the dialog box opens, check that it’s set to print at 100%. You might need to uncheck the “Fit to Page” box.
Print the first page and check that the test square is the size that it’s supposed to be. If it’s not, check your settings again.
You’ll probably need to trim the pages down a bit so that the lines of the pattern will join when you stick them.
Sort the pages out in order and stick them together with tape. Make sure that you match the lines up of your size, and use enough tape so that they stay together after you’ve cut them out!
Cut out the pieces as you would a pre printed pattern. If the lines don’t entirely match, my honest advice is to fudge it! Those edges will be in the seam allowance and you’ll have to check the fit anyway.
Do you have other tips for using digital sewing patterns? Leave them in the comments below!


Leave a Reply