The Atom Superhero Style DIY Costume
I no longer feel like Superman’s mum.
You know the part where his mum makes his suit?
As far as I am aware, she only does it the once.
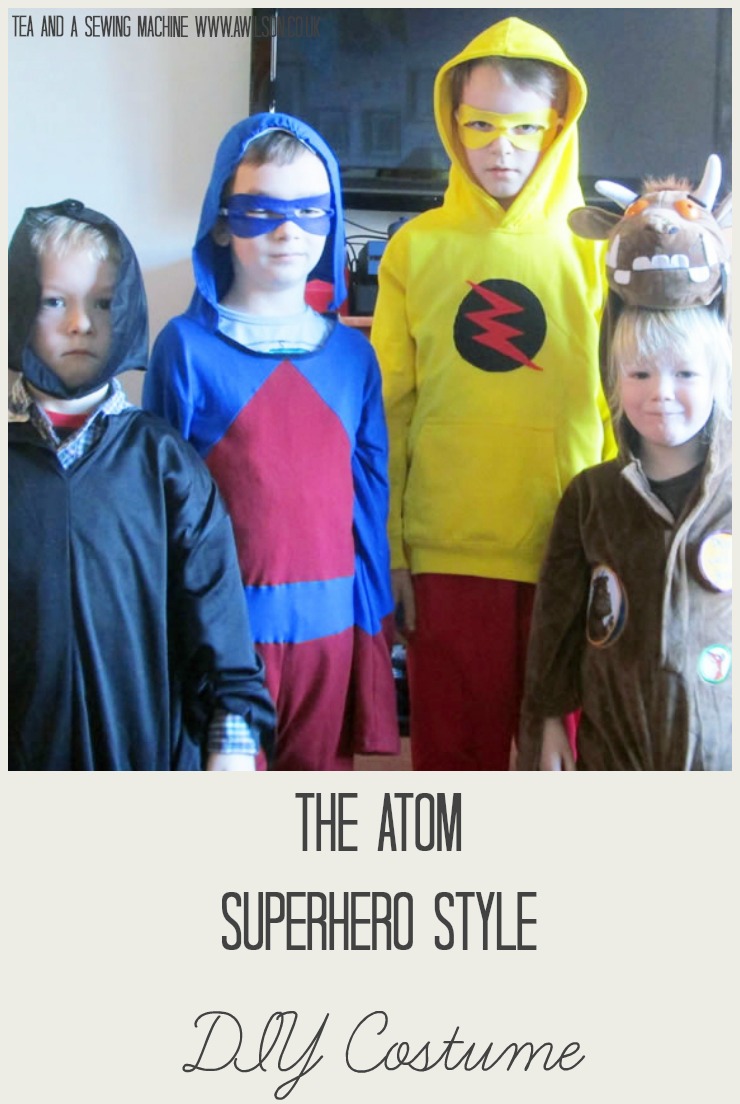
It is like I am mum to umpteen superheroes. Including Booster Gold (I know, nobody’s heard him!), Green Arrow, Green Lightening, the Reverse Flash and now The Atom.
It’s just as well for my little superheroes that their mum likes sewing!
How to Make The Atom Superhero Style Costume.
To make this outfit, I used the same approach (and some of the same pattern pieces!) as the I did for the Booster Gold Suit. For this I used one of Aidan’s existing superhero outfits as a starting point.
The fabric I used came from Minerva Crafts (affiliate link).
Making the Pattern
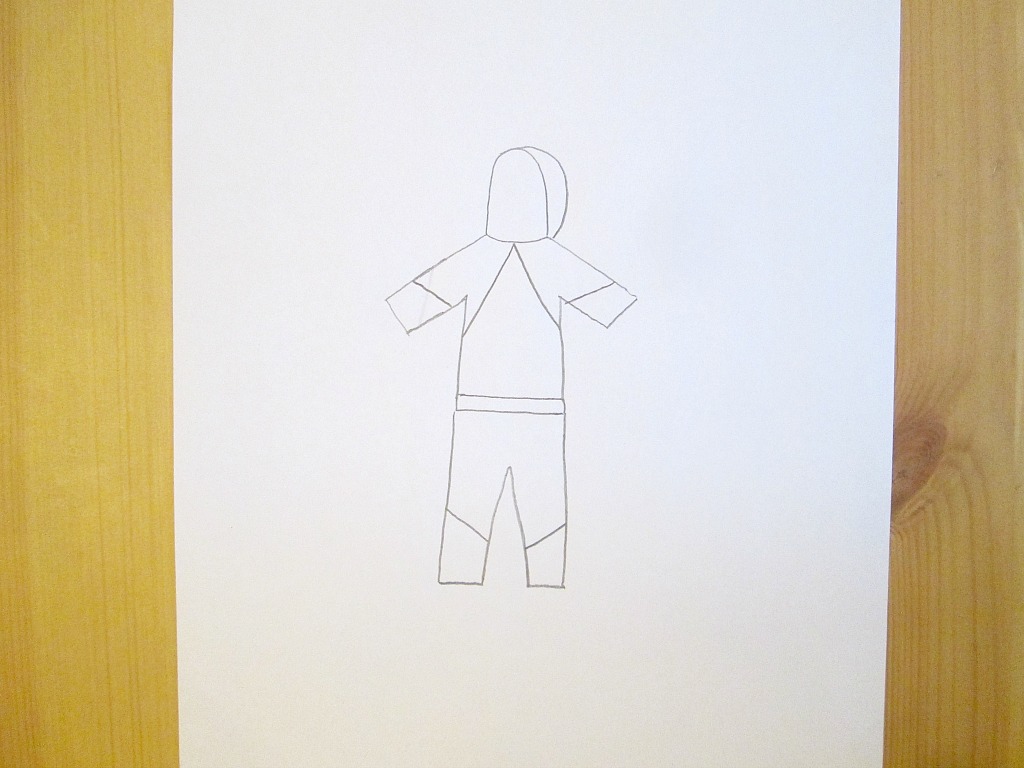
1. Make a simple drawing of the suit you are going to make. It doesn’t need to be a brilliant drawing, it’s just to give an idea of the shapes involved.
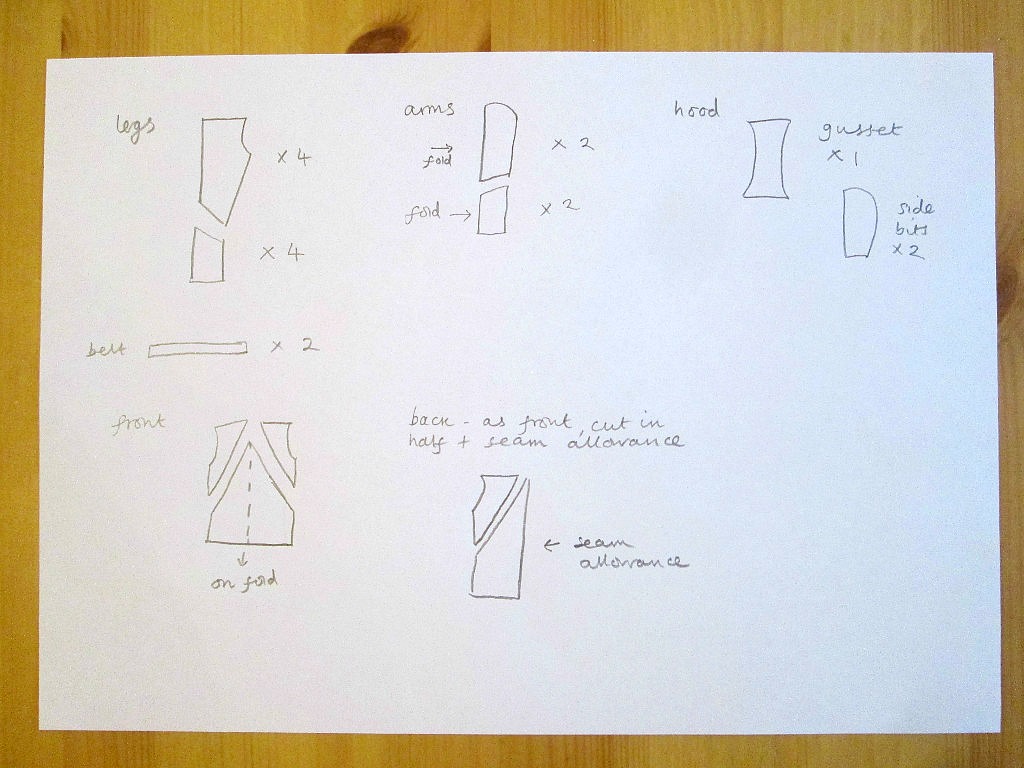
2. Now draw the separate bits that you will need.
This is how mine looked.
Legs: 2 sections, 2 of each needed for each leg (front and back), 4 of each section needed in total.
Arms: 2 sections, 2 of each needed for each arm, 4 in total. I had orginaly planned to cut these on the fold, but I realised that the triangle shape where the sections joined could be tricky.
Front: 1 red triangle section cut on the fold, 2 blue sections covering shoulders and armholes.
Back: Same as the front but with the triangle cut in half and a seam allowance added.
Hood: 2 side sections and a gusset.
Belt: sewn into the suit. 2, one for the front and one for the back.
3. Using the existing superhero suit as a size guide, draw these shapes onto pattern paper or greaseproof paper. Remember to add a seam allowance! If you are not using an existing outfit as a starting point, you might like to take a look at this post A Guide to Pattern Pieces.
Cutting Out
Now cut out all the pieces. It’s a good idea label each piece by pinning on a scrap of paper to save confusion later!
The red triangle on the front is cut on the fold.
Sewing Up
1. Take one of the blue leg sections and one of the red ones. Sew them together. It can be tricky sewing things that are cut diagonally, so check before you sew that the bits are the right way round.


Do the same with the other pieces so that you have 4 leg sections.
2. Take 2 of the legs and join the front seam. Repeat for the other 2 legs.
3. Sew the belt sections to the top of each pair of legs.
4. Take a blue arm piece and a red arm piece and sew these together. 
Sew these arm pieces together along the top, ie wrist to shoulder, not wrist to armpit.
Repeat for the other arm.
5. To make the front, sew the blue side sections to the red triangle in the middle.
6. Do the same with the back pieces, then hem the back opening.
7. Sew the hood gusset to the hood side pieces.
Now to join it all together!
8. Sew the front and back sections together at the shoulder seams.
9. Pin, then sew the sleeves into the shoulders.
10. Sew one pair of legs to the front. Then sew the other pair of legs to the back. The open back sections will need to overlap slightly where they join to the top of the trousers.
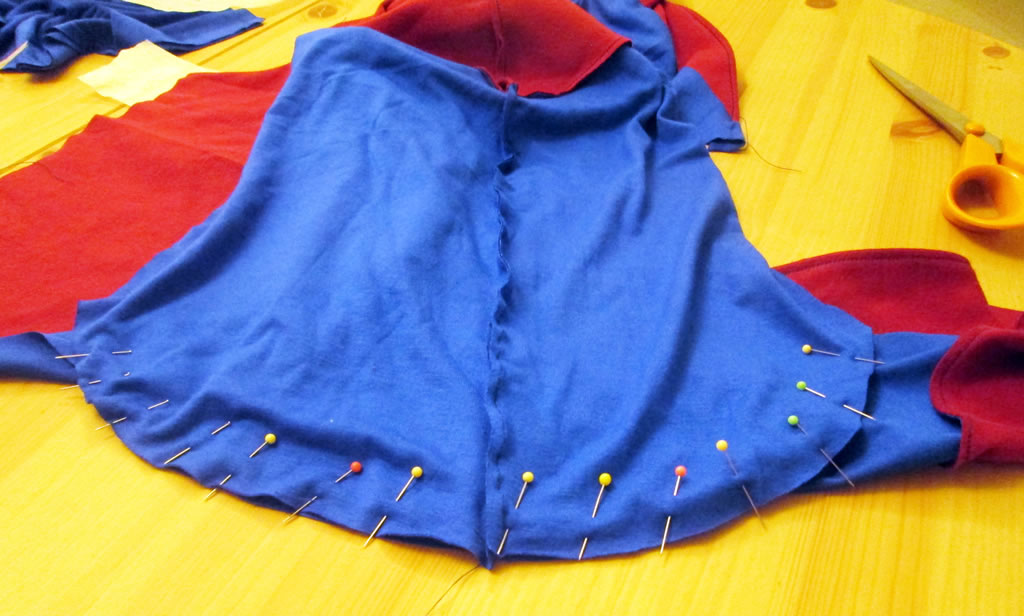
11. Now pin the side seams. Check as you pin that the seams of the different sections are aligned. Sew from arm pit all the way down to the bottom of the leg. Repeat for the other side.
12. Pin the sleeves, checking that the seams of the red and blue sections are lined up. Sew from the armpit to the wrist.
13. Attach the hood to the top. The best way to do this is to find the centre of the hood, then pin from the opening at the back round as far as the hood will go. Sew. Then hem the remainder of the bottom edge of the hood. This will make it easier for your little superhero to get the suit off when he needs the loo!
14. Finish the neckline and the hood with bias binding.
15. Sew buttons or velcro on the back, and also onto the hood to attach the open edge to the rest of the suit.
16. If the hood needs it, you could sew a smallish (10 cm, not more) of elastic to the top of the hood on the inside.
This Atom superhero suit can be adapted for all kinds of superheroes as a lot of them are quite similar.
Linking up here.


Great idea:) I’m always so grateful when school dress up days come round that I can sew, its being organised enough to make in time!!!!
vicky myers recently posted…Restyled Shabby Chic Dining Room Chairs
It usually results in some late nights here!
That’s so fun!! I need to pin this to my Halloween board! Thank you so much for sharing at my craft party on Thursday! Would love to see your newest posts this week, which starts at 7pm EST.
Thank you, I’ll be there!
So cute! Thank you for sharing at The Really Crafty Link Party! Pinned!
Thank you xx
Great detailed instructions!
Thank you!
Great costumes! I love the names: Reverse Flash! Lol!

Louise recently posted…Lemon & Raspberry Cupcake Free Tutorial
Reverse Flash is silly, I’d expect him to be really slow! I think it’s a boy thing :s
A really great tutorial and lots of really helpful photos too, I do like to be able to see if what I’m doing is what it’s meant to look like.
I like lots of photos too!