Quilted bag tutorial
This quilted bag tutorial is the last in a series of posts I have been writing to show what can be made using the new Tilda fabric collections, Memory Lane and Cabbage Rose. I was sent the fabric so that I could take part in Stitch Craft Create’s Tilda Blog Hop.
I’ve so far made a lined pouch with a zip and a flat bottom, a quick and easy fabric basket and a small round bag.
This project uses 3 fat quarters, 1 patterned and 2 plain. All 3 are use to make the outer. The lining is made from plain fabric and the patterned fabric is used for the binding and the handles.
Because of the shape of the bag, it needs something to help it to hold its shape. I had originally planned to use thick sew in interfacing, but I used the last of it when I made the zippered pouch. So I decided to quilt it instead. The quilting allows the bag to hold its shape and makes it beautifully squishy!
I didn’t add any kind of closure when I made it, mainly because I used the last of my magnetic snaps on the small round bag. If you wanted to add a closure of some kind, you could use a snap or a button.
Here is the quilted bag tutorial!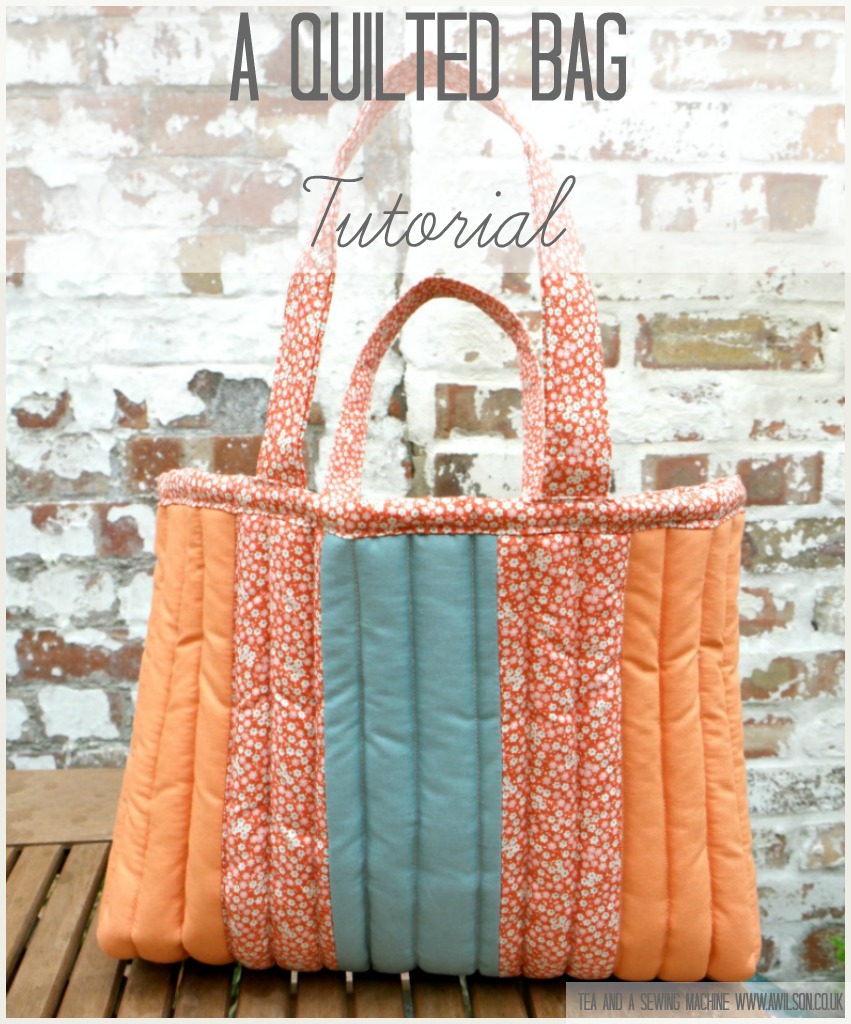
How to Make a Quilted Bag
You Will Need
3 fat quarters of cotton fabric, 1 patterned and 2 plain (I used Cabbage Rose Tess Ginger, Cabbage Rose Solid Ginger, Cabbage Rose Solid Teal), wadding, interfacing, fabric for interlining (you could use an old pillowcase or something similar), usual sewing supplies.
Cutting Out
Outer
Each fat quarter will need to be cut with the short edges top and bottom. The bag outer pieces will use the whole length of the fabric.
From the patterned fabric, cut 2 strips 8 cm wide.
From plain fabric A, cut 2 strips 15 cm wide.
From plain fabric B, cut 1 strip 10 cm wide.
Lining
You might prefer to cut out the lining after you’ve sewn the outer so that you can be sure of getting it the right size without having to faff about trimming it down a second time.
The lining will be cut from the remaining plain fabric.
For cutting the pieces for the outer, you will have had the fabric with the short edges top and bottom. For cutting the lining you will need to have plain fabric B round the other way, so turn it 90 degrees.
Cut the rest of plain fabric A in half so that it is the same width as plain fabric B. Cut this in half lengthways. You should now have 2 strips of fabric A. These will go at the top and bottom of fabric B to make the lining.
Sewing the Outer
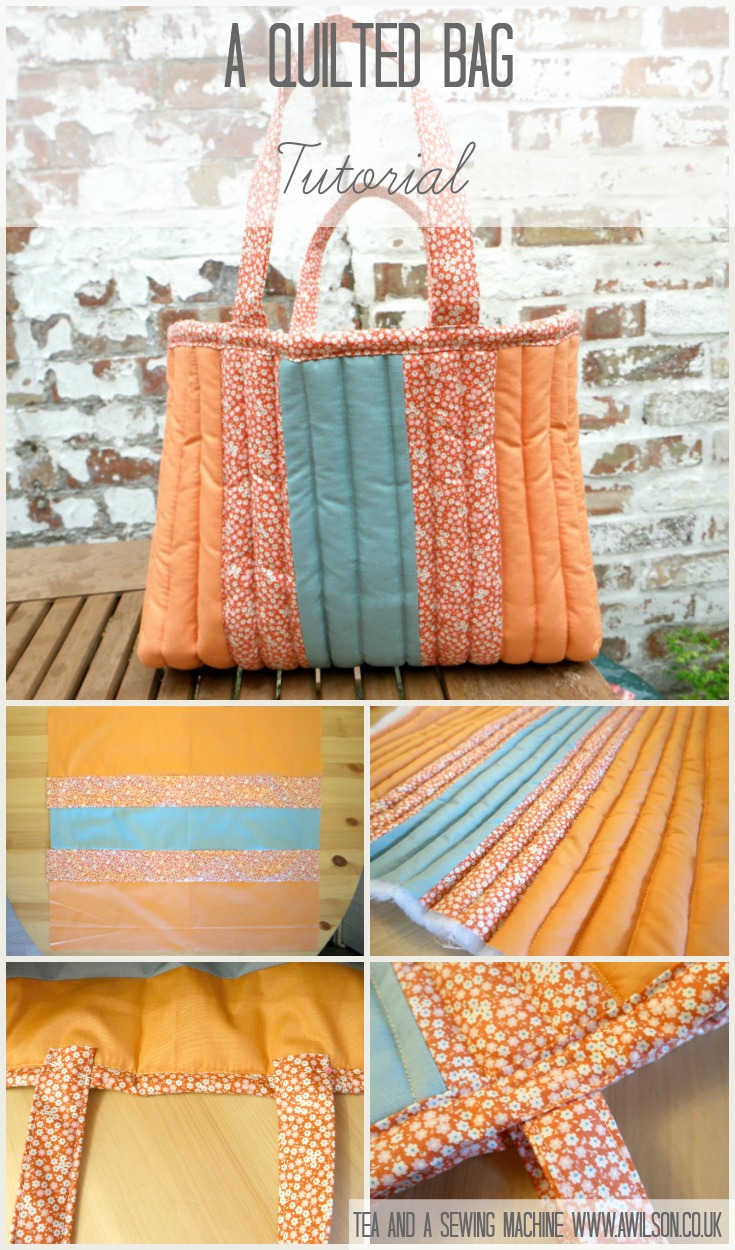
1. Join the strips along their long edges so that plain fabric B is in the centre, the patterned fabric is either side of plain fabric B and plain fabric A is on the outside. Trim the seams and press them open.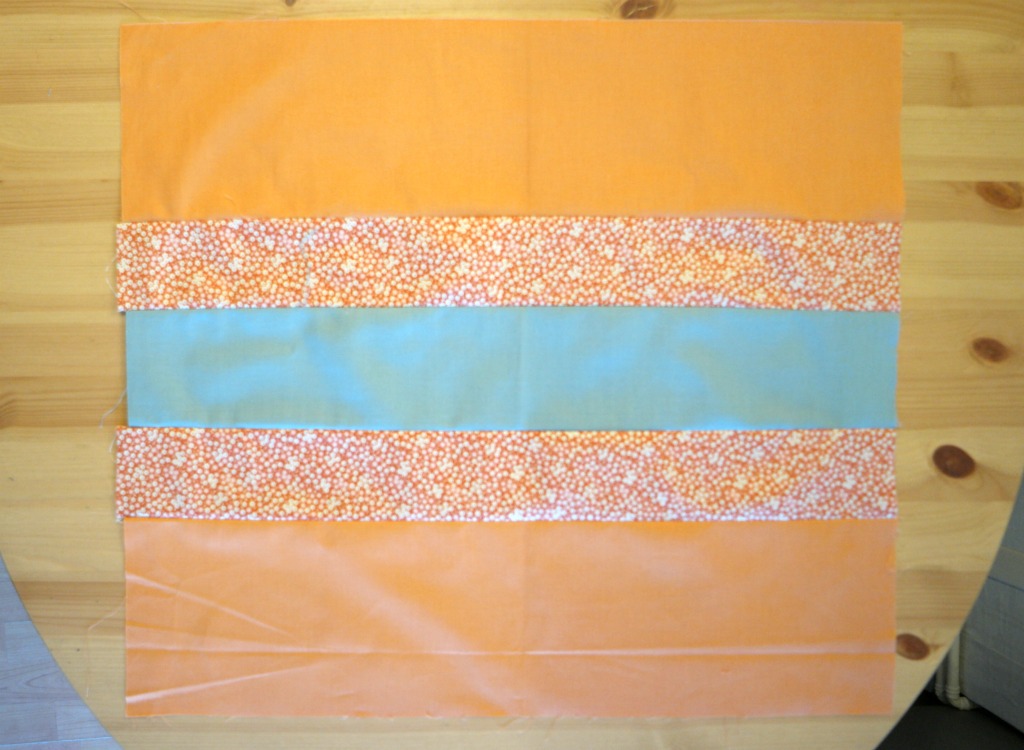
2. Cut a piece of wadding and piece of interlining the same size as the outer. Pin them together so that the outer is on the top face up, the wadding is in the middle and the interlining is at the bottom. Use plenty of pins to hold them together.
3. Starting in the middle, quilt the outer by sewing rows top to bottom a couple of cm apart. Remember to turn the outer each time to prevent the fabric and the wadding from distorting.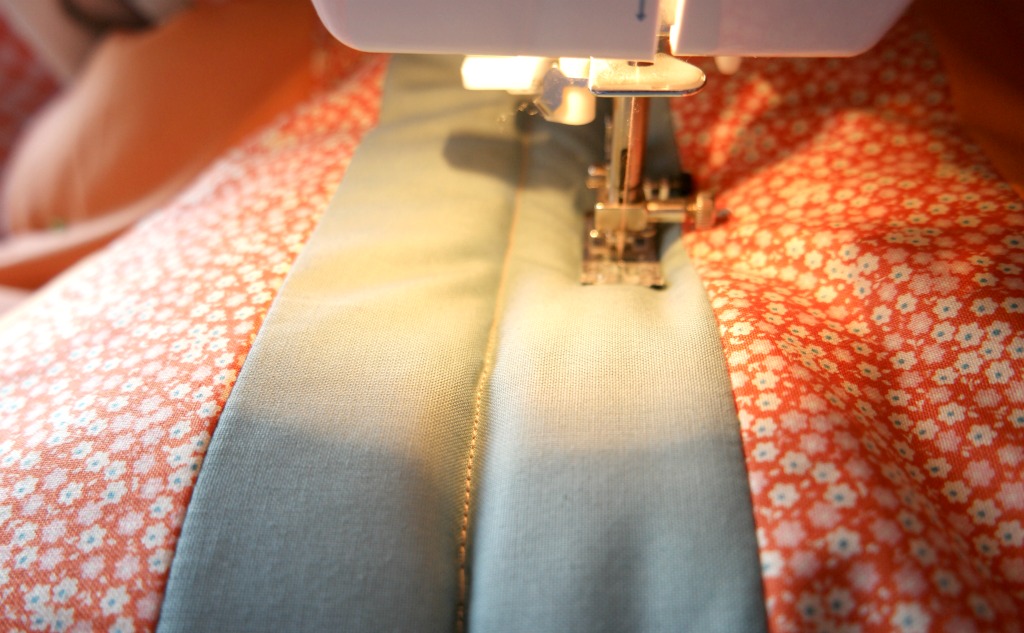
4. Once the whole of the outer has been quilted, trim off the threads and any excess fabric.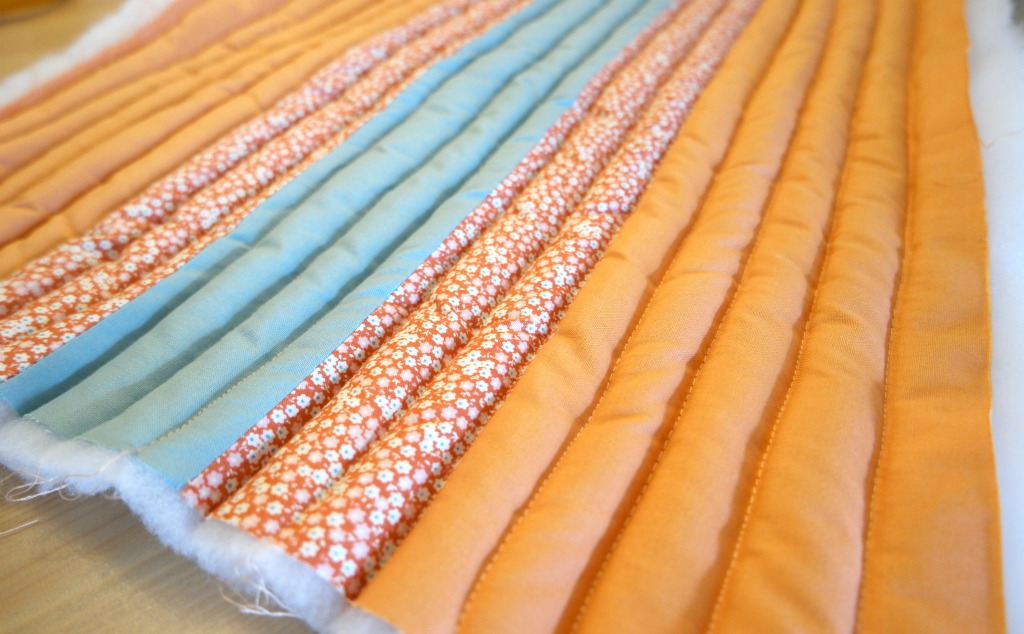
Sewing the Lining
1. Take one of the fabric A pieces and sew to the top edge of fabric B. Sew the other piece of fabric A to the bottom of fabric B. Trim the seams and press them open.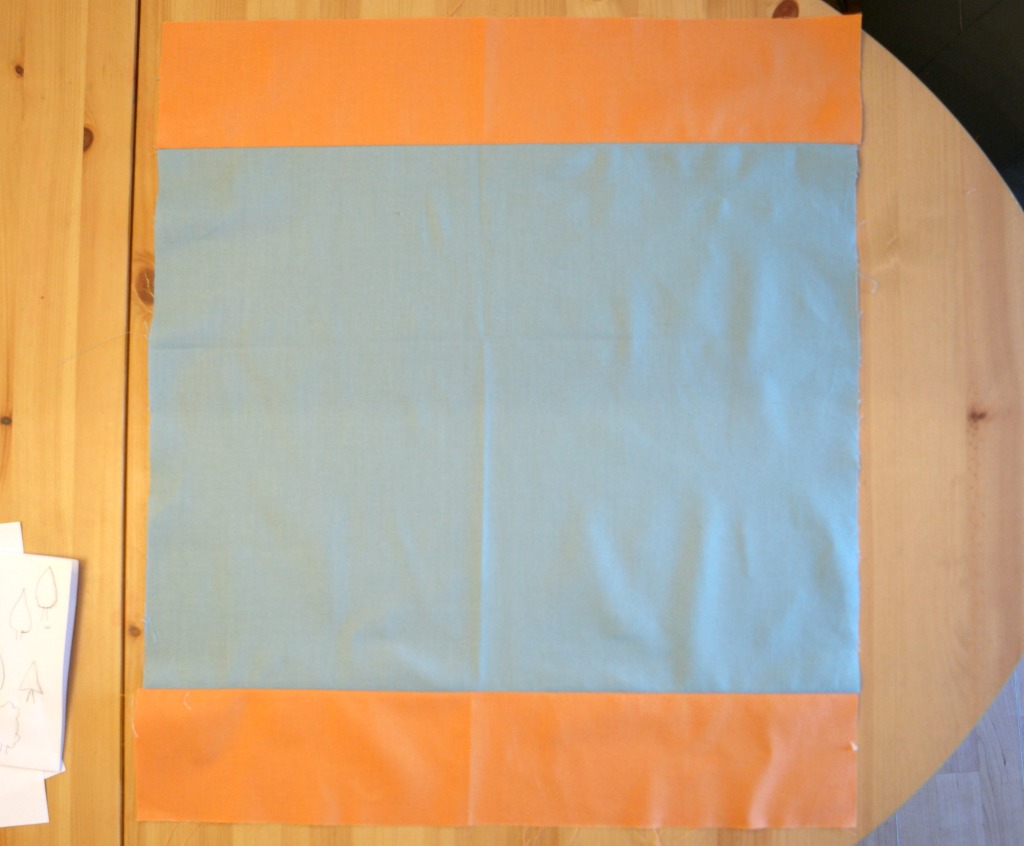
2. Check that the lining section is the same size of the outer. You might need to trim it down a bit, but be careful not to cut too much off! The outer will stretch a bit while you are sewing on the binding, so remember to take that into account.
Completing the Bag
1. Take the lining and fold it in half so that the short edges are together. Pin at the sides and sew. Trim the seams.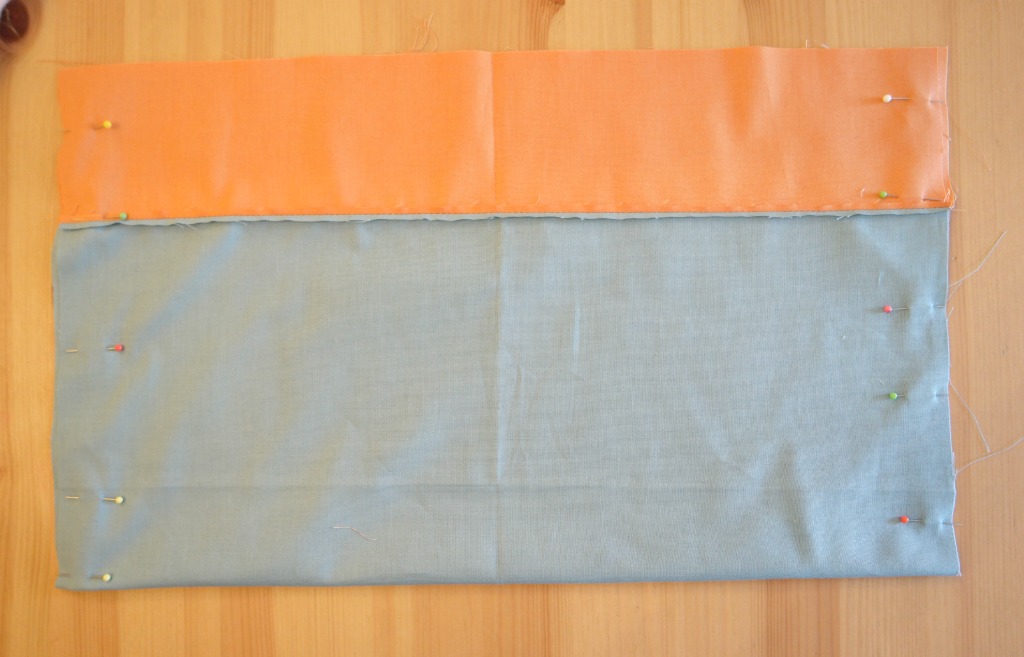
2. Squish one of the corners flat so that the side seam is next to the bottom. Measure up 4 cm and pin. 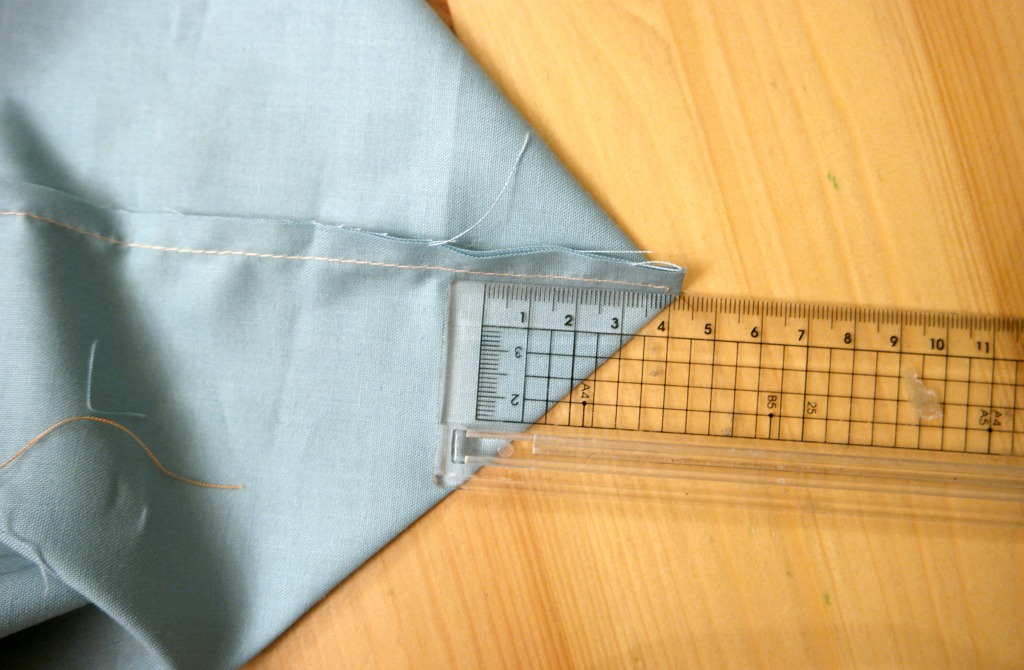 Sew at right angles to the corner.
 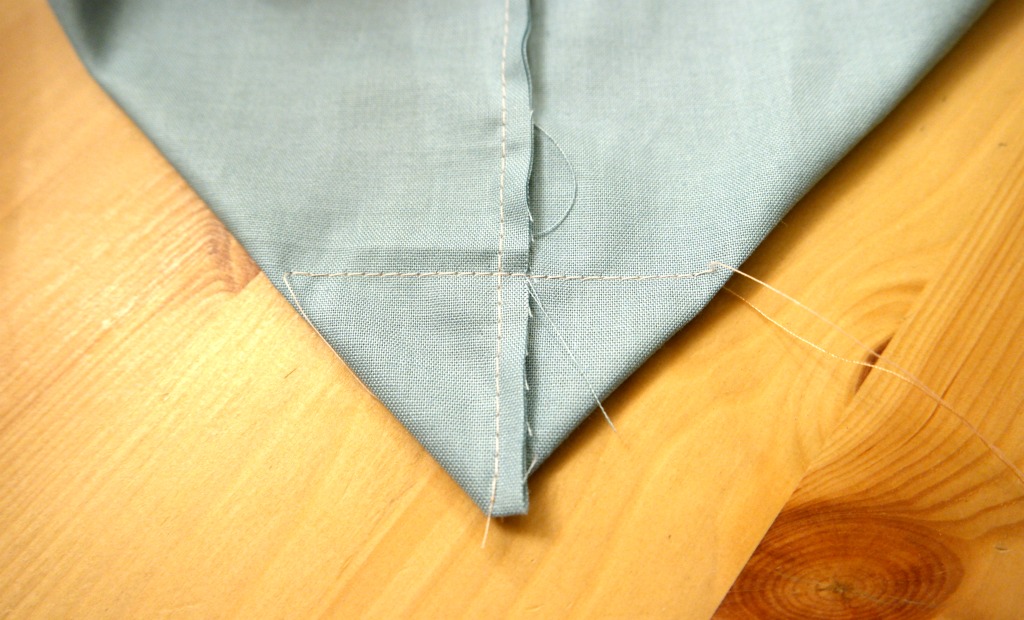 Cut the corner off.
 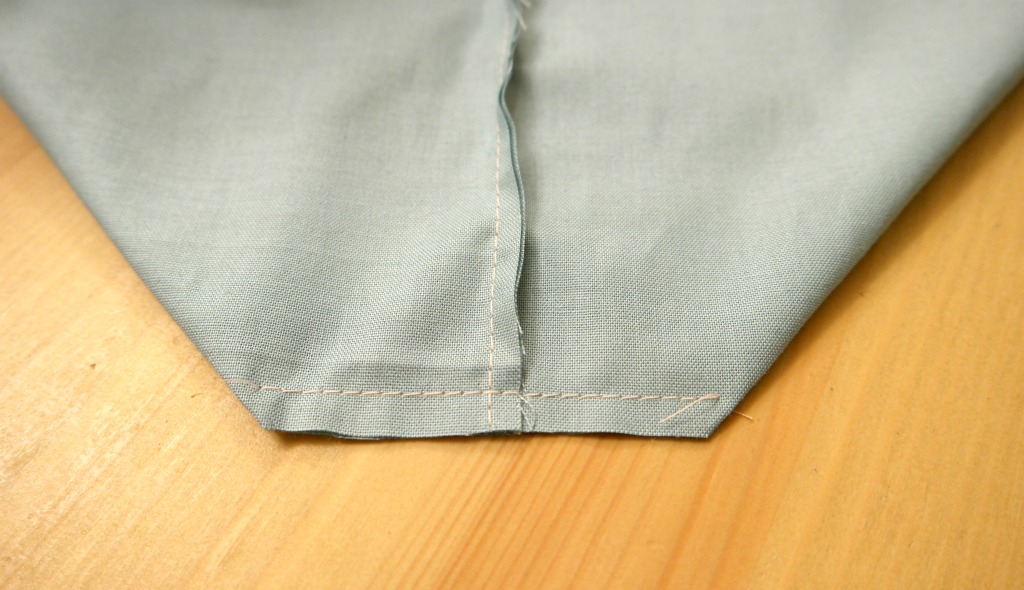 Repeat with the other corner.
3. Fold the outer in half so that the short edges are together. Sew the sides. Make the boxed corners as for the lining.
4. Pop the lining into the outer so that the wrong sides are together.
5. Measure the distance around the top of the bag. Cut a strip from the remaining patterned fabric as long as the distance around the bag, plus a couple of extra cm. You will probably need to join 2 strips together. Remember that the quilted outer will stretch a bit.
6. Pin the binding to the raw edges of the bag on the lining side, with the right sides together. Sew, keeping close to the edge.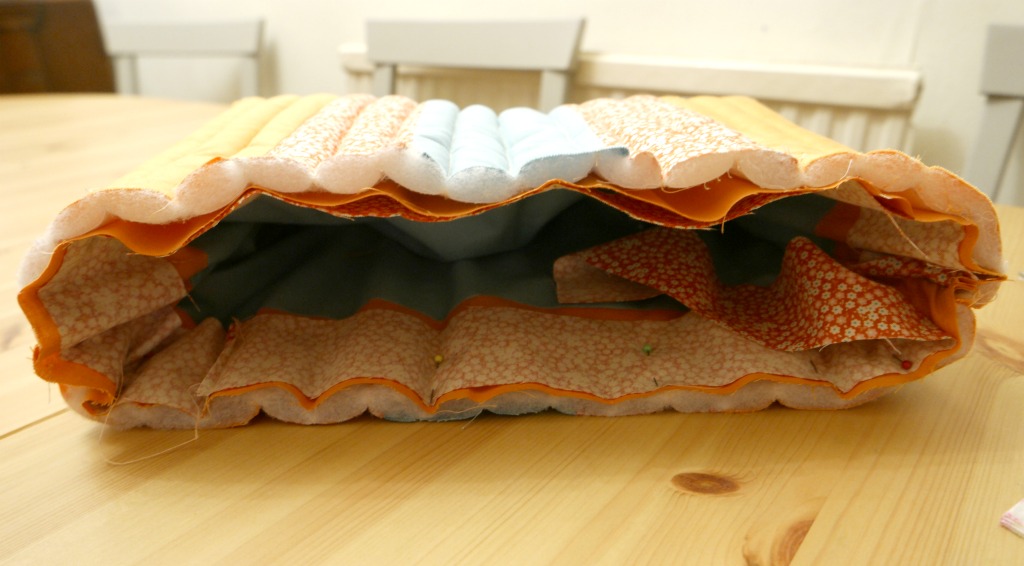
7. Fold the binding over the raw edges. Tuck the raw edge of the binding underneath and pin. Top stitch the binding, this time keeping close to the lower edge.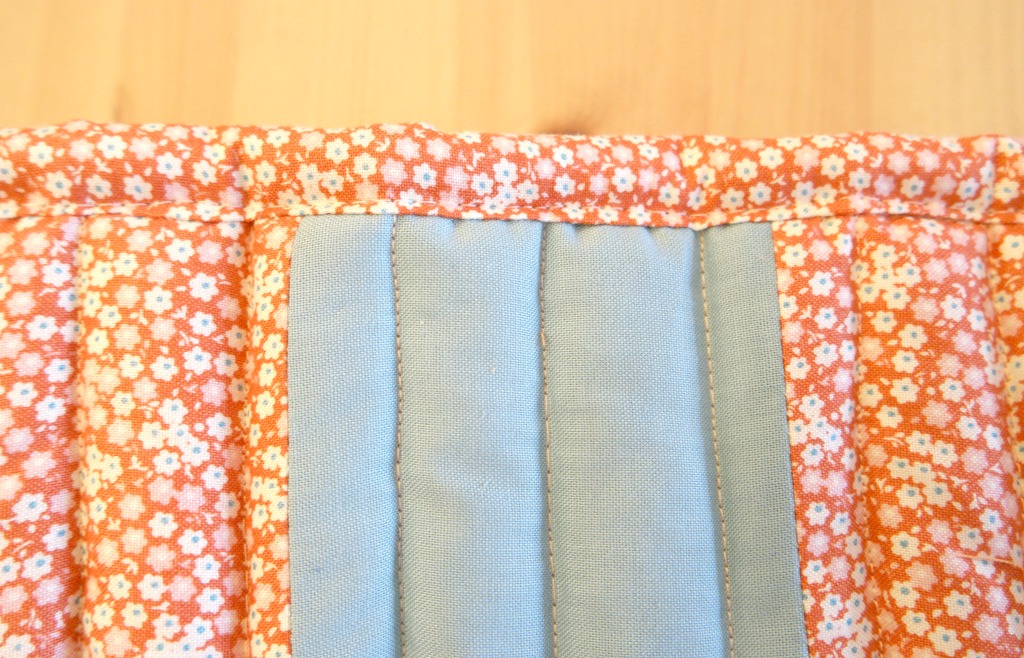
Making the Handles
1. Cut 2 strips from the remaining patterned fabric 10 cm wide and 2 pieces of interfacing the same size. Fuse the interfacing to the wrong side of the strips.
2. Take one of the strips and fold it in half lengthways. Press with your finger, then open it out. Fold the raw edges in about 1 cm on each side. Fold the strip in half again so that the edges are enclosed. Pin.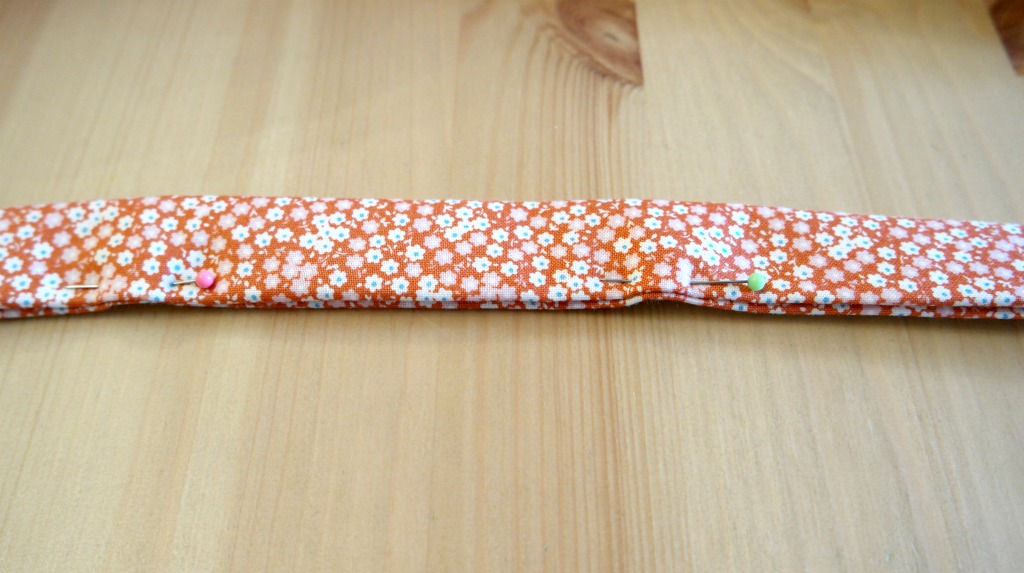
3. Sew along the length of the handle. To keep things symmetrical, you might like to sew along the other long edge as well. Repeat for the other handle.
4. Pin one end of a handle to the inside of the bag about a third of the way along, then pin the other end a third away from the other edge. If you ensure that the handle is lined up with the patterned fabric on the outside, the stitching will show less. 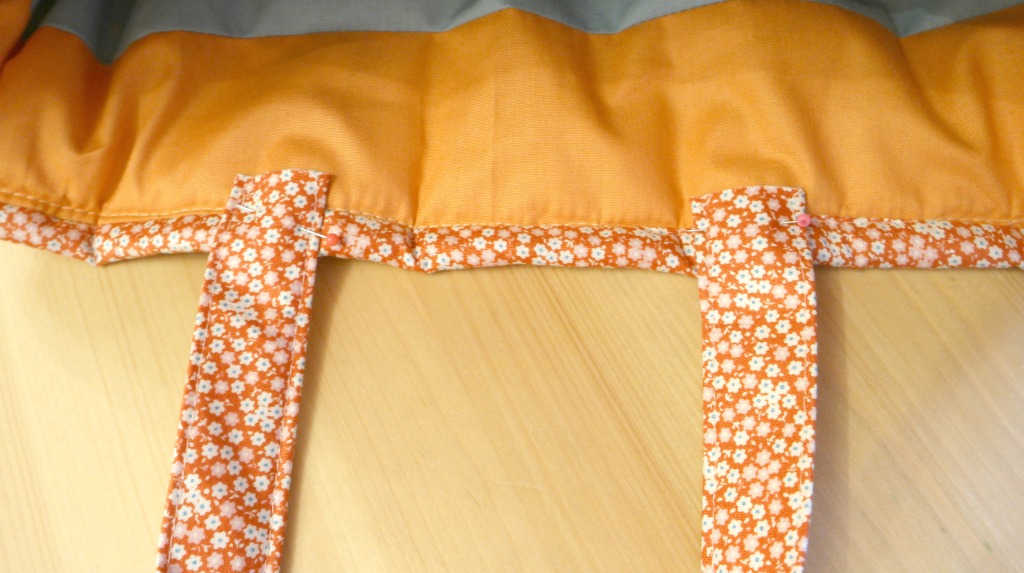 Sew the handle in place. Repeat for the other handle.
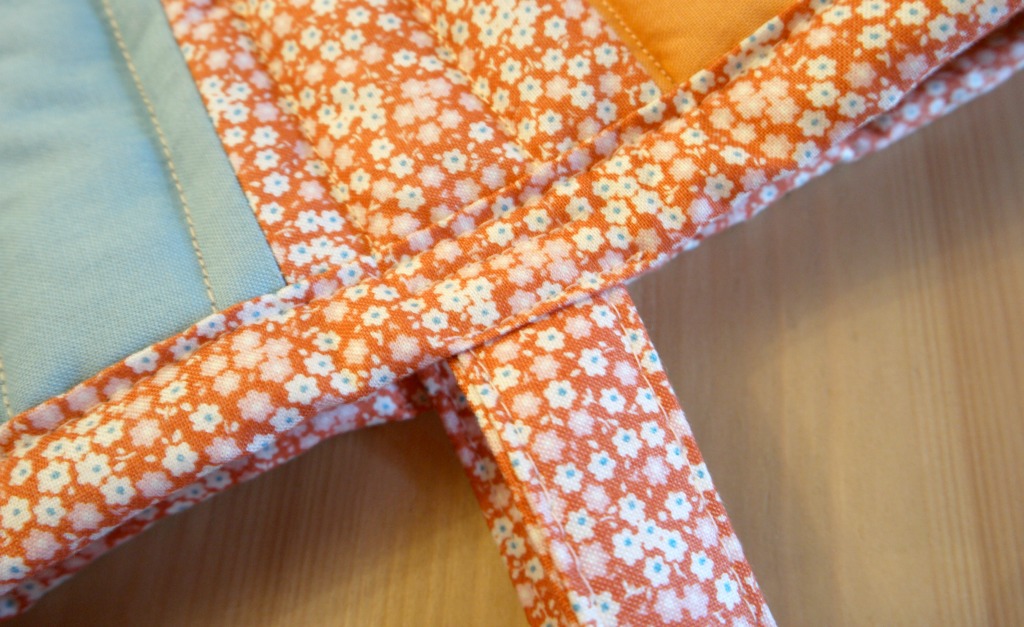
Your bag is finished! Without it being huge, it’s roomy enough for a couple of books or some nappies and a some wipes as well as your purse and your phone!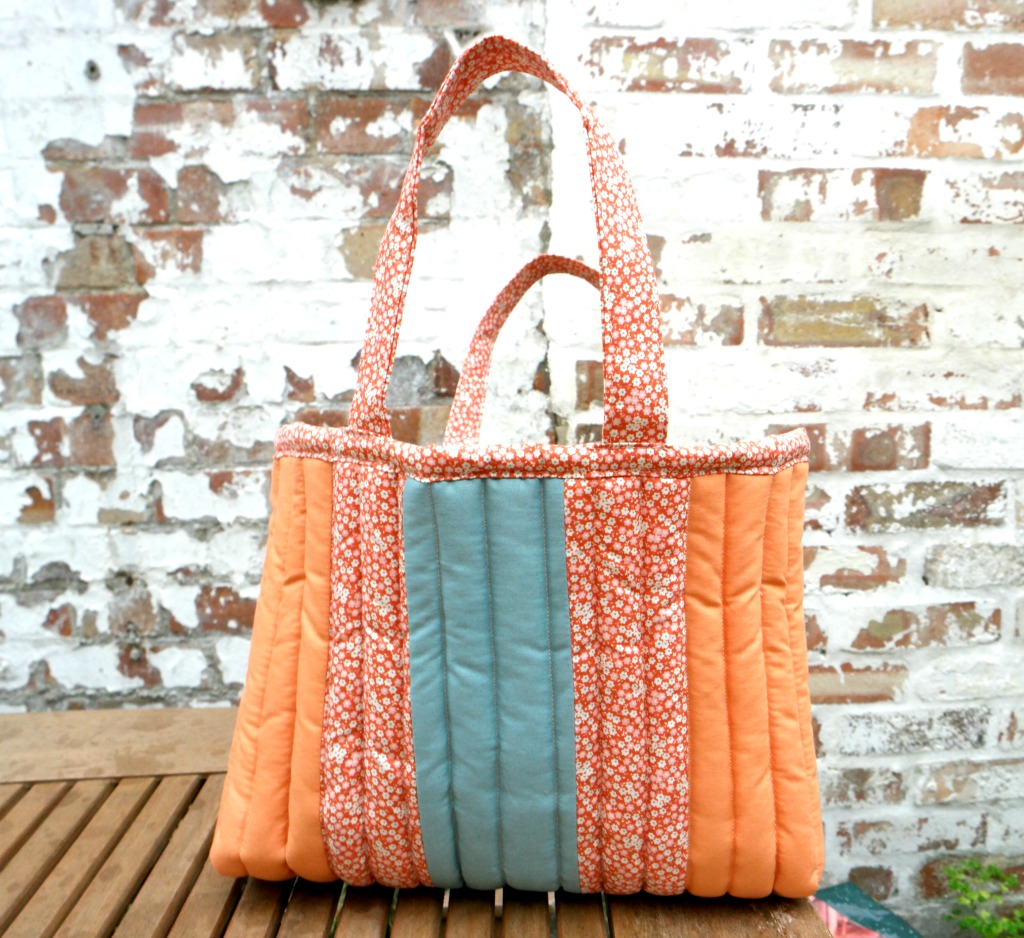
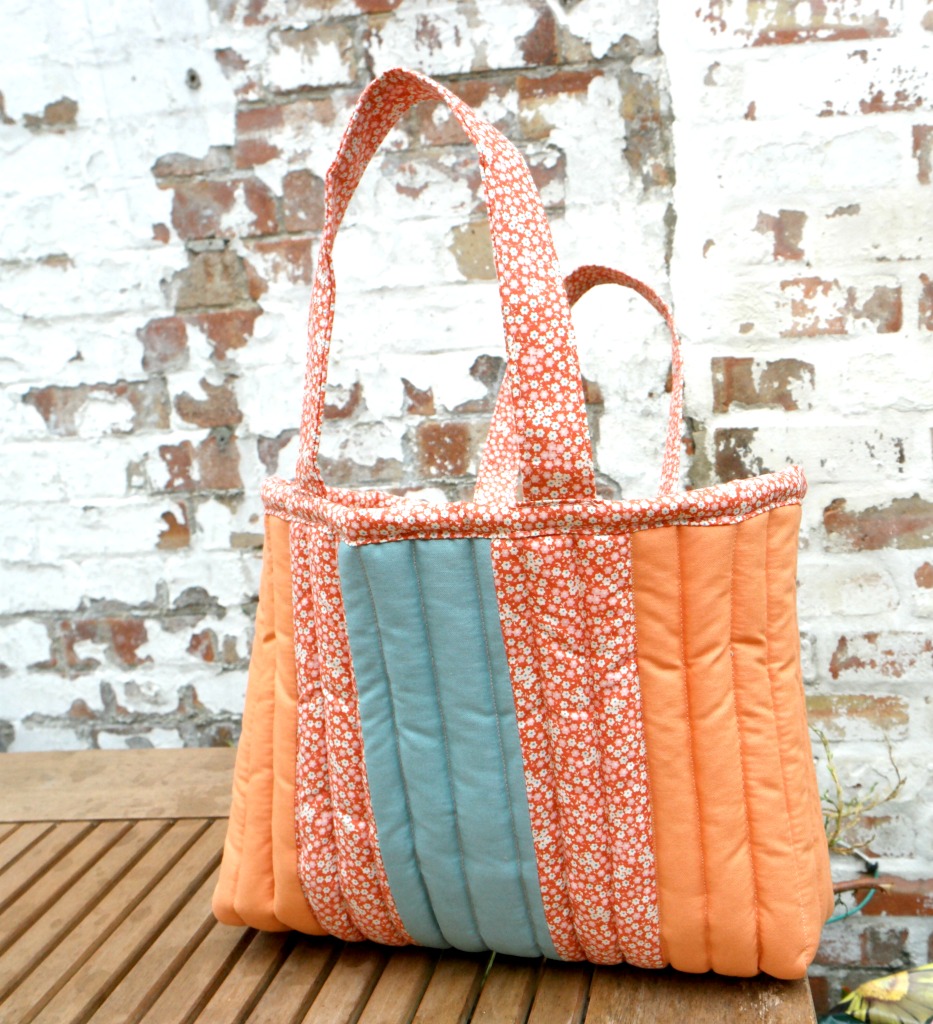
If you liked this quilted bag tutorial, you might also like these.
A Quick and Easy Shopping Bag Tutorial
Linking up here.


Hi there
Just stopped by to let you know that I featured this on my Round Tuit post this week!
Round Tuit
Thanks again for linking up to A Round Tuit Hope you have a great week!
Jill @ Creating my way to Success
Thanks Jill 🙂
It’s a gorgeous bag, and another fabulous tutorial
Thank you xx
I was given some of that thick foam type interfacing and just haven’t got round to making something with it yet, This sort of simple shape might be perfect, thanks.
That would probably work 🙂
gorgeous! thanks for sharing on craft schooling sunday!

creativejewishmom/sara recently posted…Welcome to Craft Schooling Sunday!
Thank you xx
This is great – I’d never thought to try quilting a bag, but it feels like it would be a great idea for a knitting project bag – rogue needles couldn’t make it through all the quilting!

Elsie Pop recently posted…The Great London Yarn Crawl 2016
It would make a great knitting bag 🙂
Such a useful bag and love the colours
I’ve got a real thing for orange at the moment!
I was very confused by the “lining” paragraphs ? Especially paragraph two where the instruction is to cut plain fabric A so it is the same length as plain Fabric A ? I must be missing something or maybe I need another cup of tea !
Hi Pauline, sorry, that got missed in the editing! Basically, to cut the strips for the outer you have fabric B “portrait” with the short edges top and bottom, then to make the lining, you turn fabric B 90 degrees. That forms most of the lining. Then to get it so that it is the same length as the outer section, you cut 2 pieces from fabric A that are the same width as fabric B. I’ve updated it in the tutorial. I hope that helps 🙂 Another a cup of tea is always a good idea 😀
Thank you ! I have one right here ! My husband and children laugh at my complete lack of spatial awareness so thanks for describing it so well !
No problem! It wasn’t clear enough 🙂
Cute bag!! I’ve got a Craft Gossip post scheduled for tomorrow afternoon that features your tutorial:

http://sewing.craftgossip.com/?p=89611 –Anne
Anne recently posted…Tutorial: Faux leather passport cover
Thank you xx
Love your new bag Anna!!

Jill recently posted…Upcycled Teddy Bear from old sports uniform