Pattern Drafting: How To Draft an A Line Skirt
This post contains affiliate links.
One of the things I love to do is make my own clothes, especially making them from my own designs.
There is nothing like trotting off out in an outfit that I’ve made myself. I like knowing that nobody else will be wearing the same as me, and I don’t care if people think I’m mad/ too old to be wearing a pink tutu with pink tights and pink shoes, or if I’ve escaped from a 50s themed tea party.
We’re supposed to pretend that clothes don’t matter and it’s what’s inside that counts. I agree to this up to a point, but remember how happy Anne Shirley was when Matthew sorted her out with a dress with puffed sleeves? I want to feel like that as often as I can!
Using a pattern can sometimes feel a little bit limiting, especially if you have something in particular in mind and you can’t find exactly what you want. One way round this is to adapt a favourite pattern. Another is to start with your own ideas and draft or drape a pattern yourself.
I’ve done this myself lots of times over the years. Sometimes things turned out very well (like this sundress). Other times they turned out less well.
But even with the things that could be labelled as disasters, I still learnt something, which makes it valuable, even if the item in question ended up as a cushion cover instead.
If you’re considering making clothes from your own designs, my advice would be #1 do it, and #2 keep things simple as far as you can.
If you’ve made clothes from commercial patterns, this will help you a lot. You can take a basic sleeve shape for example, and adapt it, or start out with a simple skirt and change it up a bit.
Having a collection of things that you know how to make, an idea of basic pattern shapes and some knowledge of how clothes are put together will help enormously.
One such thing is a basic skirt pattern. If you know how to draft one according to your measurements, you can change it however you like!
In the rest of this post, I’m going to show you how to draft a pattern for an A line skirt.
How To Draft an A Line Skirt Pattern
You Will Need
Pattern paper. Any large paper will do, but I recommend using the kind of pattern paper that has a grid marked on it. It costs a bit more but it makes things so much easier!
Tape measure
Pins
Pencil
Any kind of pattern drafting is easier with a dress form, but you can do it on yourself if you don’t have one. Just mind the pins! Alternatively you could use a friend or family member who is a of a similar size.
How On Earth Are We Going To Do This and Not End Up With Something That Looks Awful?
That’s a good question!
This is how.
The first job is to draft a straight skirt. We’ll do the front and back separately, and half of it each time. We can use the halves to draft the other halves. That way the front and the back will both be symmetrical.
Then by messing about with the darts, we can change the shape of the skirt pieces. We can use this to draft the pattern pieces for the A line skirt.
You’ll have pattern pieces for a straight skirt and an a line skirt, and you can use them however you like!
Job 1: Drafting the Straight Skirt
Drafting the Front
We’re going to draft the front and the back separately, and we’re only going to do half.
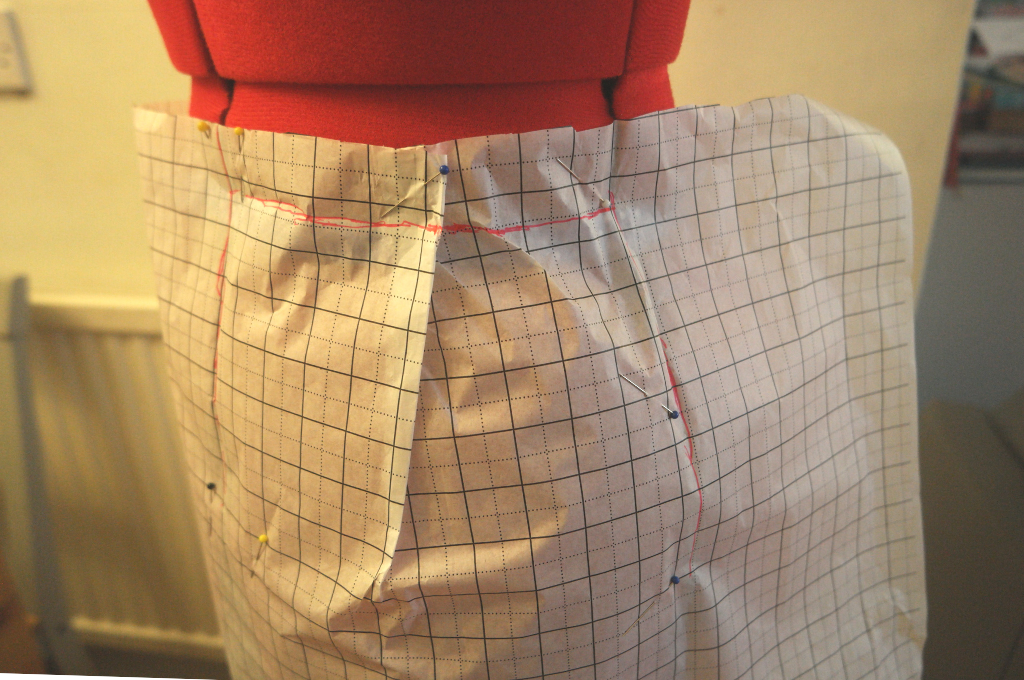
Starting with the front, pin a large piece of pattern paper at the hips on both sides. It needs to be slightly more towards the back.
If you’re using the paper with the grids on, it will be easy to check whether it is straight. Vertical lines need to be running up and down at the sides and at the centre front.
Pin the paper at the centre front, making sure that you keep the vertical line.
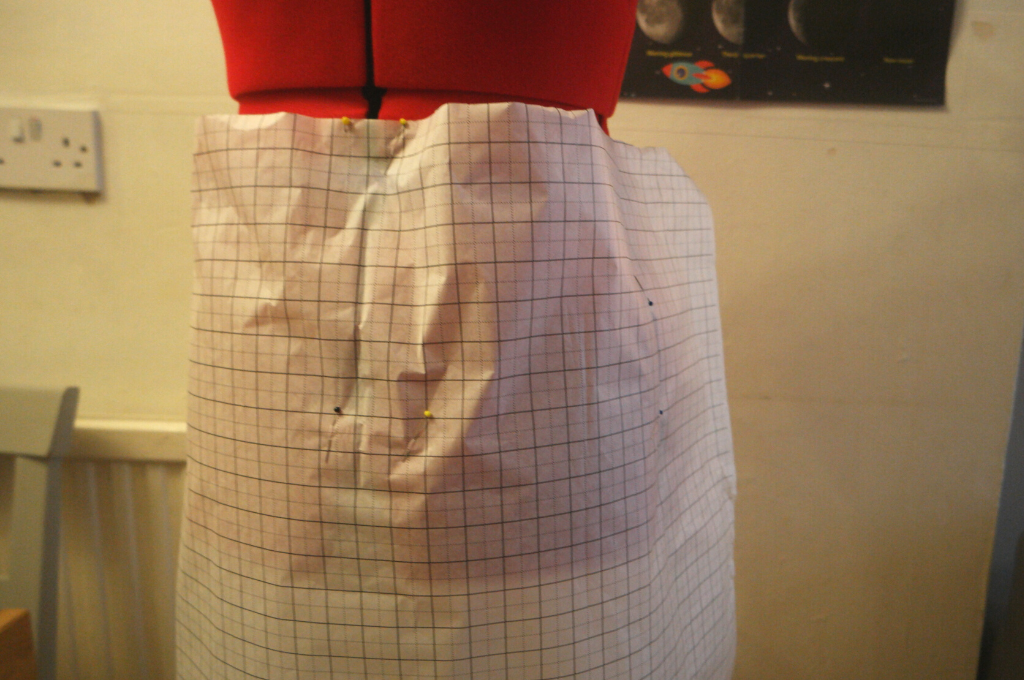
There will be a huge amount of bagginess at the waist, which we’re going to fix with a dart.
The dart will probably need to go about half way between the centre front and the side seam, but put it where it naturally wants to go. We’re not following any rules here about how long the dart needs to be either; just make it as long as it needs to be. The purpose of it is to remove the extra at the waist.
When you’ve figured out the dart. fold it and pin it.
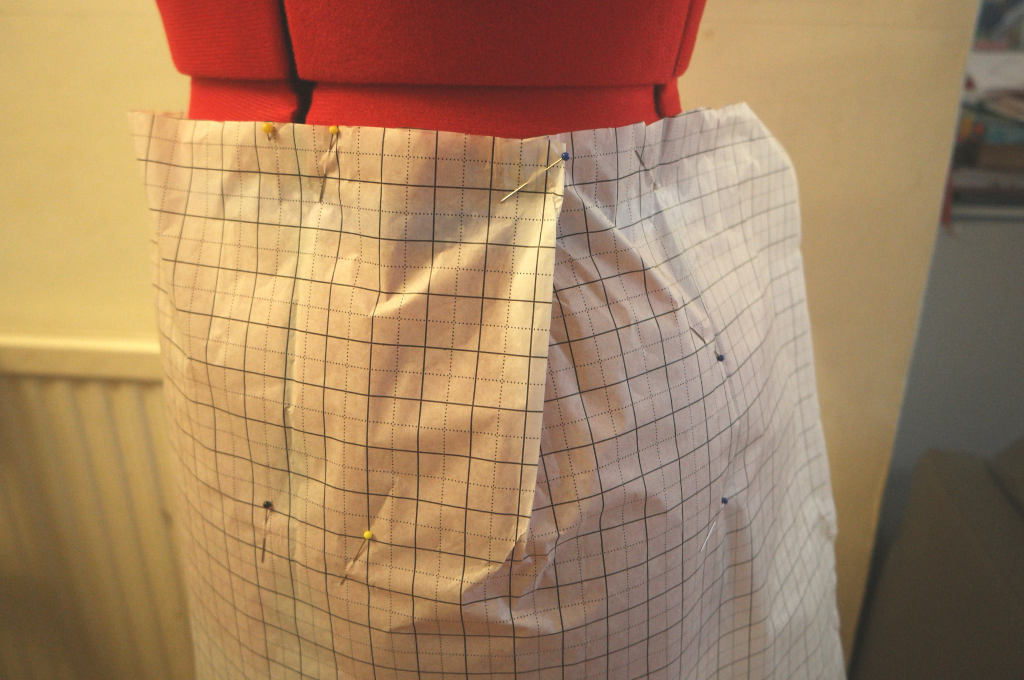
Now grab a pencil and mark on the centre front and the side seam (this will be half way round your hip).
Draw on the waistline. If you doing this on yourself, you’ll be able to feel it. If you’re using a dress form, you might find it helpful to pin some ribbon or a piece of elastic around the waist.
Put it to one side.
Drafting the Back
We’re going to draft the back in the same way that we did the front.
Take another piece of pattern paper and pin it at the hips and round the back. If you are doing this on yourself, you might need somebody to help you.
Check vertical lines at the side and the centre back. Pin the centre back. Fix the bagginess with a dart. Again, this will probably need to go about half way along, but put it where it feels like it needs to go.
For larger ladies, you might find that 2 smaller darts work better.
Mark the side seam and the centre front, and the waist line.
Finishing Off the Straight Skirt Pattern
You’ll need to the following things to both the front and back pattern pieces.
Decide how long you want the skirt to be and measure down from the waist. Draw a straight line to mark the hem.
Draw the centre line and the side down to the hem.
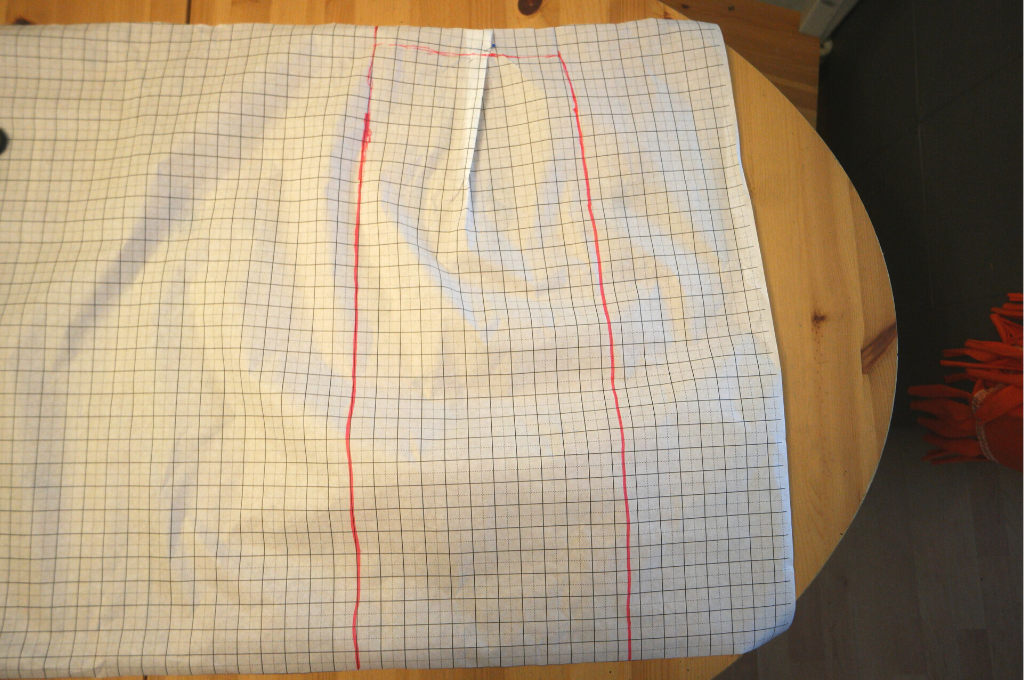
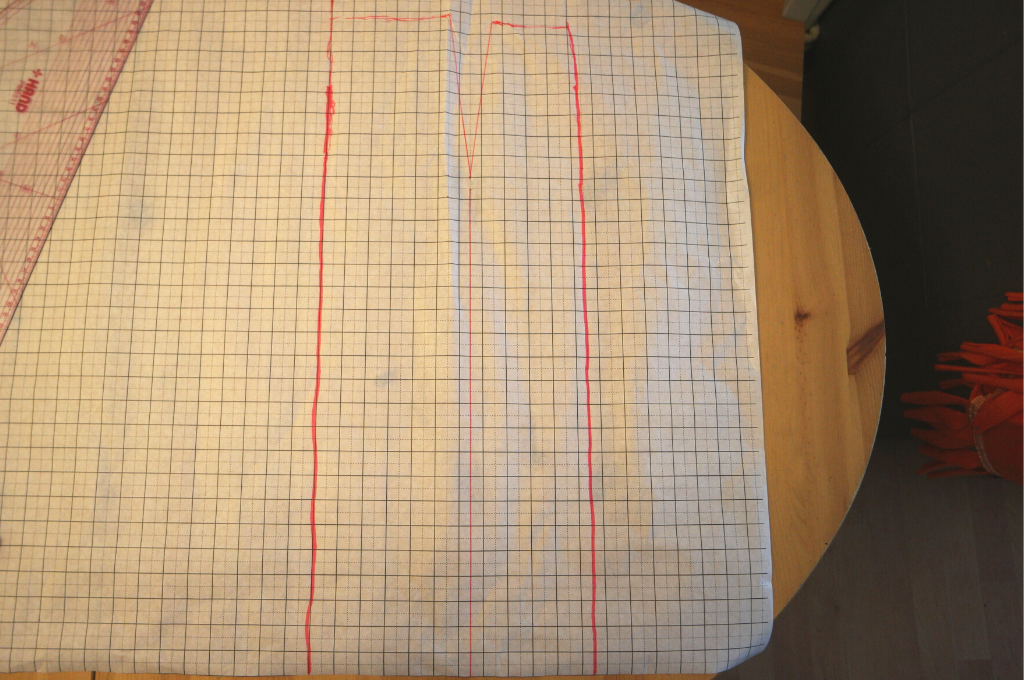
Using the fold lines, draw the dart.
Job 2: Transforming the Straight Skirt Pattern into an A line skirt
This is where the magic happens!
Draw a vertical line from the point of the dart down to the hem.
Cut out the dart.
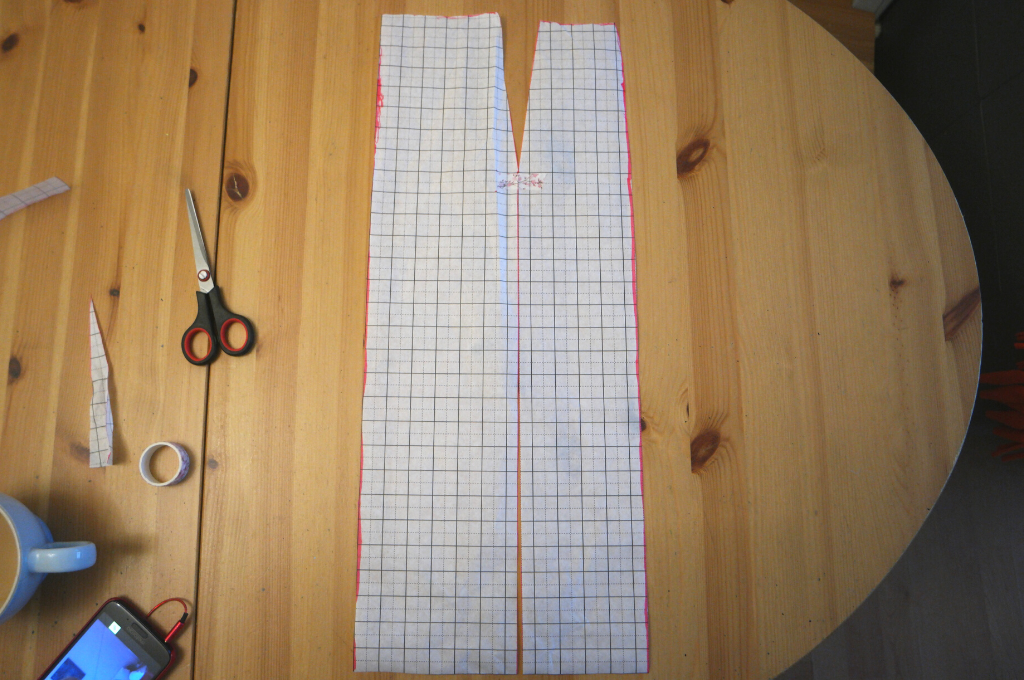
From the hem, cut along the line that you drew from the point of the dart. Don’t cut the whole way! Leave half a cm or so. I managed to cut right through it, hence the tape.
Now move the edges of the dart so that they are together. You could tape it so that it stays put.
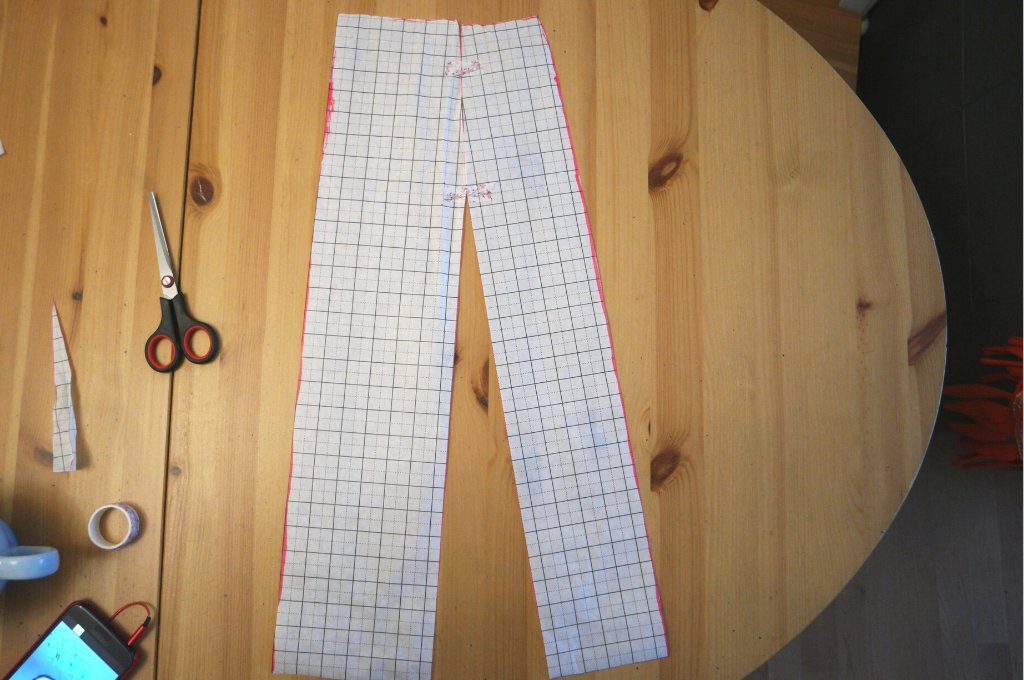
You’ll notice that a huge kind of anti dart has opened up in the skirt. By closing up the dart, you’ve made the skirt fuller and it will still fit!
Draw round this to make the pattern piece for the a line skirt. I extended the waist by 2 cm and drew another line from this point down to the hem. Then I used a French curve to join the inside line to the outside one. A dinner plate will do if you don’t have a French curve.
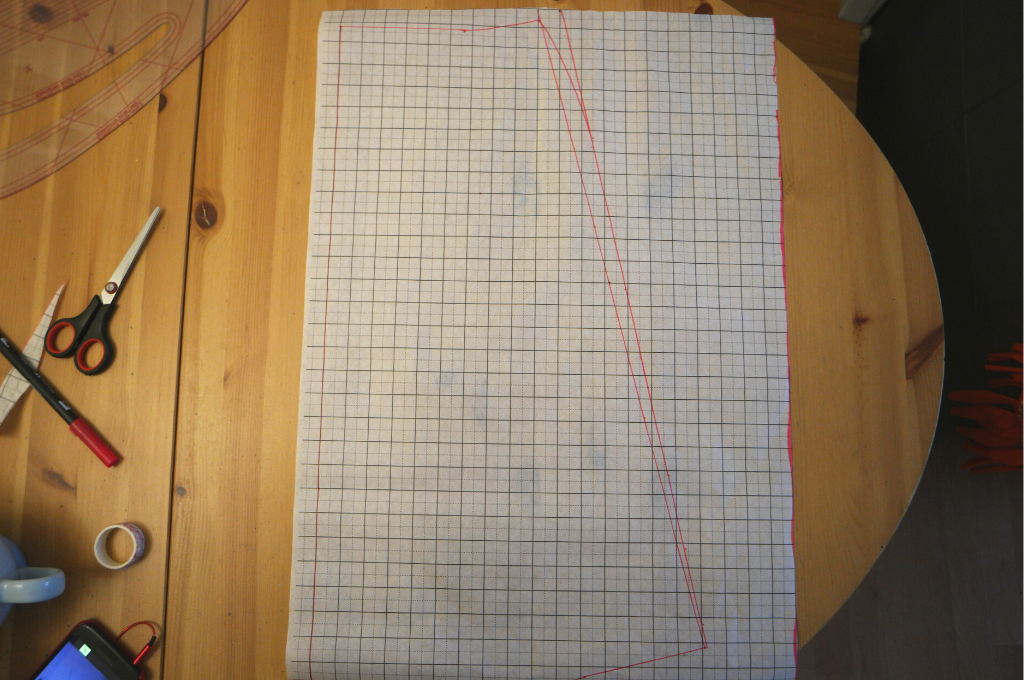
You can use the plate/ curve to join the points of the anti dart too, or leave them straight for a different kind of hemline.
The waistline will need to curve a little bit too, upwards from the dart to the side seam by 1-2 cm.
Job 3: Draft the waistband and add a seam allowance to the pattern pieces.
Drafting the Waistband
This is optional! You might decide to line your skirt instead, in which case all you’ll need to do is make a second skirt the same as the first, just a bit shorter, and join them at the waist.
Alternatively, you could use the waistband pieces as facings instead.
Take your skirt front piece (A line version) and lay it on top of a piece of pattern paper. Trace the waist line, then the side seam about 4 cm and the same down the centre front.
Join the lower line so that it follows the shape of the waistline.
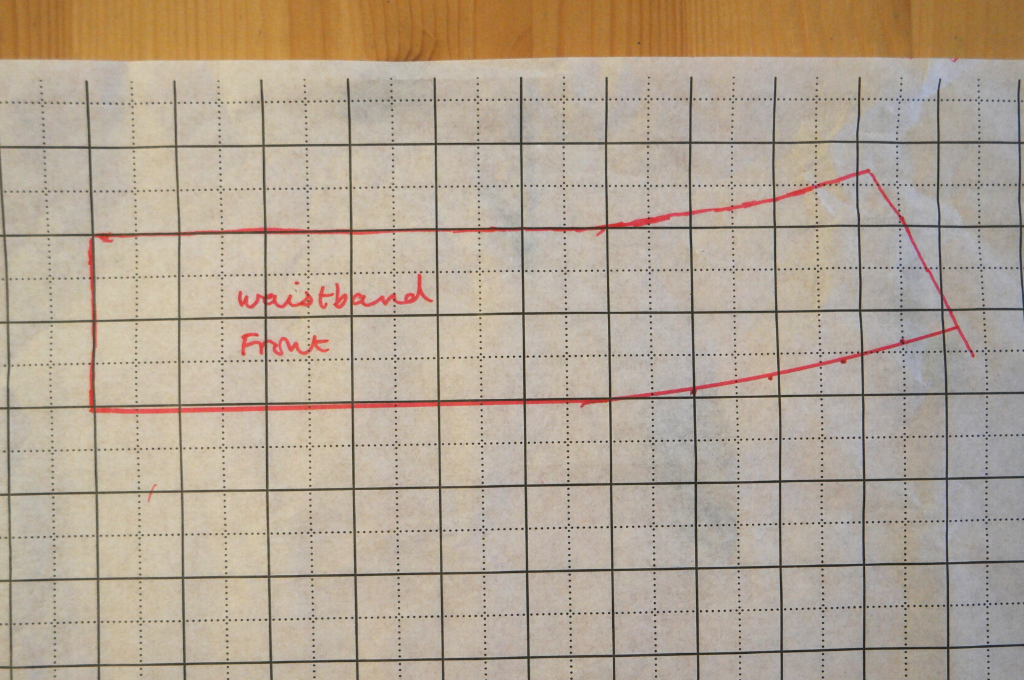
Add a 2 cm seam allowance along the top, the bottom and at the side. You won’t need one at the centre front because you’ll cut in on the fold so that it’s one piece.
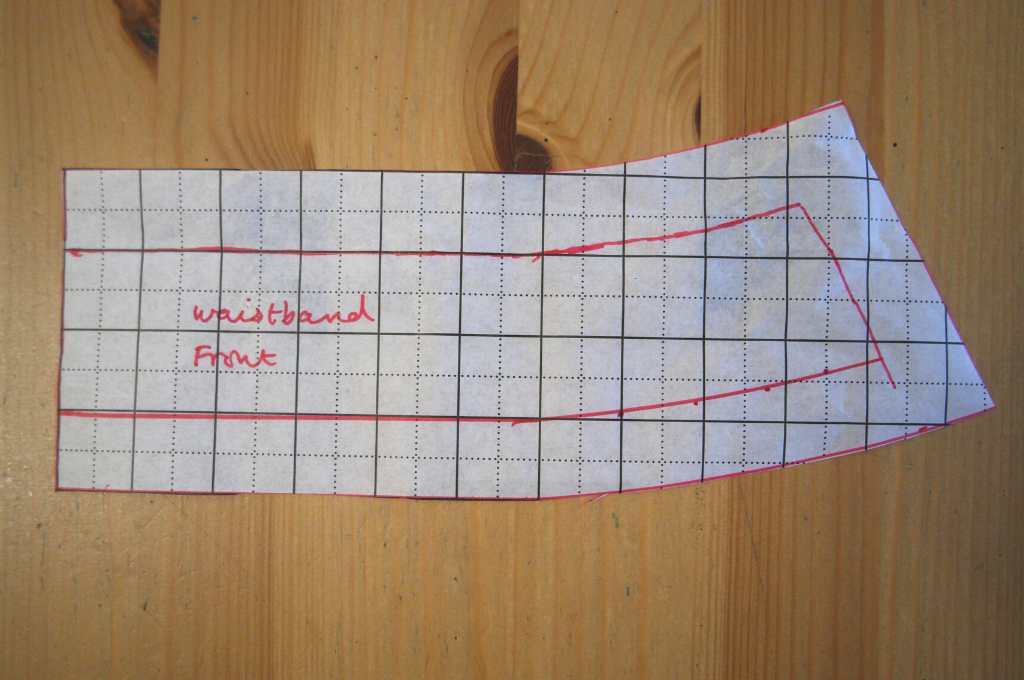
When cutting out, you’ll need two.
The waistband for the back is made in the same way. The only difference here is that you’ll need a waistband for each half of the back. So when adding the seam allowance, add on 2 cm at the centre as well.
When cutting the waistband for the back out, you’ll need two left hand pieces and two right hand pieces.
Adding a Seam Allowance to the Skirt Front and Back
The skirt front will be in one piece cut on the fold, so add a 2 cm seam allowance to the side and the bottom hem.
The skirt back will be made from 2 pieces, cut on folded fabric. To this section, add a 2 cm seam allowance to both sides and the bottom hem.
So now you have a pattern for a straight skirt and an A line skirt!
There will be another post about assembling your A line skirt in a couple of weeks. Or you could give it a go yourself!


3 Comments