Jewellery Bag Tutorial

Now that Christmas is finally over I can concentrate on making things that are not jam or dinosaur hats. I’ve made some tiny purses and some earrings, but the jewellery bags have given me trouble. It has to be lined because nobody wants to find that they cannot remove their favourite earrings from the little bag because they’ve got caught in the seams, but the biggest problem I’ve had is with the casing for the ribbon. I could not figure out a way to finish the ends of the casing tidily and leave a bit more fabric at the top. One option would have been to put buttonholes in near the top, only my sewing machine doesn’t do buttonholes. So I decided that the casing would just have to be at the top and I would have to do some embroidery or something on the front to make it special.
Here is how to make it.
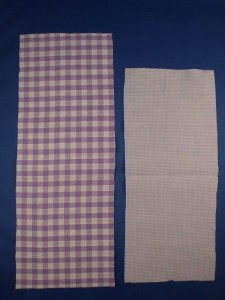
You will need two pieces of fabric, one for the outer and one for the lining. You might want a fancy bit and a plain bit, or two plain bits in different colours, or a piece with a larger pattern and a second with a smaller pattern. Whatever you think looks nice. I’ve used poly cotton, some from my husband’s old shirts and some from some little bits and bobs I got from an ebay shop, http://stores.ebay.co.uk/The-Vintage-Fabric-Company?_trksid=p4340.l2563. They offer a weekly surprise bundle of little bits of fabric, some of it old and some new, for a reasonable price. They are also able to employ a young adult with special needs through the stuff they sell on ebay so you get a nice feeling that you are helping somebody, even if it is indirectly.
To get the size, I tore a page from my A5 notebook and folded it in half. This was the basic size for the bag, so to get the right size of fabric, the fabric needs to be twice as long as the paper template. When you have cut your two pieces of fabric, you will need to cut a couple of centimetres off the lining piece. This is so that it doesn’t get caught up in the casing.
If you want to embellish the front, do it now. For the bag in the first picture, I used a rubber stamp and some permanent ink, then attached a sequin and a bead. Maybe you could do some embroidery or applique, or just leave it as it is.
2. Put the lining on top of the outer, wrong sides together, so that the lining is in the middle of the outer.
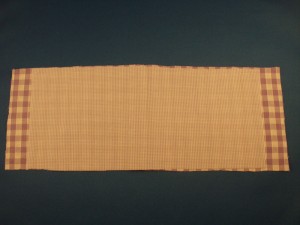
3. Now to make the casing. I have found that it is easiest to do this first. Leaving it until last resulted in a messy tangle of fabric, thread and sewing machine, and some bad language, so we’re going to make this first so we won’t get stressed with it. Take one corner of the outer fabric and carefully fold it in about 0.5cm. The folded bit will look like a long triangle. The pointy end of the triangle needs to include some of the lining. Pin and then sew. Repeat for the other three corners.
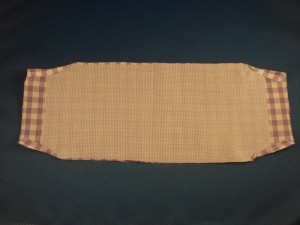
4. This stage is a little bit fiddly.
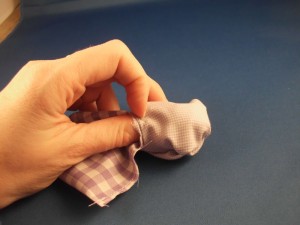
First of all you need to fold the outer fabric down to the top of the lining piece to make a hem.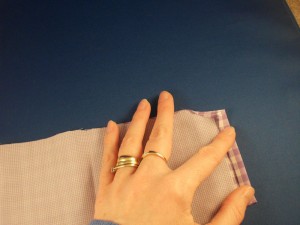
Then, holding the fold, fold it down again so that the first fold is level with the pointy end of the triangle that you made in the previous stage.
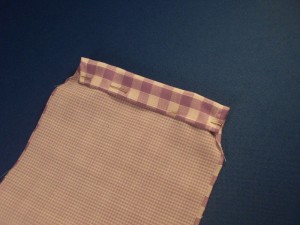
Pin and sew, then repeat for the other end. Voila, casing complete! And hopefully no swearing!!
5. Now we make it into a bag. Turn it inside out so that the right sides of the fabric are together and the casing is inside.
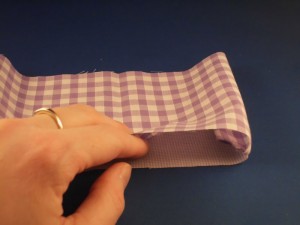
Adjust the fabric so that both bits of the casing are together with the outer on one side, folded in half with the right sides together, and the lining on the other side. We are going to sew the outer first, so make sure that the casing is inside the lining.
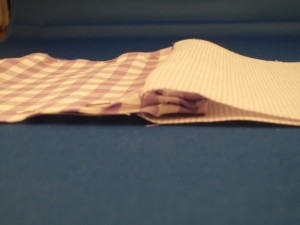
Sew up both the open sides of the outer as far as the casing. Don’t sew the lining or you’ll find yourself in a pickle.
6. It’s almost done! Just the lining left to do now. Push the casing into the outer so that you don’t sew it when you sew up the lining. Make sure you leave a gap of about 3 cm at the folded end of one side so that you can turn it the right out.
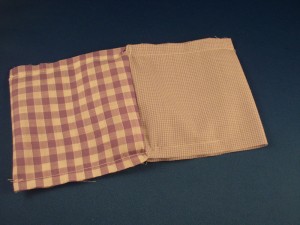
7. Now you can turn the bag the right way out. Push it all through the gap that you left in the lining.
8. Neatly sew up the gap in the lining, pop the lining inside the outer and, Bob’s your uncle, one bag!
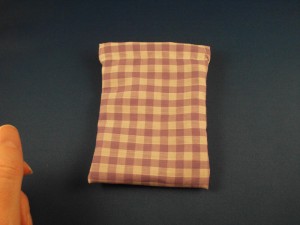
All you need to do now is thread some ribbon through the casing and fill it with your treasures. Happy sewing! 🙂

