How to Design and Make a Dress
How to Design and Make a Dress
Have you ever considered that it might just be possible to design and make a dress from scratch?
One of the best things about being able to sew is making your own clothes.
How many times have you been shopping and seen something you quite liked, except that it didn’t fit quite right, it wasn’t available in the right size, you didn’t like the colour or the collar made it look weird?
I’ve walked past things and thought, “That’s nice,” only to be horrified when I’ve seen the price ticket!
Making your own clothes solves these problems.
You can make things you like in a colour and style that suits you. You’re not restricted to what the fashion people have decided we ought to be wearing, and you don’t need to worry about turning up at a party or a wedding in the same outfit as somebody else.
When choosing a pattern, there are probably almost as many as there are different clothes in the shops. If you find a pattern you like, using a different type or colour of fabric or can make it look totally different!
One of the issues I have with patterns is that often I’ll have an idea of what I want to make, but I can’t find a pattern that’s exactly right.
It’s possible to alter patterns. My sister Eleanor is very good at doing this! But it doesn’t always solve the problem of the thing not being what you want in the first place.
Another problem I have with both patterns and ready to wear clothes is that I know what I like, but I can’t always find it.
I love my vintage style dresses and I don’t care at all if that’s a weird thing to wear for the school run! I’d rather celebrate my individuality and creativity by looking like I’m on my way to a 50s themed tea party than be one of the herd in a mummy uniform bought from Next. I don’t fit in anyway, so I might as well make the most of it.
So the answer is to not only make your own clothes, but to design them as well!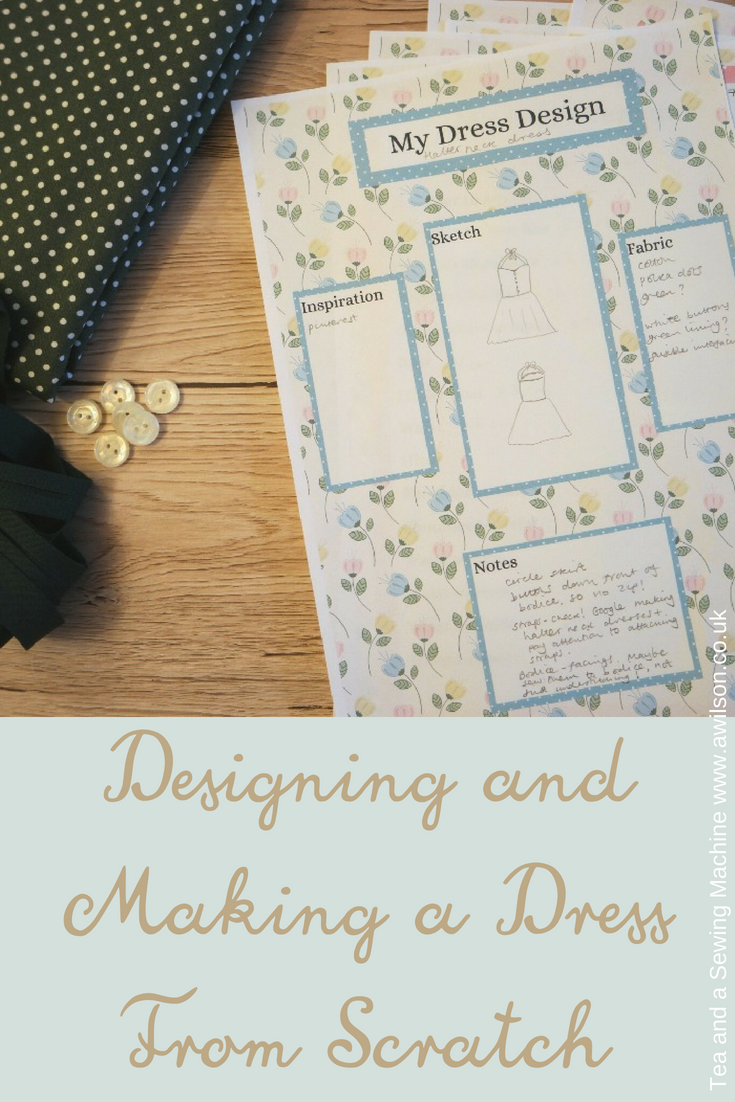
If you’ve not tried this before, it might seem daunting. But if you’ve made clothes for yourself from patterns, just think for a minute about what you know and what you can do.
You probably have a good idea of what pattern pieces ought to look like. The chances are you know how to sew darts and how to put in a zip. You can work out order for sewing something together. You know how to sew seams and hems neatly. You can finish a neckline and add a lining. If you’ve tried your hand at making jackets and shirts you probably have a whole lot of other skills too!
So why not put them to good use and design and make a dress yourself?
How to Design and Make a Dress From Scratch
As an idea, designing and making a dress from scratch can be overwhelming. It can be difficult even knowing where to start.
It’s something I’ve done myself lots of times and know that it’s both possible and fun!
I want to encourage you to have a go. This is why I ran the Cherry Blossom Dress sewalong, and it’s why I’ve written my ebook, Designing and Making a Dress From Scratch.
In the ebook I take you through the the stages of how to design and make a dress, from collecting ideas and making sketches, to drafting pattern pieces and choosing fabric, to deciding on an order for making it up, to sewing it all together.
There are also 7 printables to accompany the ebook.
By completing the printables as you go along, you’ll be able to clarify your ideas as you go along, and you’ll end up with a plan for making a dress just like the one that’s in your head!
You can find out more about the ebook here.
I’m going to show you how I’ve used the printables to design a dress that I’m currently making. The tutorial for the dress itself will appear in a week or two when I’ve finished making it!
Using the Printables
I’ve used the printables to design and make a dress, specifically a vintage style halter neck sundress.
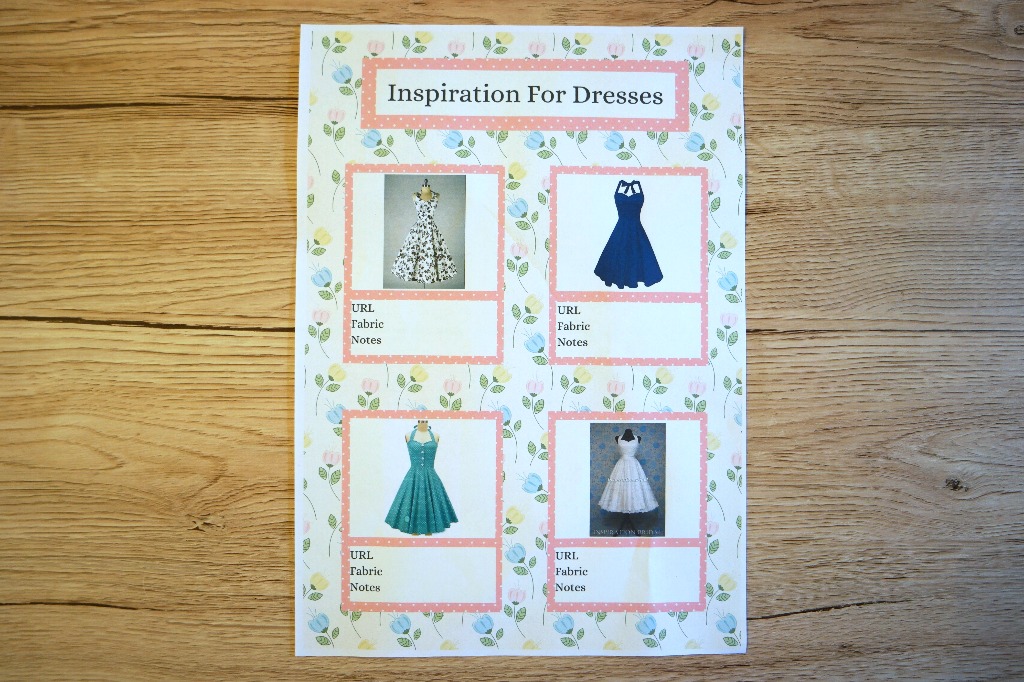
Inspiration For Dresses
To design and make a dress, you need a place to start! The best places are where there are dresses that you like.
When you find dresses that catch your eye, the first printable provides you with somewhere to to record your inspiration.
Pinterest is great for this, but if you already have boards full of ideas of things you want to make, you might need to narrow things down a bit.
I have a board called Sewing Clothes With and Without a Pattern, but there are lots of different things on it!
In addition to Pinterest, there are plenty of places to find ideas for pretty dresses! Try Google images, magazines and taking photos on your phone while you’re out.
As I had some idea already of the kind of thing I wanted to make, I identified the ideas that were the most useful, printed them out some of the ideas and stuck them on.
If there’s a url, you can write that in, and there’s room to make some brief notes about fabric etc if you want to. I felt that the pictures were self explanatory, and I’d already decided to make my dress out of cotton.
My Dress Design
Now it’s time to take those ideas that you liked and turn them into your dress
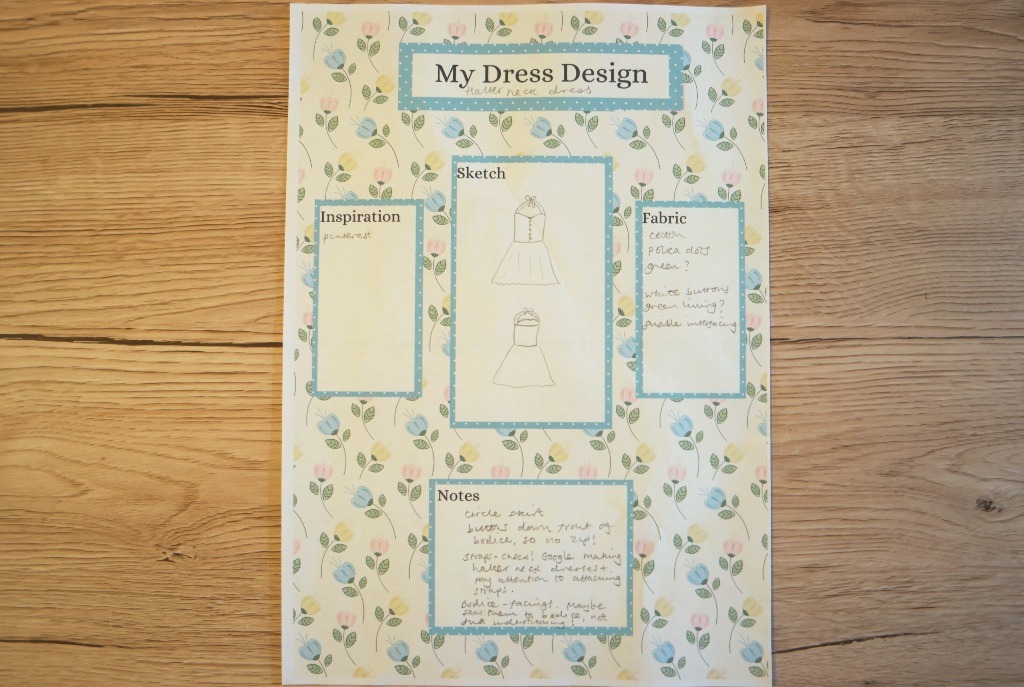
On the second printable you can make some sketches, record sources of inspiration, ideas for fabric and anything else you want to write down.
Under the notes section I wrote that the skirt is a circle, there will be buttons down the front and that the bodice might need facings if I decided not to line it.
In the fabric box I wrote down what I would need, including haberdashery.
This helped to get me thinking a little bit about the 4th printable which is sketching the pattern pieces, and the 5th one, a shopping list for fabric and haberdashery for the dress.
My Measurements
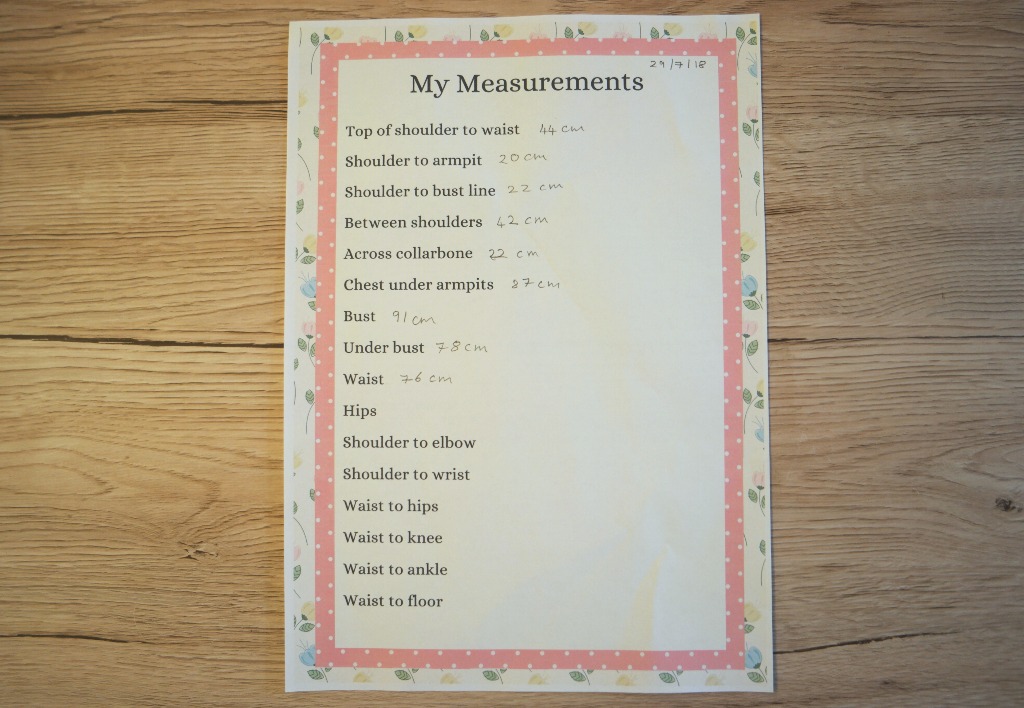
To design and make a dress, you’re going to need to know your measurements.
It doesn’t matter too much when you take your measurements, but it will need to be before you draft the pattern pieces and before you decide how much fabric you’ll need to buy when you go shopping!
Obviously if you’re making a knee length dress, you won’t need to know your waist to floor measurement! So just record the measurements you need.
I didn’t need measurements for hips, arms or anything past my knee, so I didn’t bother with those.
Pattern Pieces
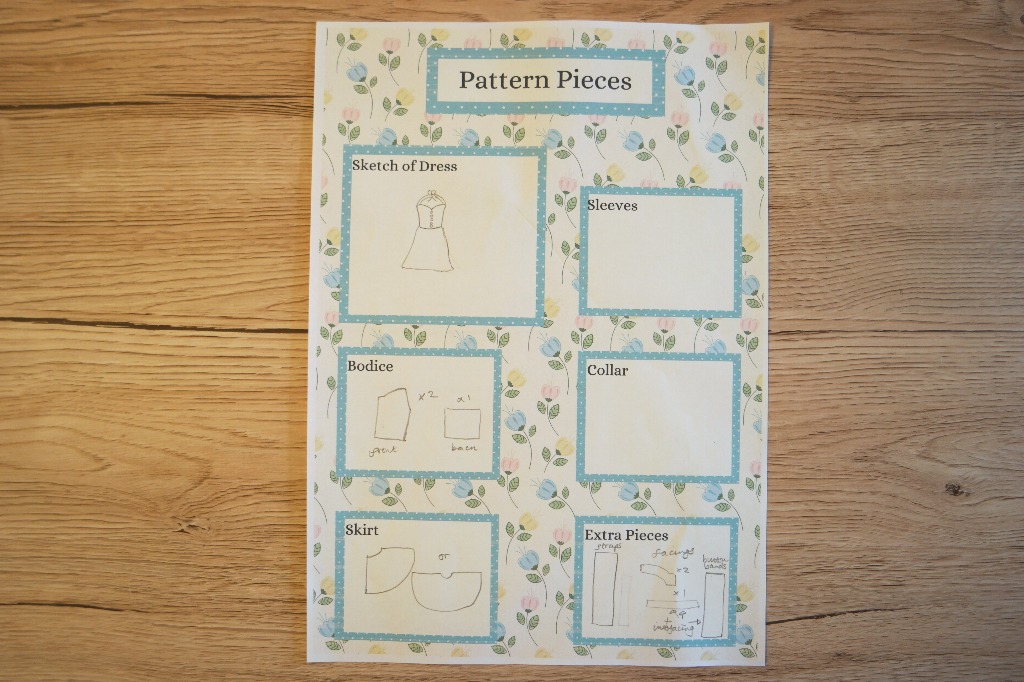
Sketching the pattern pieces will help you to clarify the shapes you’ll need to cut.
If you’ve made clothes for yourself from patterns, you can use that knowledge here. Otherwise a quick google will give you the information you need.
The dress I’m making doesn’t have sleeves or a collar, so I didn’t need to draw anything in those boxes.
Identifying the pattern pieces I’d need to make made me realise that I’d need to cut straps and button bands. I also drew facings, although I’ve since decided to line it instead.
Another thing that I hadn’t thought of was that the button bands and the facings would need fusible interfacing. Working all of this out at this stage meant that nothing got left off the shopping list!
Fabric and Haberdashery Shopping List
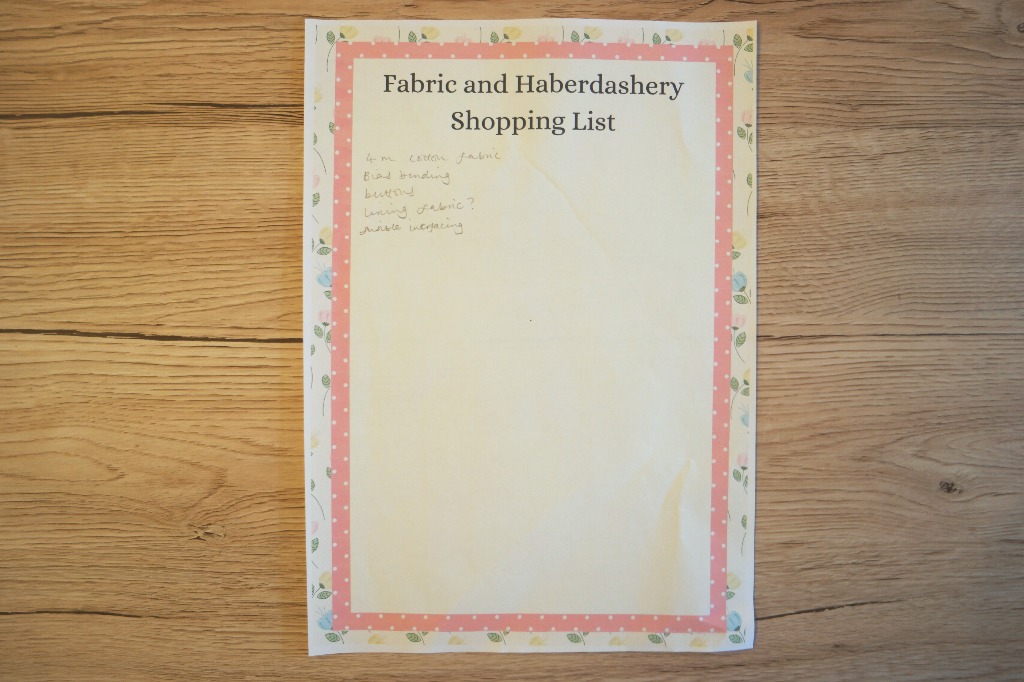
Sorting out exactly what I was going to make and how I was going to make it enabled me to think about what I would need, and the shopping list printable meant that I could add things as I thought of them.
For the dresses I make, I usually need 4 metres of fabric (although when I made the last one there was quite a lot left over). I also needed buttons and bias binding. I had some fusible interfacing already.
Writing everything down as it occurred to me meant that nothing got left off the list and I was able to get everything I needed when I made the trip to the fabric shop.
Steps For Sewing Up
When you design and make a dress, sometimes the order in which you do things doesn’t matter very much.
For example, it doesn’t matter if you sew the shoulder seams before you sew the skirt to the bodice or afterwards.
But sometimes the order does matter! If you’re adding darts to the bodice, you’ll need to do that first before you sew side seams or attach the skirt.
Having a plan for the reduces the chances of messing things up and needing to unpick things at best, or having to start again!
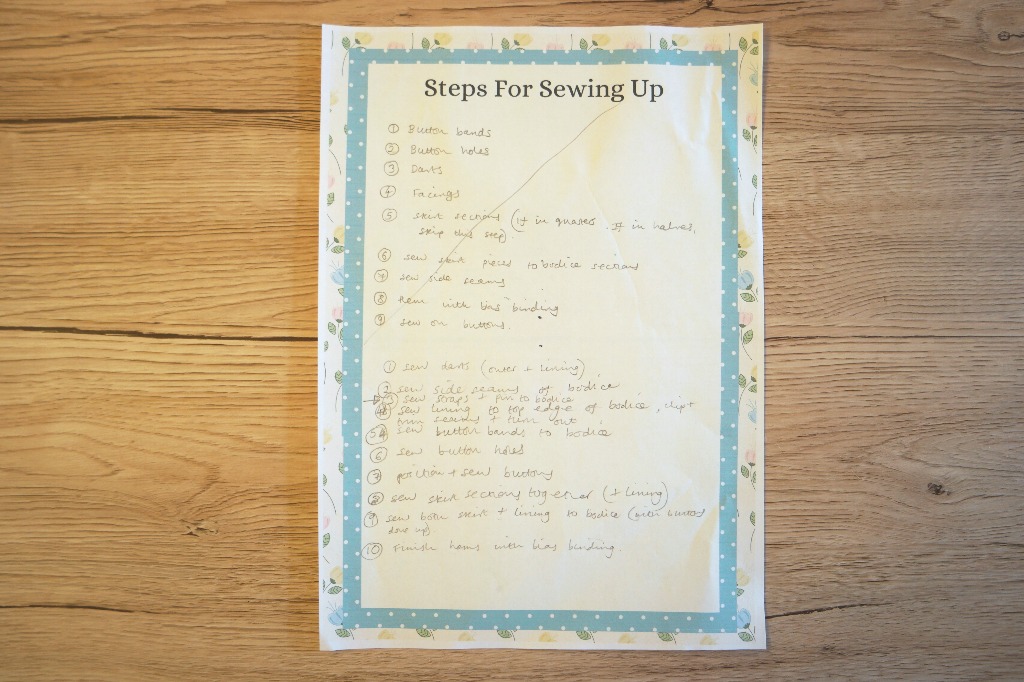
I was very glad I did this actually, because the order that I would usually do things in had to be changed because the dress will have buttons instead of a zip.
You can see from the photo that I had to change it!
This is the order I decided on for sewing my dress together:
1. Sew the darts in the dress and the lining
2. Sew side seams of dress and lining
3. Sew straps and pin to bodice
4. Attach lining to bodice along the top
5. Make button bands and sew to bodice
6. Make button holes
7. Sew on buttons
8. Sew skirt sections together (also lining)
9. Attach both skirt and lining to bodice
10. Finish hems with bias binding
Finished Dress
This is the last stage when you design and make a dress, and it’s one that we often miss out!
The last printable gives you the opportunity to record what you’ve made. If you keep these safe, you’ll be able to refer to them long after the dresses you’ve made have worn out.
It also gives you a chance to assess what went well and what you might do differently if you make the same dress again.
Now I’m Ready!
I’ve got my plan.
I know how I want the finished dress to look and it’s clear in my mind.
I know how the pattern pieces will need to look.
My measurements are recorded on the printable.
I’ve bought the fabric and habby.
I’ve got a plan for sewing it up.
So the next part is making the pattern pieces and cutting out before sewing the whole thing together. Because I’ve planned everything out, I feel ready and quite confident that I’ll end up with something wearable.
Sewing clothes without a pattern is a learning journey
When you design and make a dress, you want to end up a lovely thing you can wear, but if it’s not perfect it doesn’t matter.
My vintage style sundress isn’t perfect. There’s a hole at the top of the zip and the waist seams don’t match perfectly. I’ve also had to move the straps a couple of times.
It’s still my favourite dress though! And when I make the halter neck dress, I’ll be extra careful when I’m matching the seams, and I know to take my time positioning the straps.



I loved it so much, your work is incredible, I was inspired to make a type of dress for an event, thank you very much
I am having so much reading what you have written. Thanks
I’m pleased you like it, thank you!