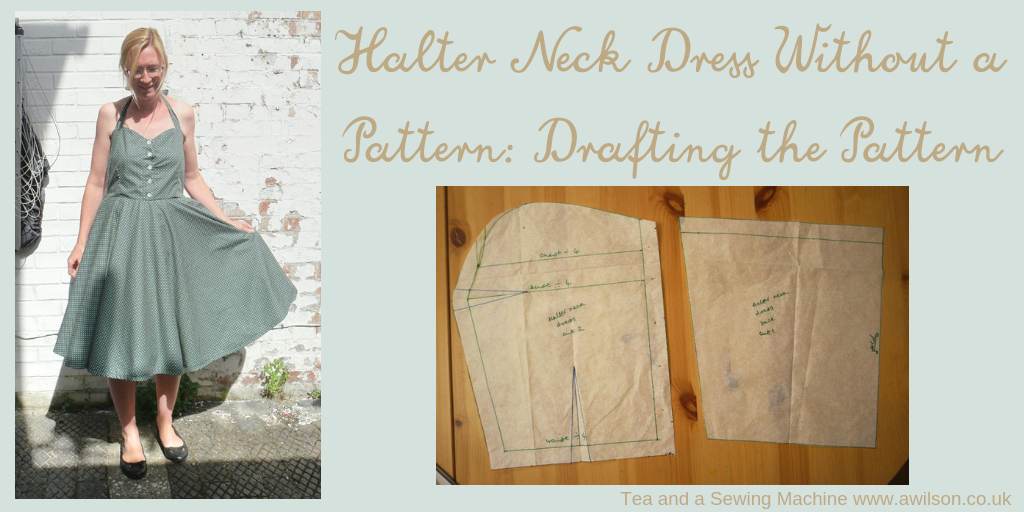
Halter Neck Dress Without a Pattern: Drafting the Pattern
Having a wardrobe full of clothes that are too big has been the perfect excuse to make new things for myself!
When the weather’s warm enough, I love my vintage style dresses. It’s not easy to find these in the shops, so the obvious answer is to make my own.
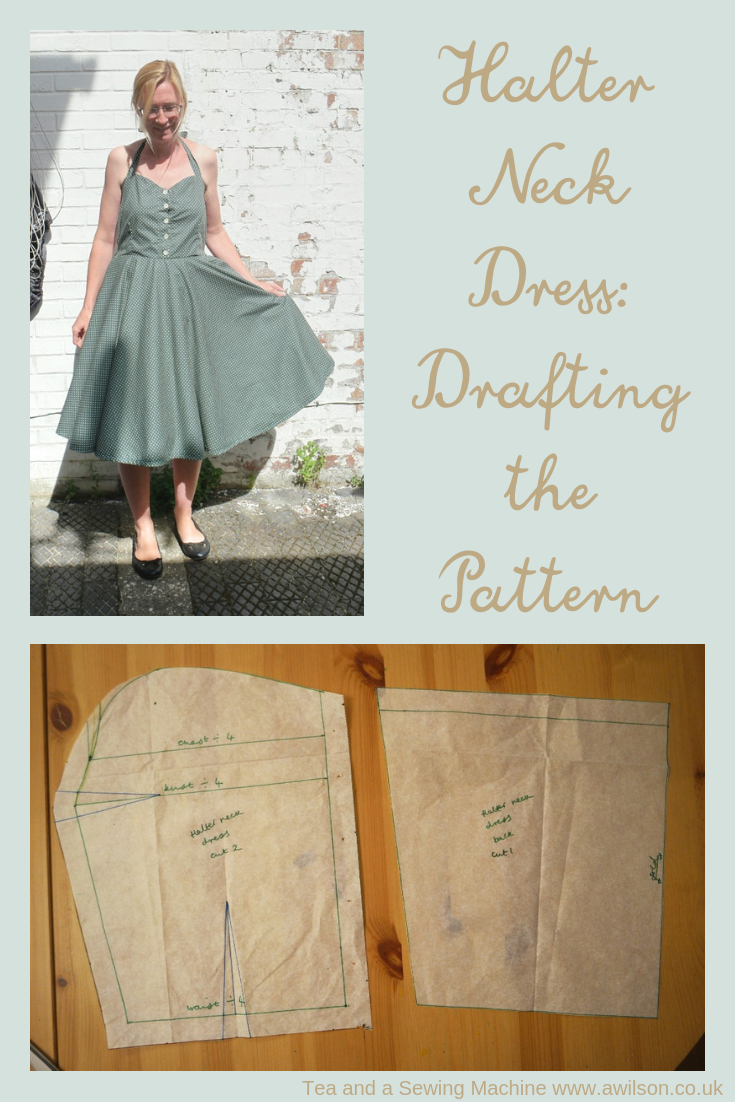
I successfully turned my cherry blossom dress into a sundress, and having seen a halter neck dress on Pinterest that I rather liked, I decided to have a go at making one, using the cherry blossom dress as a starting point.
To help with designing the dress, I used the printables from my newest ebook, Designing and Making a Dress From Scratch. You can find out more about the ebook here.
The printables helped me to collect ideas, design the dress and work out how I was going to make it, step by step.
I wrote a post about designing a halter neck dress using the ebook’s printables which you can read here.
Now that I’ve worked it all out, the next step is to make the pattern pieces!
If you haven’t drafted pattern pieces before, it might seem daunting, but it’s perfectly possible, especially if you’ve made clothes for yourself before from patterns.
Making things from patterns will have given you an idea of how the pieces ought to look.
Even if you haven’t don’t worry, because in the rest of the post I’m going to show you how to draft the pieces for a halter neck dress.
Drafting Pattern Pieces For a Halter Neck Dress
You Will Need
Tape measure
Pencil
Big bits of paper (pattern paper is ideal. This is an affiliate link).
Long ruler
Scissors
Pins
A French curve is useful, but you could use a plate instead.
Taking Measurements
For detailed instructions about taking measurements, you might like to read this post here.
Basically, don’t measure yourself over a bulky jumper, try to make sure that the tape measure is straight and don’t pull it too tight!
You will need to measure:
Across your collar bone
From one shoulder to the other
Chest under your armpits
Bust
Waist, where the tape measure rests comfortably.
From the top of your shoulder to your waist
From the top of your shoulder to under your armpit.
The top of your shoulder to where you took your bust measurement.
The top of your shoulder to where you want the top of the dress to be.
Your waist to just below your knee.
Drafting the Bodice
I’ve used the same strategy here as I did for the vintage style sundress. I started off by making a pattern piece in the same way that I did for the Cherry Blossom Dress Sewalong, then adapted it by changing the neckline and removing the shoulders.
Unlike the Cherry Blossom dress and the vintage style sundress, this has buttons down the front. So the bodice front is in 2 sections with button bands and no zip.
This will affect the order in which the dress has to be sewn together, but we’ll come to that later!
Drafting the Bodice Front
Start off with a large piece of pattern paper.
It will need to be about 10 cm (4 inches) longer and wider than your longest and widest measurements.
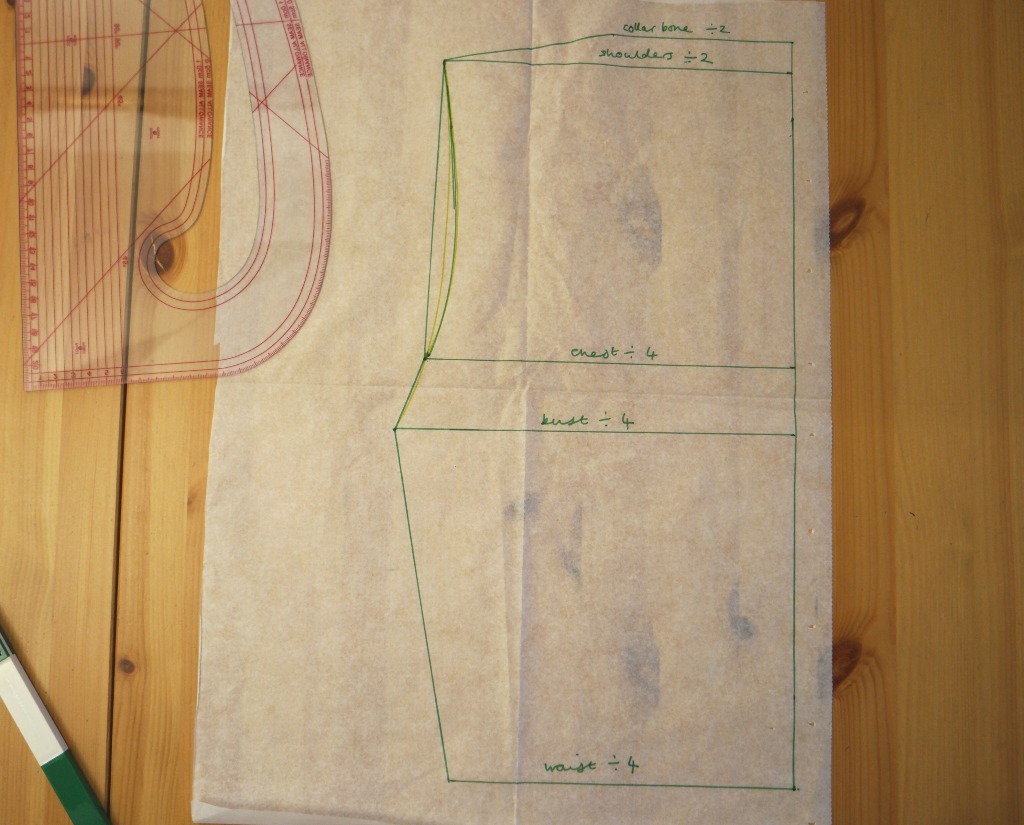
Draw a vertical line the same length as the distance from the top of your shoulder near your neck to your waist. This will be the centre line of the bodice. When you cut out your fabric, it will be this line that goes on the fold.
On this line, mark off the distance from your shoulder to your armpit and from your shoulder to bust.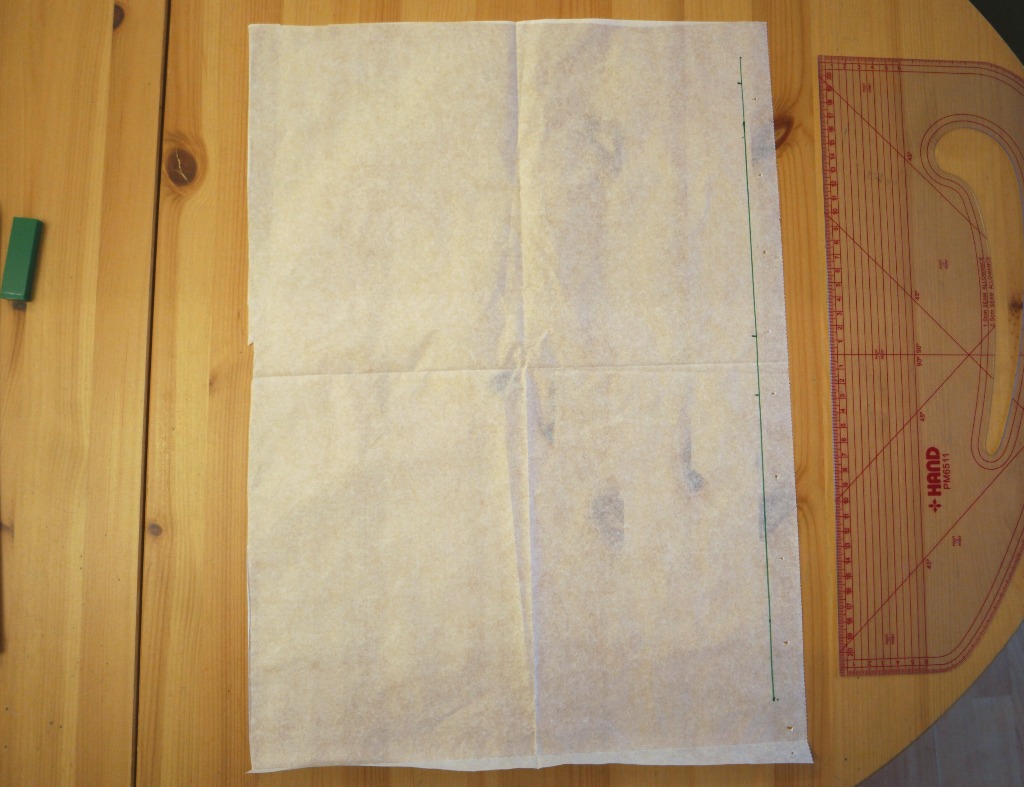
At the top of the vertical line, draw another line at right angles to it the same length as half the distance across your collarbone.You only need half the measurement because you’re drawing half of the bodice front.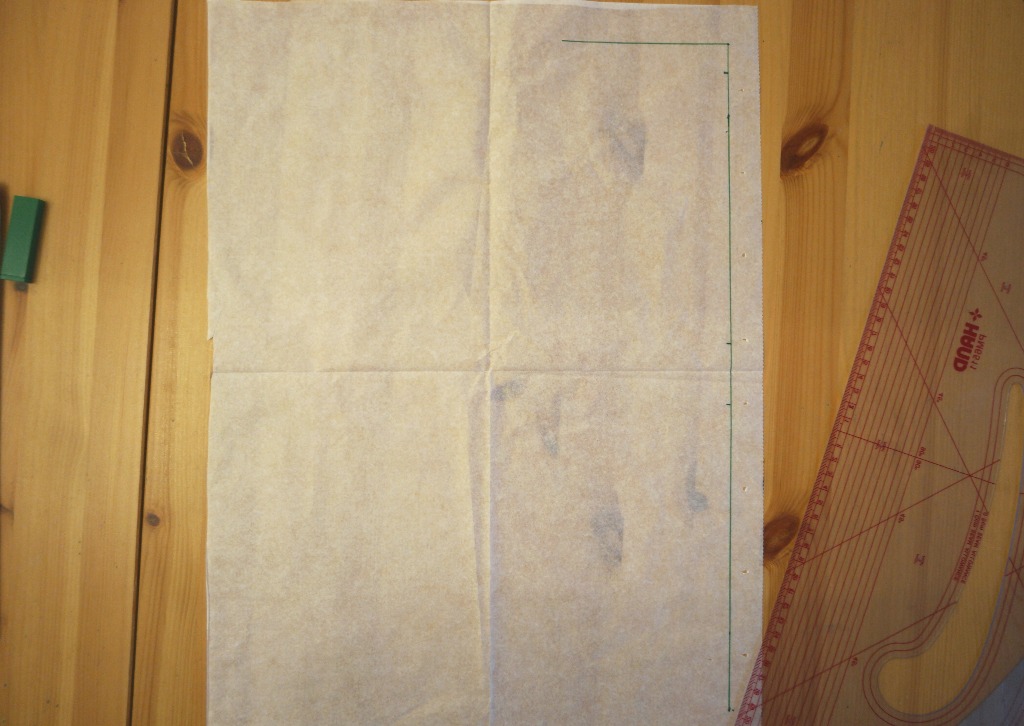
A couple of cm (about an inch) below and using the measurement across your shoulders divided by 2, draw another line below the first horizontal line.
For the next horizontal line, find where you marked your shoulder to armpit measurement. Draw a horizontal line the same length as your chest measurement divided by 4.
Now find where you marked your shoulder to bust measurement. Draw another horizontal line the same length as your bust measurement divided by 4.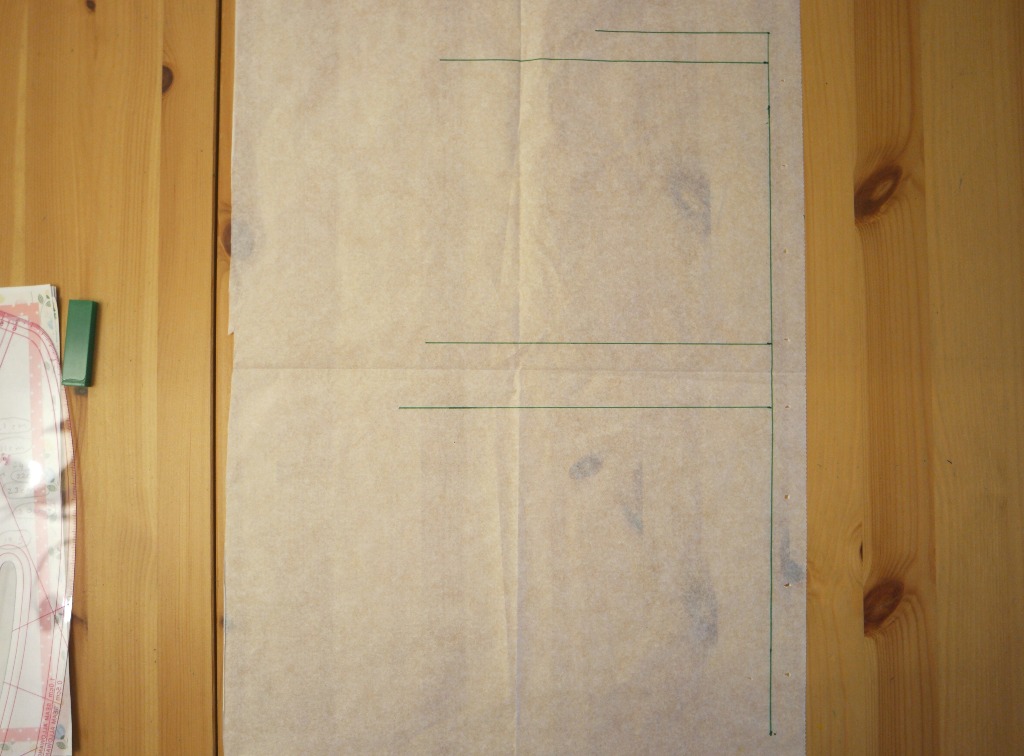
From the bottom end of the first vertical line, draw a horizontal line the same length as a quarter of your waist measurement, plus 2 cm (3/4 inch). The extra cm are to make allowances for the waist darts. We’ll come onto those in a minute!
Now join the lines up! To get the curve of the armhole, you might like to use a French curve. If you don’t have a French curve, you can use a plate instead.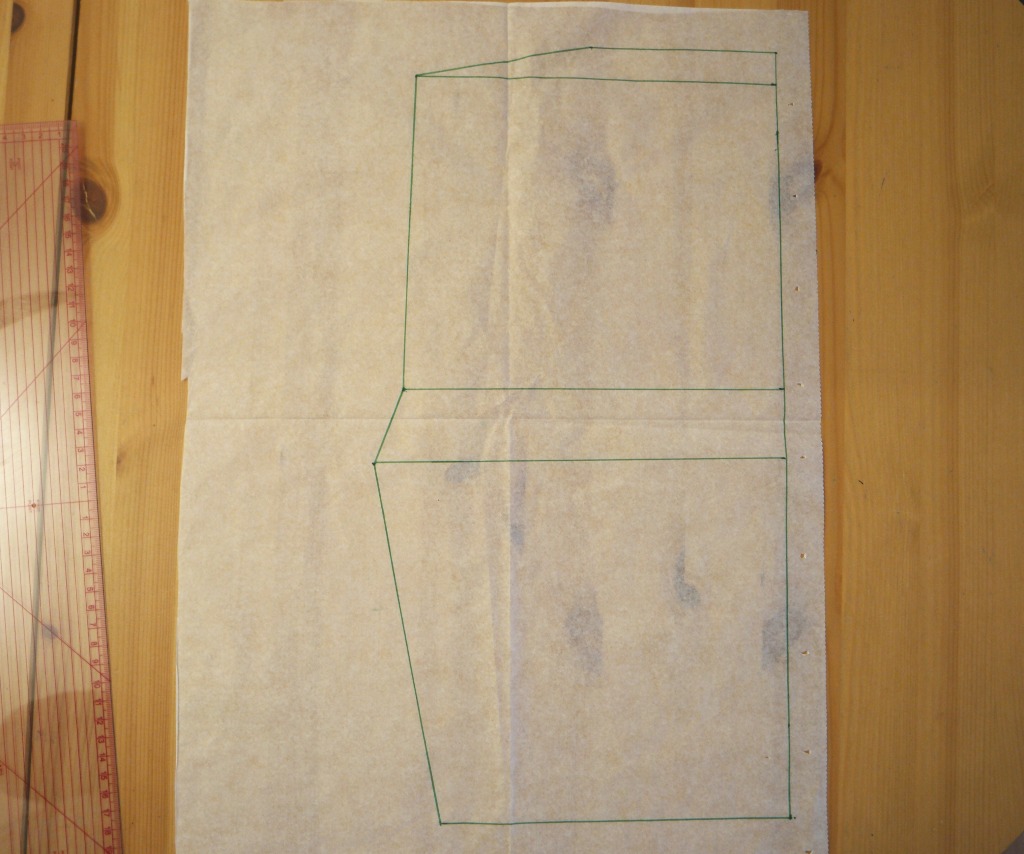
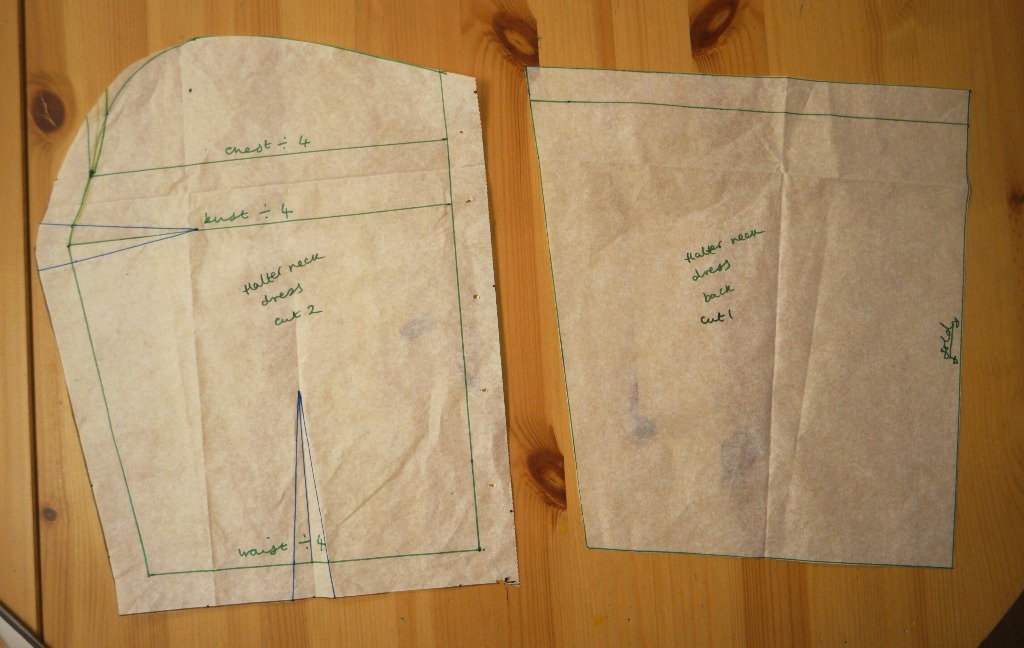
To draw the neckline, measure down about 15 cm (6 inches) from the top of the centre line. Using a French curve, join from here to the far end of the collarbone line.
To position the side darts, find the bust line and mark a couple of cm (3/4 inch) either side. Join these marks to a point about 8 cm (3 inches) along the bust line.
You will need to check this on yourself or on your dress form to determine whether the darts are in the right place, so pin the darts on your pattern piece and hold it onto yourself. If they’re not right, adjust them.
You might need to make them wider or narrower, shorter or longer, or adjust the position a little bit.
To add darts at the bottom of the bodice, find the halfway point on the piece you have made. I found that for this dress, they needed to be a bit longer than on my other dresses, They will need to be about 12 cm (5 inches) long and 2 cm (3/4 inch) wide in total, so 1 cm (3/8 inch) either side of the line. Check it on yourself to get them in the correct place.
Now add a 2 cm (3/4 inch) seam allowance to the bottom, the side and the centre.
Adapting Your Bodice Pattern Piece For the Halter Neck Dress
You can either use this pattern piece and adapt it for the vintage style sundress, or if you prefer, draw round it and put the original to one side.
Find the horizontal line you drew for your chest measurement. Between your chest measurement and your waist, the pattern piece will need to have a straight edge. This is because this is where you’ll be joining the front to the back and if it’s curved you’ll end up with weird bumps.
On the centre line, mark where you would like the top centre of the bodice to be, plus a couple of cm (3/4 inch) for the seam allowance. The best way to do this is to hold the pattern piece against yourself or your dress form and draw it on.
Draw a line from where you marked your chest measurement at the side to where you marked the top of the bodice on the other side. From the chest side, it will need to be curved, then slope gently downwards.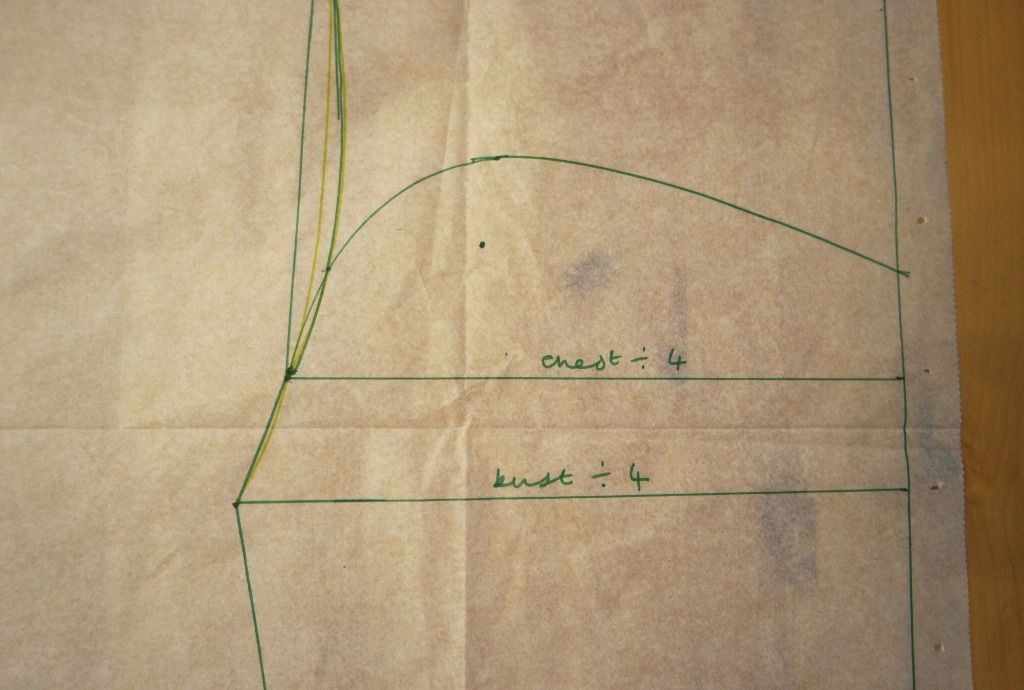
You could use a French curve for this, or a plate if you don’t have one.
Don’t forget to add the darts and a seam allowance if you’re making a copy!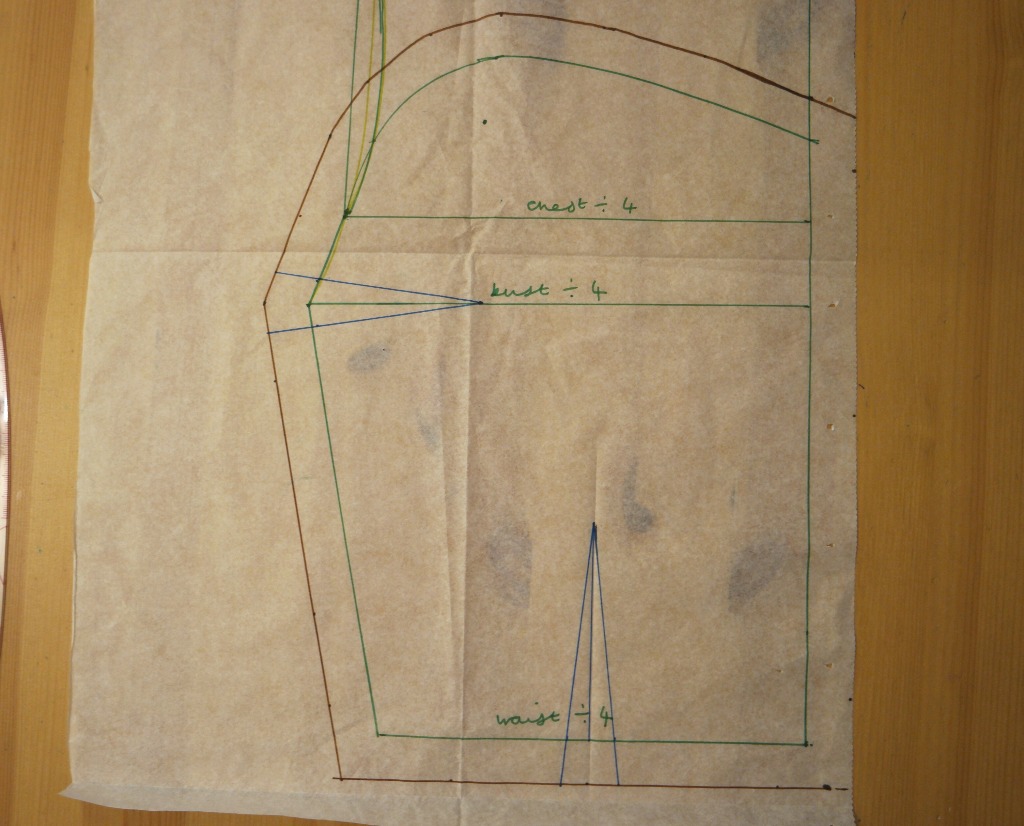
Cut it out.
Drafting the Bodice Back
Draw round the adapted bodice front onto another piece of pattern paper.
Find point where you drew the chest line. Draw a straight, horizontal line across the pattern piece.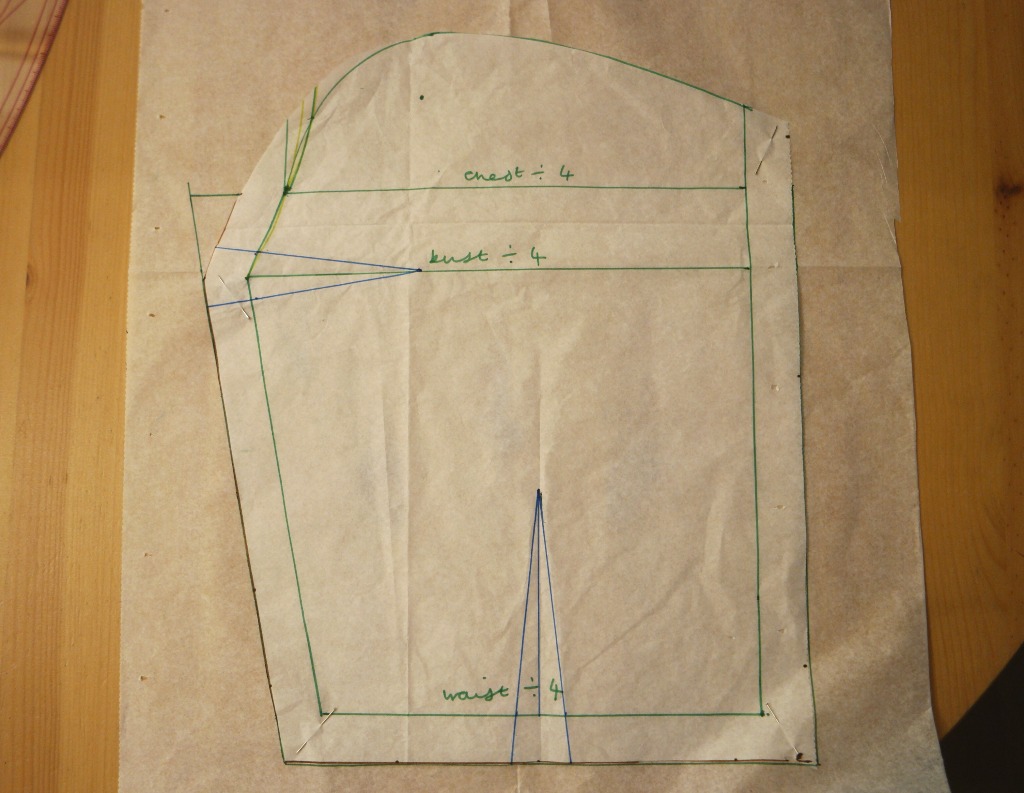
Working Out the Skirt Measurements
The skirt of the halter neck dress is made up of 4 quarter circles with the middle cut out, like a doughnut.
To work out the size of square you need, you will need the length of the skirt, plus the distance from the edge of the doughnut hole to centre.
To do this, you will need pi. If maths isn’t your thing, don’t panic!
Pi is the relationship between the distance around the edge of a circle and the distance across it, passing through the centre. The distance around the edge is roughly 3 times the distance round the middle. We only need to know from the edge to the centre, not right the way across, but this is easy to work out as we can just halve it.
It’s easiest to do this on a calculator. There’s probably one on your phone, or if you Google calculator, it will bring one up.
To calculate the dimensions of the skirt and how much fabric you need, take your waist measurement and add 10 cm (4 inches) for seams and ease.
Divide it by pi, then divide this answer by 2. Jot this down somewhere as you will need it in a minute.
Now add this number to your desired skirt length.
This new number tells you how long the sides of the squares of fabric need to be.
For the lining, you can use the same measurements. Just make the skirt 10 cm (4 inches) shorter.
Now you’re ready to cut out the bodice and skirt pieces of your halter neck dress!
As this is a different style of dress to the ones I usually make, I made a toile for the bodice. I was glad I did, because I discovered that I needed to adjust the side seams and make the darts a bit longer. I’d recommend making a toile if you have time and some spare fabric.
The next post will take you through sewing the halter neck dress together.


A very good tutorial. I like this stylization above all because you can feel loose and comfortable in them. A very nice combination of colors. I really like your dress
Thank you!