Fruit Garland and Decorations Instructions
 So we’re into December and Christmas preparations are well under way. We’re really not get-it-all-organised-in-October people so there’s still a fair bit to do, but the tree is up some presents have been bought, the cake has been baked and I’ve made a list 🙂
I have also managed to make some stuff, despite Boy 4 still being a clingy little limpet/ mad button presser/ tornado and the fairies that are supposed to clean up my house, well, are not.
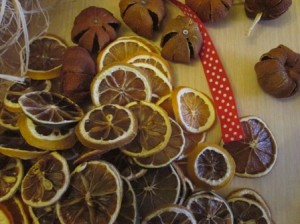 A couple of weeks ago to I managed to get myself sufficiently organised to start drying fruit to make a dried fruit garlands and decorations with.
These things are gorgeous, they smell amazing and they make a lovely alternative to tinsel and mass produced plastic tat. It is also a good way to use up left over oranges, lemons and limes if you accidently bought too many in the run-up to Christmas.
It will keep, so you can reuse for several years to come. I made a dried fruit garland last year and when I opened the decorations box I was met with a lovely citrus smell. The orange slices had also hardened over the year and it wasn’t mouldy at all!
How to Make a Dried Fruit Garland
I have included some affiliate links.
You will need: citrus fruit (I used oranges,lemons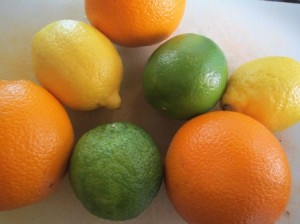 and limes), an oven, raffia
 or string, a darning needle or wire and a skewer, ribbon.
You may also want to add pine cones and cinnamon sticks.
The first stage is to dehydrate your oranges, lemons and limes. There are a number of ways of doing this, but I have found that the easiest and quickest way is in the oven.
Cut the fruit into slices not more than half a cm thick. If you start at the stalk end and cut across the segments, you will get a lovely stained glass window effect and also an area in the middle for threading.
Put them in the oven straight onto the rack, don’t bother with a baking sheet as this will allow the warm air in the oven to get to both sides of the fruit and it will dry quicker. Put the oven on about 100 degrees c, no hotter. Remember that you are drying the fruit out, not cooking it!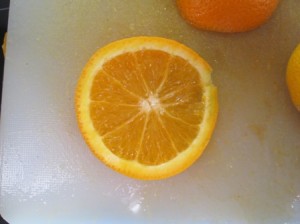
It will take between 2 and 4 hours for the slices to dry, depending on the thickness of the slices. The thinner the slices, the quicker they will dry. If they are not totally dry, it doesn’t matter, you can always put them on a sunny windowsill or next to a radiator to finish drying them out.
To dry whole clementines or satsumas, lemons and limes, leaving the top and bottom of the fruit intact, make a cut at 12 o’clock and 6 o’clock, then at 9 and 3 o’clock and then half way between those, so you that you have eight slits evenly spaced out around the fruit. Stick a skewer or a darning needle through it from top to bottom. Put it in the oven straight on the rack as before.
Tips for Drying Fruit
- Thinner slices dry faster.
- Drying whole fruit it takes longer than the slices. Small fruit dries quicker (I used clementines, but lemons and limes might also work well).
- A lot of juice will come out and may well end up on your kitchen floor, so putting down some pre-emptive tea towels or some kitchen towel to catch it might be an idea.
- Once dry the fruit keeps for ages. However, do not be tempted to store almost dry fruit in a tin and then put the tin next to a radiator. It will go mouldy, as some of mine did when I did this.
- Put a skewer through the middle of the whole fruit and the slices as soon as you get it out of the oven, while it is still soft.
- Fruit that is not quite dry can be left out do dry out naturally.
The 2nd stage is to make the citrus fruit decorations. For the simple tree (or wherever you like!)

decoration, take several strands of raffia and fold in half. Knot the ends together. Thread the loopy end through a satsuma and then through several slices of orange, lemon and lime. I used six slices. Tie a ribbon bow around the knot at the bottom, between the satsuma and the slices, and above the slices. Hang it up and enjoy the lovely smell!
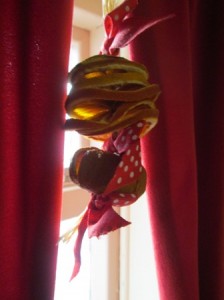
For the citrus fruit garland, take 3 dried satsumas. Fold several strands of raffia in half, thread through the satsuma and knot the ends. You need enough of a loop each side of the satsuma to thread some ribbon through. Sort your slices of orange, lemon and lime into piles of seven. You will need six piles. Smaller slices will look better at the top and bottom of the piles and larger slices in the middle. Thread a
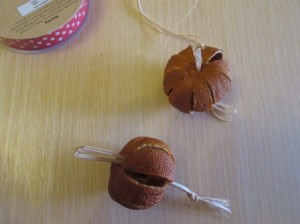
doubled over loop of raffia through the centre of each slice in the first pile and knot as for the satsumas. Repeat for the rest of the piles.
You should now have 3 satsumas each on a raffia with loops at either end, and 6 bunches of seven dried fruit slices, threaded onto raffia with a loop at either end.
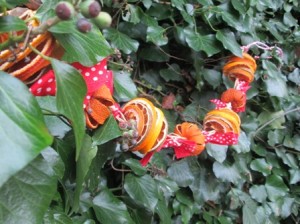
Choose the largest satsuma. This will be the central fruit in the garland. On either side of the satsuma put a fruit pile that you have threaded onto raffia. Using the raffia loops on either side, tie them together with ribbon. On the other side of the fruit piles, add the satsumas, then another fruit pile. Your fruit garland is almost complete!
To finish it off, add some ribbon or twine to the final loops at either end. You can now hang it up or give it to somebody as an unusual gift!





Hi! I am going to experiment with my citrus for a garland. I will use lemons, limes, mandarines and whole kumquats. I am going to use my dehydrator machine set to 110 F and my counter top convection oven set dehydrate at 100 F. I am hoping by using a lower temperature and a longer time I can keep the vibrant colors of the peels and flesh without turning them brown.
sounds great!
Saw these at a craft fare and they were charging £10.00 for small rings and £20.00for long garlands so you could make a tidy sum if you charged say a £5.00
I’ve thought about doing that 🙂
Do you have any advice for storing dried fruit decorations. I have made a lot this year and don’t want them to go mouldy in store. I didn’t varnish my fruit.
If they’re properly dry, they should be fine. I didn’t do anything special to store mine, just popped them in a cardboard box and put it away in the cupboard with the other decorations. Just make sure that they don’t get damp xx
Love to make home maid decorations’
It’s fun isn’t it 🙂
love home made stuff, the more unusual the better!