Drafting a Skirt Pattern: Spanish Style Skirt
This post about drafting a skirt pattern contains affiliate links.
So the Great British Sewing Bee is over for another year, and while there are things they made on the programme that I probably wouldn’t make, I feel inspired to make a Spanish style skirt like the dress that Nicole made.
It’s not the kind of thing I would normally wear. I like my circle skirts! But this dress was so pretty and I loved the ruffles at the hem.
Wearing a full on Spanish dress to do normal life things might be a bit too much, even for me! And the colours and prints probably aren’t the kind of things I would choose either. But as I began thinking about it, I realised that I could probably make a skirt version out of fabric I had already.
I’m trying to resist the urge to buy more fabric, mostly because I have a pile of bits left over from other projects.
So taking into account that I don’t usually wear bright colours, it’s going to be a Spanish style skirt in vintage florals. I’ve only got as far as drafting the skirt pattern, but I can tell you that in my head it looks amazing!
The skirt section on Nicole’s looked like a fairly simple fitted skirt. I could have used a pattern, but I decided to draft one myself.
Drafting a skirt pattern can be intimidating if you haven’t tried it before, but it’s easier than you’d think! Here are the instructions if you’d like to try it!
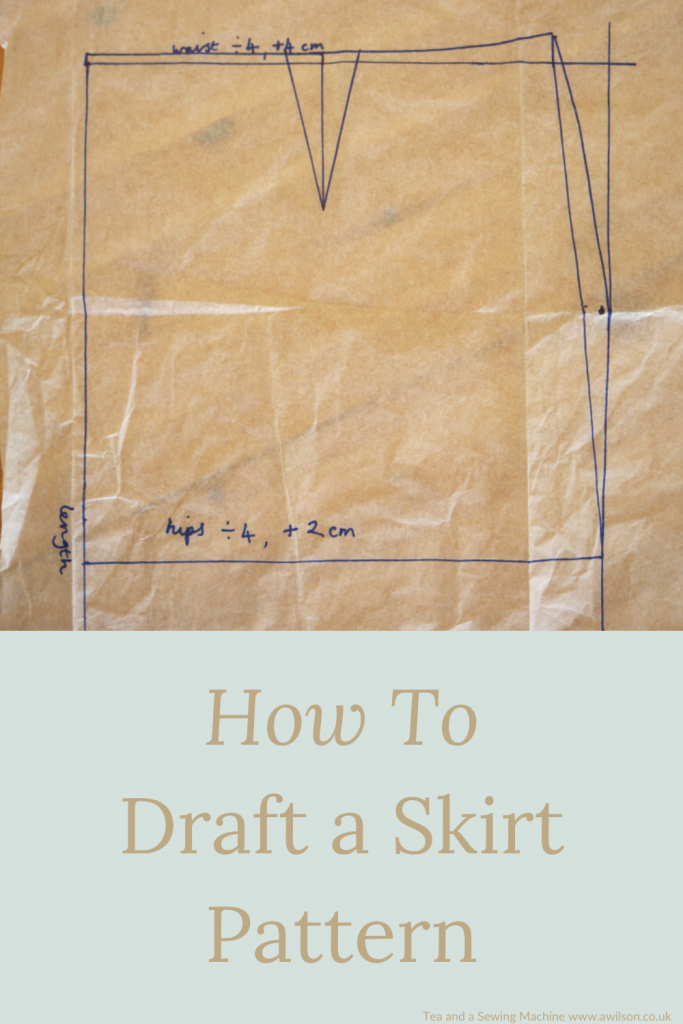
How To Draft a Skirt Pattern
You Will Need
Pattern paper. I recently bought a roll of this from Amazon. It has cm squares on it which makes pattern drafting much easier.
Tape measure. Plastic ones are considered to be better than fabric ones because they don’t stretch, but it’s fine as long as you use the same tape measure for measuring yourself and for measuring out your pattern.
A pencil or pen. I drew the pattern with a Sharpie and I would not recommend it! The pen bled through the paper and onto the table, and had to be removed with rubbing alcohol. I’d use a pencil or a water based pen.
Somewhere to jot down your measurements. I find this most definitely necessary as I forget them otherwise!
A long straight edge. A 30 cm ruler is fine, especially if you use the pattern paper with a grid.
A French curve is nice to have, as is a friend or a helpful husband to assist with taking measurements. I have this French curve. Unfortunately Amazon don’t supply helpful husbands!
Taking Your Measurements
For drafting a skirt pattern you only need to take 4 measurements: your waist, your hips at the widest point, the distance from your waist to your hips (where you took the measurement), and from your waist to just below your knee.
My advice here is to write your measurements down (I forget them if I don’t!), and don’t pull the tape measure too tight! Lots of us have gained weight during lockdown, and yes, it’s depressing, but you’ll forget about that when you have a lovely skirt to wear. If it’s too tight, you’ll remember and you’ll be uncomfortable and you won’t want to wear it. So keep the tape measure loose!
When measuring around your hips, make sure that the tape measure is level all the way round. This is where having a friend or a helpful husband comes in handy.
There’s a post here about taking measurements if you’d like more advice.
When you’ve taken your measurements, divide your waist measurement by 4 and add 4 cm.
You’ll also need to divide your hip measurement by 4 and add 2 cm for ease of wearing.
Drafting the Skirt Front
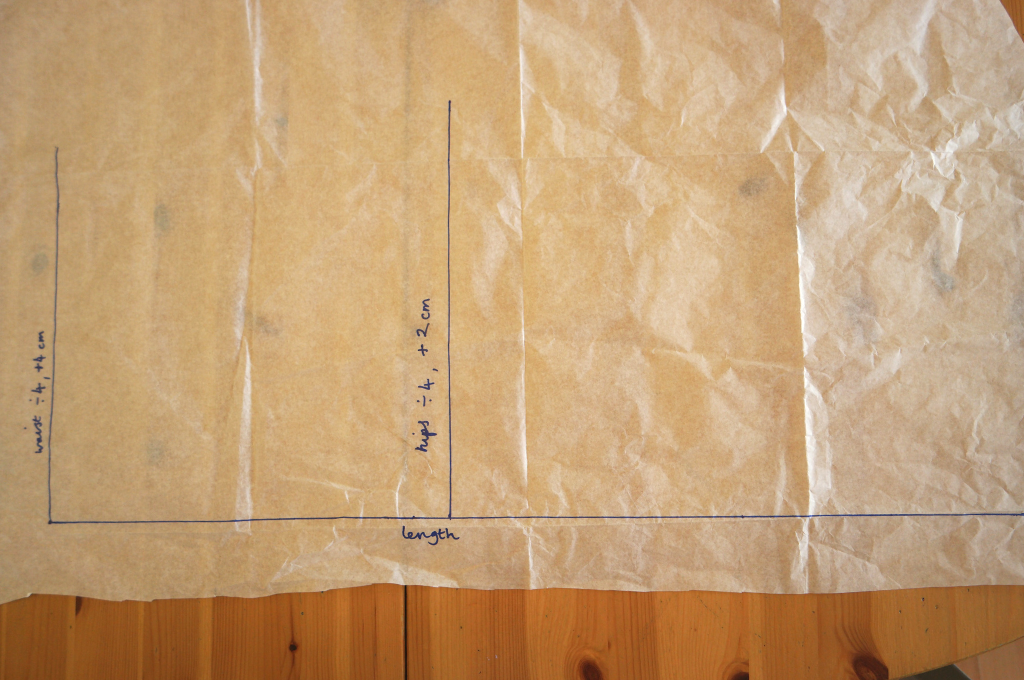
On a piece of pattern paper, draw a line the same length as your waist to hem measurement. This will be the centre front of the skirt.
From the top end of the line, draw another line outwards the same length as your waist measurement divided by 4 plus 4 cm.
On the original line and measuring from the top, measure down the same distance as from your waist to your hips. Draw another line outwards the same length as your hip measurement divided by 4 plus 2 cm.
At the bottom of the original line, draw a third line outwards the same length as the hip measurement.
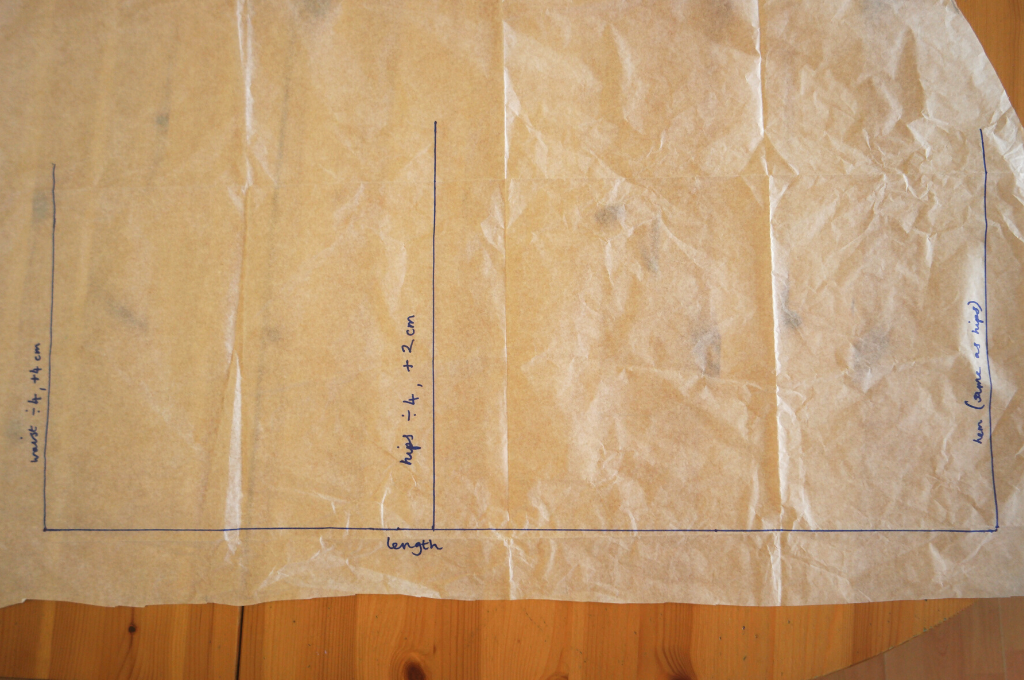
Now join them up.
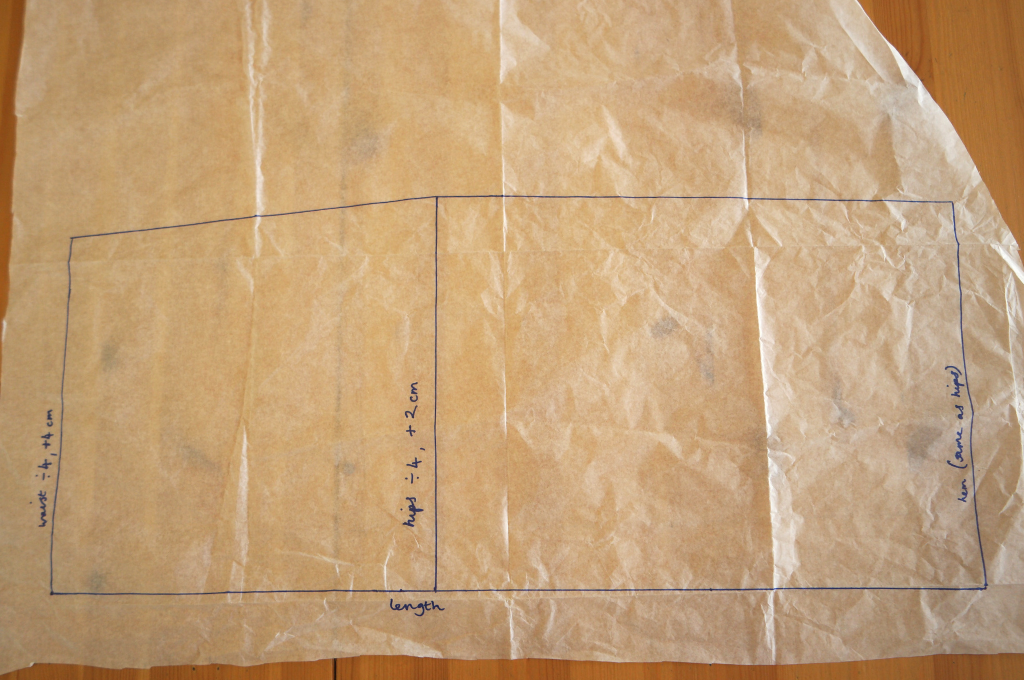
The next step in drafting a skirt pattern is to make some little changes to this to allow for the fact that women are not cuboid and bits of us bulge at least a little bit.
Drawing the Curve of the Hips
This is where having a French curve will come in handy. If you don’t have one, you could try a dinner plate or just draw it freehand.
There’s 4 things to do here.
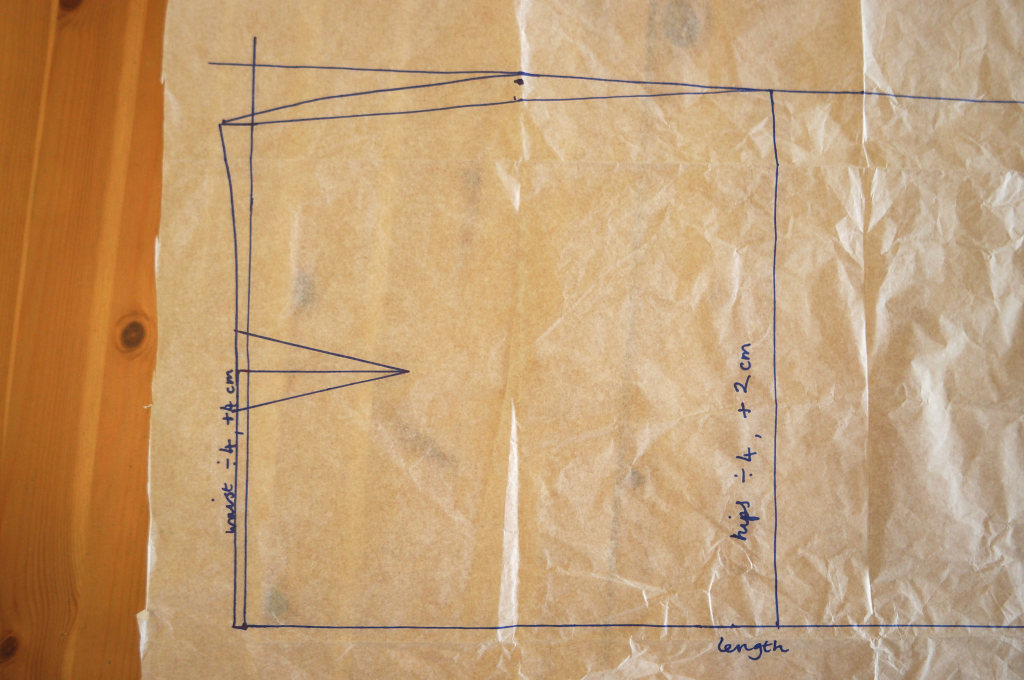
Firstly, find the waist measurement line where it joins with the side of the skirt. Measure up 1.5 cm from here and add it to the line. This photo shows where the dot is. I forgot to take a picture after I’d joined the line to the dot!
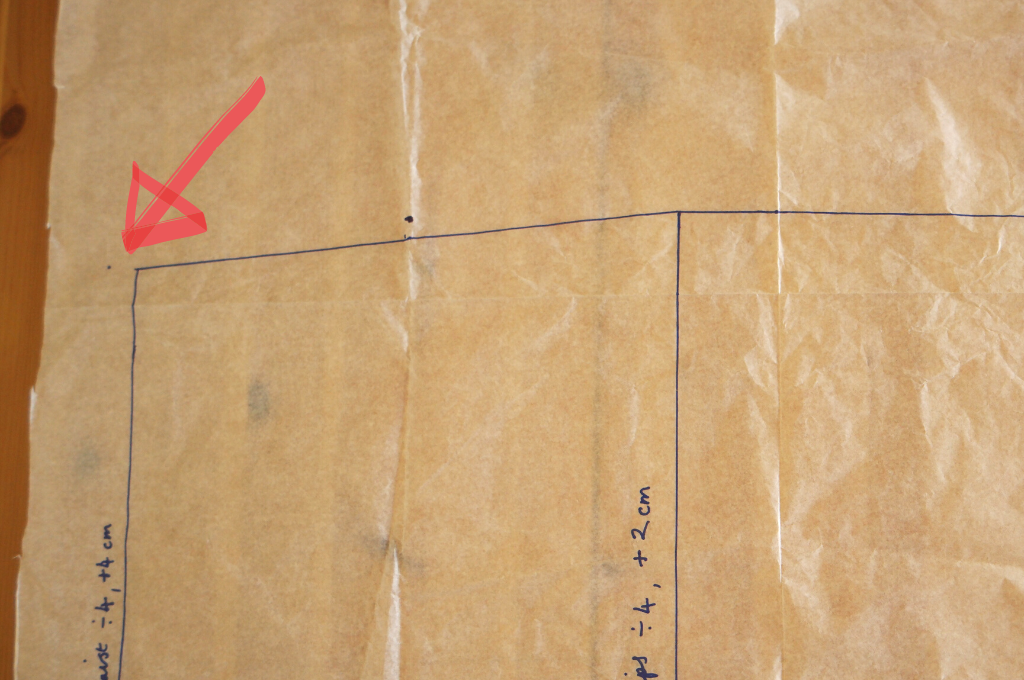
Secondly, find the line you drew from your waist line to your hip line. Mark the halfway point. This is the other dot in the picture above.
Thirdly, extend the line you drew for your waist, then extend the hip to hem line upwards so that they meet. You should now have a big rectangle. This is to help you to draw the curve.
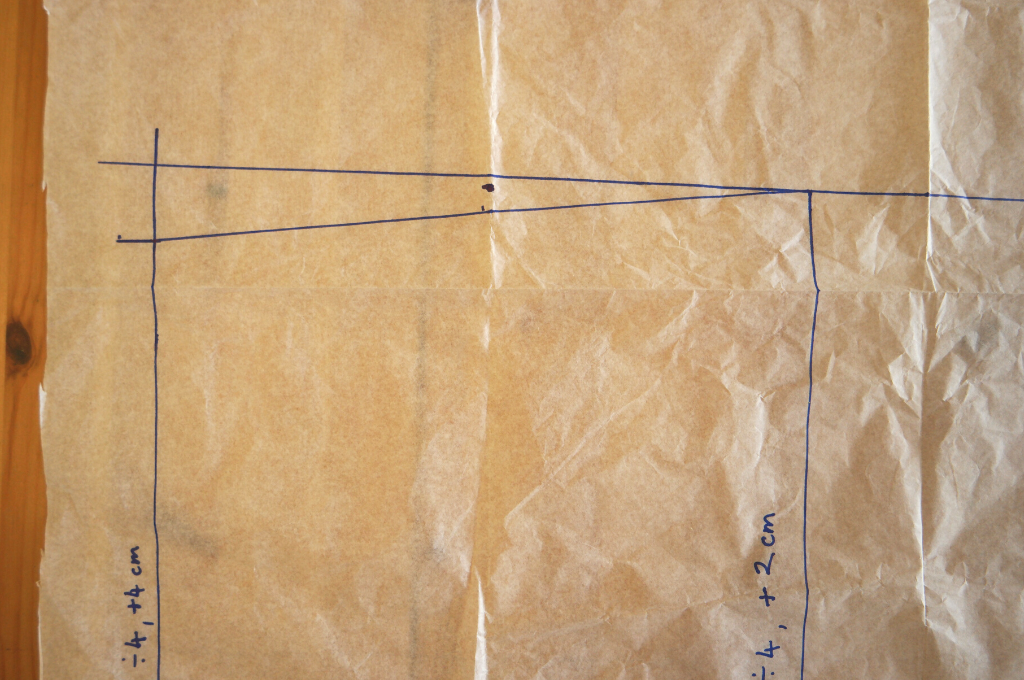
Lastly, take your French curve and draw a curved line from where you added the 1.5 cm to the halfway point between your waist and your hip. The vertical line that you added should meet it about here. If not, you might need to make the curve a bit longer.
Sorting Out the Waist
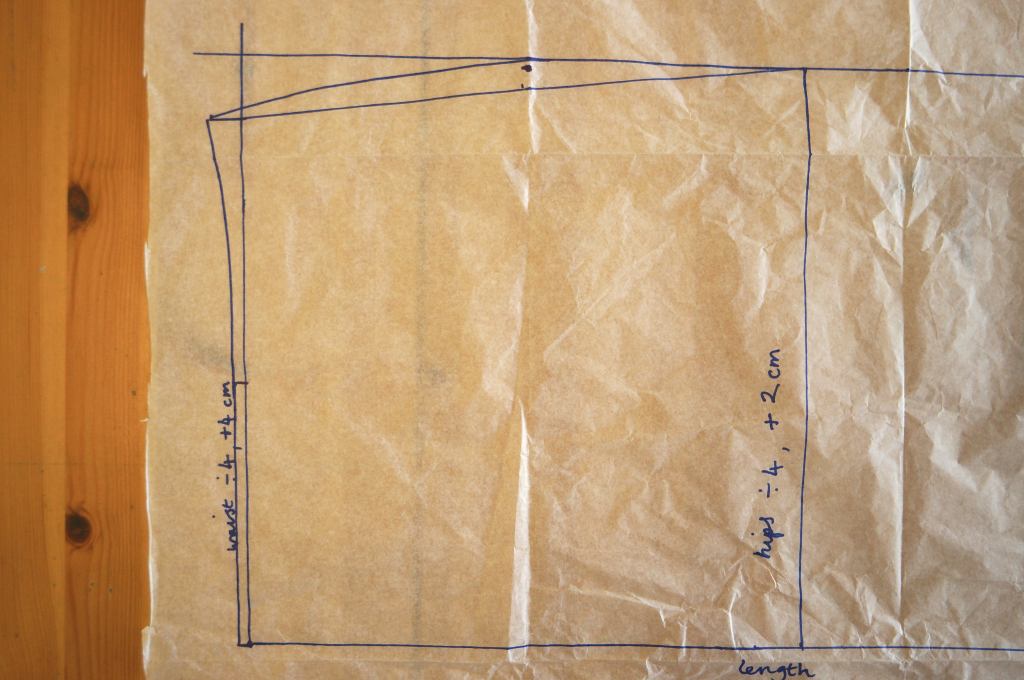
You’ve already marked an extra 1.5 cm on one side. Now on the centre front side, make another mark 0.5 cm above the waist line.
Find the halfway point on the waist line. Join this point to the mark you made on the centre front side of the skirt.
Now grab your French curve again, and join the halfway point to the outside edge with a curved line.
Drawing the Dart
The finished skirt will have 4 darts in total, 2 at the front and 2 in the back. I’ve made skirts before from patterns I’ve drafted myself and, apart from circle skirts, if you don’t bother with darts you’ll end up with something that doesn’t fit very well!
They’re not tricky to do and they’ll make all the difference.
Find the halfway point on the waist line again and mark 2 cm either side.
Now draw an 8 cm line downwards from the original point. Join the end of this to the points on either side to make a triangle.
Adding the Seam Allowance
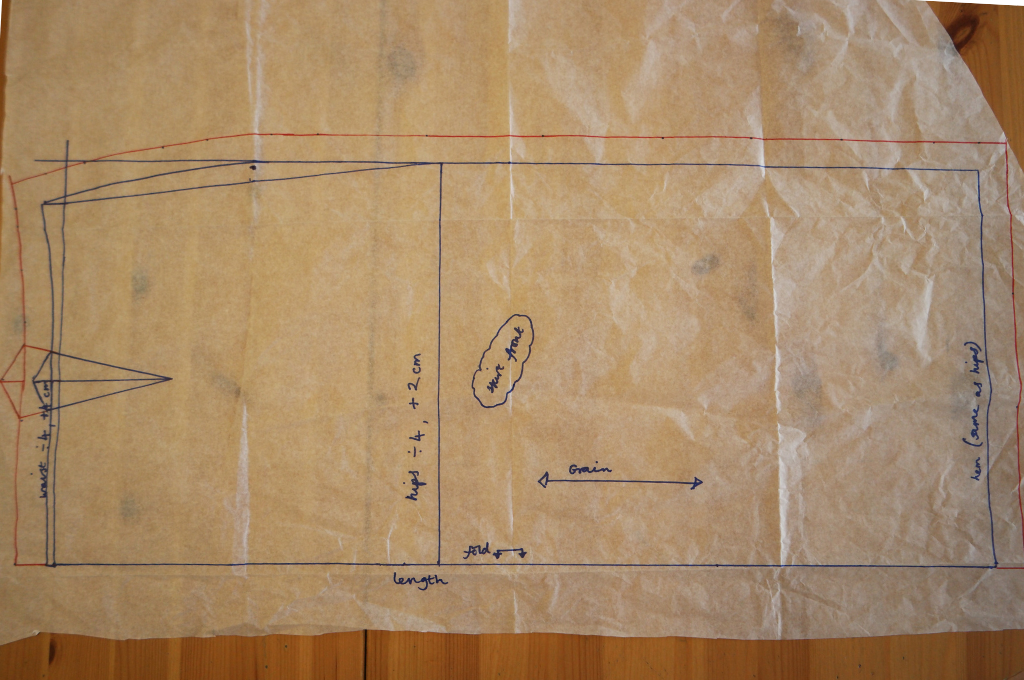
Add a 2 cm (3/4 inch) seam allowance along the waist, side and the hem. You’ll be cutting this section on the fold, so there’s no need for a seam allowance along the centre front.
Drafting the Skirt Back
The good news is you’ve already done most of the work!
Instead of redrawing the whole thing, you can trace the skirt front onto another sheet of pattern paper.
You will need to make some changes as we’re not the same round the back as we are at the front! Also you’re going to need to be able to get in and out of it.
There are going to be 3 changes to make. The first is to the waist line.
Find the original waist line on the skirt front. Do you remember that you made it 1/2 cm higher at the centre front end? For the skirt back, you need to make this point 1 cm lower than the original line.
Using your French curve, join this to the original line at the middle point.
The next change is to the dart. Extend the original line by 2 cm, then join it up to the points on either side. This means that the darts on the back of the skirt will be 4 cm wide like the ones on the front, but a couple of cm longer.
The last thing to do is to add a seam allowance to the centre back. You’ll be putting a zip in here.
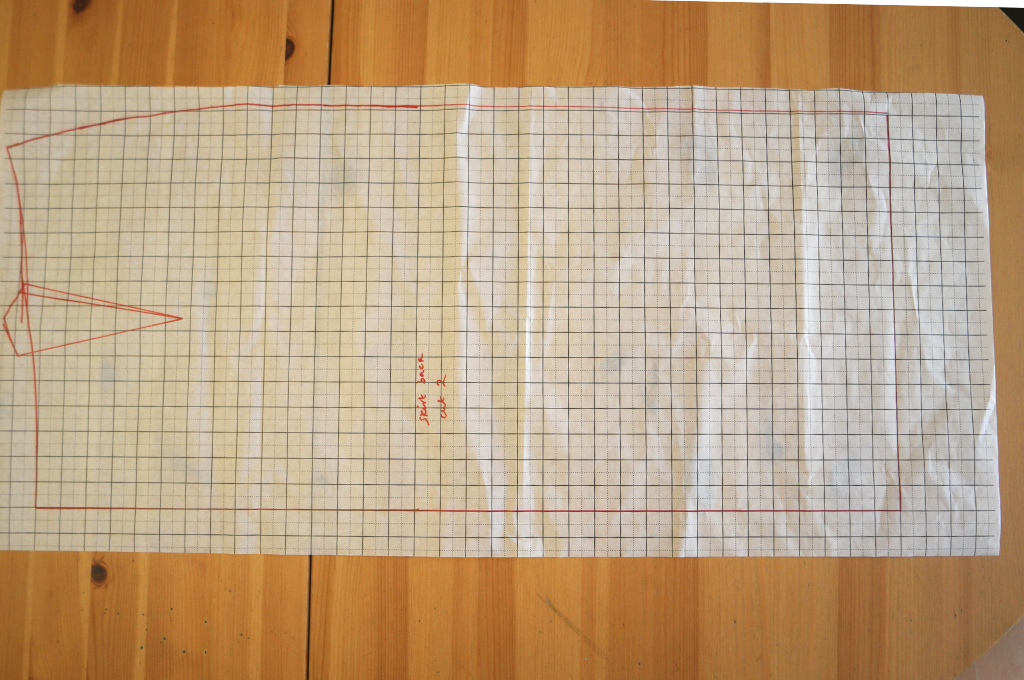
Your self drafted skirt pattern is ready! In the next post, I’ll talk about modifiying it a bit and then using to make a Spanish style skirt.
If you’re interested in finding out more about making clothes from patterns you’ve drafted yourself, I encourage you to have a look at my ebooks and other downloads, as this is something I’ve written about quite a lot!



One Comment