It’s dress time again!
Our friends Matt and Vicky are getting married in a couple of weeks and I needed to sort out something to wear. I hadn’t even thought about it unti the other night when Husband was getting bleary eyed staring at dozens of suits on the internet.
Not being one to pass up an opportunity to get making, I found some gorgeous fabric on the internet with cherry blossoms on. What could be more perfect for a spring wedding?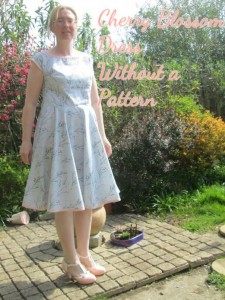
The dress is very simple. The bodice has two parts, front and back, and the skirt is a circle, in quarters. There is an invisible zip in the side.
Here is a tutorial in case you want to make one yourself!
Cherry Blossom Dress Without a Pattern
You Will Need: some old fabric/ bin bag/ greasproof paper or newspaper, 3-4 m cotton fabric depending on the width of the fabric and your dimensions (I used 4 m of fabric 110 cm wide) , 6-7 m bias binding again depending on your size, usual sewing supplies.
1. To draft the pattern for the bodice, pin a piece of old fabric/ greaseproof paper/ bin liner to your front, while wearing an old t shirt or fitted top. It will need to fit snugly without being too tight as cotton doesn’t stretch!
The piece of fabric will need to be large enough to cover side and shoulder seams of the t shirt you are wearing.
Using a pen, draw where you would like the neckline to be. Pin some darts to give it some shape, then draw on where the side and shoulder seams will need to be. Mark onto the fabric where your waistline is. You might find it helpful to use a mirror.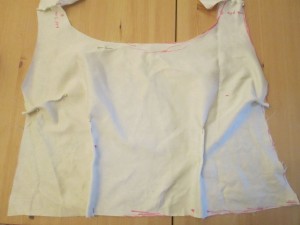
Carefully remove it and put it to one side.
2. To make the back piece, you could either use the same approach and pin a piece of fabric onto yourself and draw it on (you will need a friend to help you unless you are a contortionist!) or you could take the t shirt off and use it as a guide to make the back piece.
3. Cut out the bodice pieces, marking on where the darts will need to go.
4. To make the skirt, you will have to do some maths. If your maths is not your thing, unfortunately it is the only way. But don’t worry, maths is not my thing either and I managed, so you can too!
The measurements you need are your waist measurement (add 10 cm for seam allowance and a bit extra, just in case) and how long you want the skirt to be.
The thing to remember is that the circumference (edge of the circle) is the diameter (distance across the circle passing through the middle) x pi (which is 3 and a bit).
Diameter x pi = circumference.
Equally circumference divided by pi = diameter.
Ok?
So: waist measurement (don’t forget the seam allowance!) divided by pi = diameter of the bit where your waist will go. We only need the radius though as you will be folding the fabric to cut it out, so diameter divided by 2 = radius.
Now add the radius to the length that you want the skirt of you dress to be. So mine was 15 cm (radius) + 80 cm (skirt length plus a bit extra for the seam allowance) = 95 cm. You will need 4 squares of fabric this size (ie my squares were 95 cm x 95 cm) to cut your skirt from.
If you are using a directional print, make sure you have it the right way up! I actually made a bit of a mistake with mine, the cherry blossoms are all the correct way up but some are pointing the wrong way because the fabric is directional right and left as well as up and down!
WIth the squares on top of each other (you might prefer to do them separately if you are a nervous nellie) take one corner. From the corner, make a mark on each side the same length as the radius that you calculated earlier. Further down, mark off the length for your skirt. 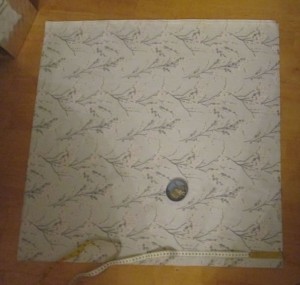
So I pinned 15 cm down from the corner, then 95 cm down from the corner.
Using pins and a tape measure, carefully measure off your waist and hemline from the top corner right across the fabric. 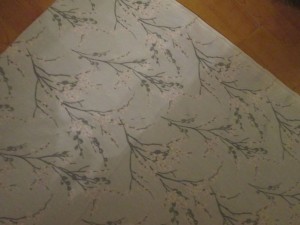
Cut out using the pins as a guide.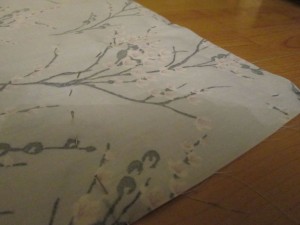
You should now have 4 quarter circles, each one with a chunk out of one corner.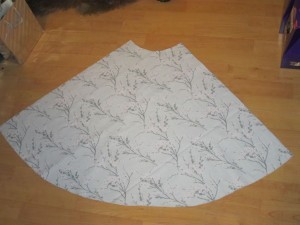
Phew, tricky part over! Sewing it up is much easier!
5. Time to start sewing it up! Take two of your circle quarters and, with the right sides together, sew along one of the long straight edges. Repeat for the other two quarters.
6.Sew the darts on the front bodice piece.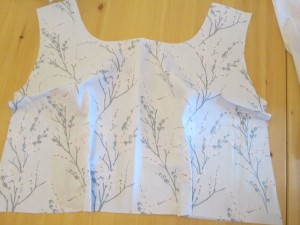
7. Take one of your semi circles made in step 6. With the right sides together, pin the waist of the skirt to the bottom of the front bodice. Sew. 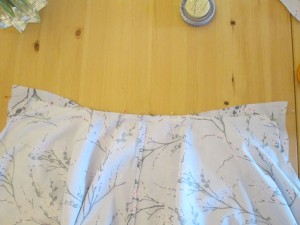
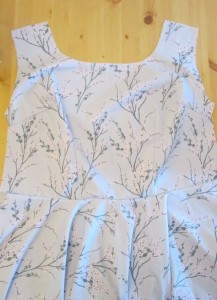 Repeat for the back bodice piece and the other semi circle.
8. Pin the 2 dress pieces to yourself inside out and pin the side seams (pin the waist, but don’t bother with the rest of the skirt). Undo one of them (you won’t be able to get it off otherwise!) and sew the pinned seam.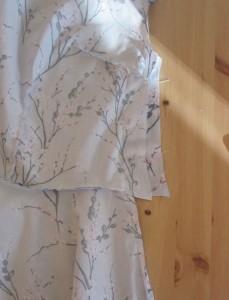
9. Put it back on, pin the open side again and pin the shoulder seams. This is easier if you have someone to help you, but not impossible if you do not. Unless you have uneven shoulders, you could just pin one, then do the other the same so that they match. Sew the shoulder seams.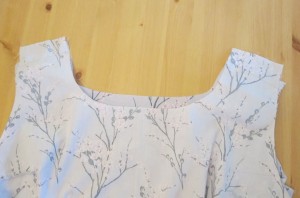
10. Put the dress on again inside out and pin the open side. Mark where the pins are on both sides. This is easier with someone to help you, although I managed without! Unpin, take it off and pin it back together. Sew the side seam. Press all the seams open.
11. Place the zip over one of the side seams, ensuring that the bottom of the zip covers the top of the skirt. Pin, then tack in place. 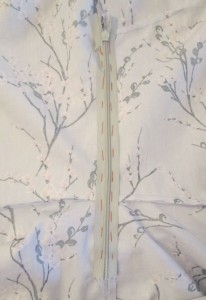 Sew round the zip (much easier with a zip foot), then unpick part of the side seam to free up the zip.
 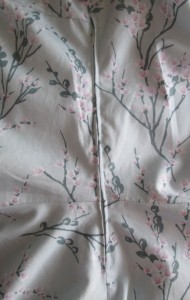 For more detailed instructions for putting in a zip, take a look at my tutorial here!
12. I find that the easiest way of finishing armholes and necklines is to use bias binding.
Starting with an armhole, cut a piece of bias binding long enough to go round the armhole, plus a bit extra.
Open it out and pin one of the edges to the raw edge of the armhole, on the wrong side, beginning at the armpit. Sew it on, remembering to tuck the end of the tape underneath when you start. 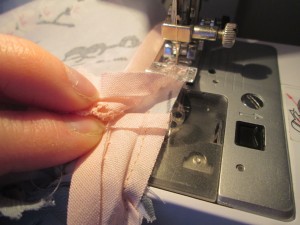
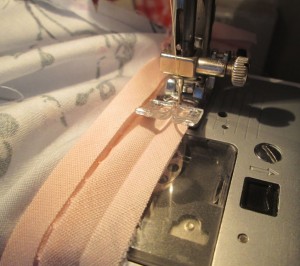 Fold the bias tape over the armhole and pin on the other side. Top stitch all the way round.
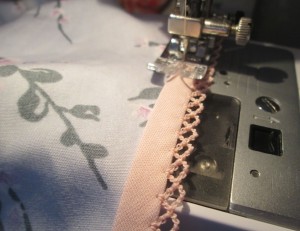 Repeat for the other armhole and the neckline.
13. Finish the hem with bias tape in the same way. As hemming a circle skirt can be tricky, I found this way so much easier!
I’m very happy with how this has turned out!
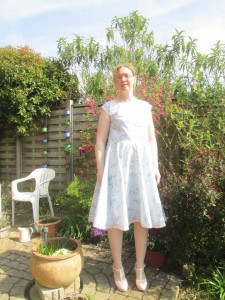
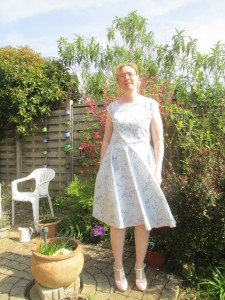
To celebrate the relaunch of my ebook, Sewing Clothes Without a Pattern, it’s currently part of a bundle of goodies, all full of useful advice advice and information about making clothes without a pattern. As well as the ebook, the bundle includes a guide to drafting pattern pieces, an abook about dressmaking techniques, tip sheets for working with knits, taking measurements and achieving a good finish, and some printables. You can find out more here.


Hi Anna, Looks great on you. Can you tell us where you obtain your dress material ?
We also live in Norfolk, UK.
I used to go to Art school in the 1960s and enjoyed screen printing and dress design. Now my wife is teaching me to make clothes as retirement is boring.
Hi Tim, the cherry blossom fabric came from ebay. Otherwise I buy stuff from Plush Addict (mainly quilting cotton so sometimes a little bit £££) or Minerva Crafts. Sorry you’re finding retirement boring 🙂
Finally! Something simple I can use not only to refresh my wardrobe, but to make matching dresses for my sisters and I!
I’d love to see when you’ve made them!
Such pretty fabric and a lovely swish to it. How clever without a pattern.
Thank you 🙂
I am in awe of people who can make clothes without a pattern. Making bags I can easily do, but clothes, that’s another story. Thanks for sharing the process. Maybe one day when I’m feeling game…

Pam @Threading My Way recently posted…Showcasing ~ Mason Jar Pincushion Tutorial
It’s just having a go and not being scared of things going wrong 🙂
Hi, Anna! I really, really love this! It looks like a style that would look great on absolutely any figure. Just adorable and a wonderful tutorial!

Michelle recently posted…Fantastic Repurposed Earrings
Thank you xx
This is such a lovely classic dress, great post

Emma recently posted…DIY: Leather Jacket to Suspender Skirt
Thank you
I love your tutorials! Im going to attempt the circle skirt first. Thanks for the tips!
Yay! I’m cheering you on!
Gorgeous dress Anna! This is definitely my kind of sewing with no pattern!
Thank you xx
Your dress is beautiful! Thanks for linking up at the Stitch It, Blog It, Share It Link Party. I hope to see more of your sewing projects at the party each Sunday night at 7pm.
Thank you!
You made this! GET YOU! I have only ever made clothes for my toddler and its so rewarding isn’t it! It looks fab and thanks so much for linking up with #MMWBH x
Thank you! I love making stuff!
WOW! Whats a stunning dress, you are a super talented lady! Thanks for linking up to the #MMWBH 🙂
Thanks!
Your dress looks great, you’re very talented to draw up your own pattern.
Thank you!
I’m amazed you have made the dress without a pattern. Thanks for taking the time to write the tutorial:)
It’s much easier than you’d think 🙂
Lovely dress 🙂
Thanks for sharing at Creative Mondays..
Thank you!
What a pretty dress, thanks for sharing how to make one, although I’m not sure that I’m brave enough to give it a try.
That’s why I make the pattern pieces out of fabric first, then I can pin it to myself and be totally sure it fits right 🙂
Lovely fabric and I especially love the trim around the hem.
The fabric is beautiful and I’d never seen bias binding like that before!
Pretty dress and this takes me back to college and pattern piecing with calico
Thanks Caroline, it’s much easier than people realise.
Clever you! I am sure you will look lovely at the wedding.
Thank you!
It’s gorgeous! Love the bias tape on the armholes and hem. I’m all for easier AND it looks better I think!
Thanks Nicole, I think so too!
Love the swooshiness of the skirt! Your instructions make it sound quite achievable too. I imagine this is the kind of time when a dress form would be useful too. I’m tempted to try making just a skirt using this method to start with – work my way up to making my own bodice pattern!
It was quite windy when I took the photos! A dress form is very useful for doing this kind of thing, although mine is not the same shape as me any more so I don’t use her as much. I would definitely recommend making just a skirt, it’s a nice easy project!