Cherry Blossom Dress Sewalong Stage 2: Drafting the Bodice and Cutting Out
Cherry Blossom Dress Sewalong Stage 2: Drafting the Bodice and Cutting Out
Welcome to the 2nd stage of the Cherry Blossom Dress sewalong!
Today we’re going to be drafting the pattern pieces for the bodice and cutting it out.
The bodice for the Cherry Blossom Dress is made from 2 pieces, the front and the back.
Drafting the front will take a little bit of time, but that’s most of the work. Once it’s done, we’ll use it as a template for drafting the back.
Then you can cut them out!
Before You Start
You’ll need your measurements from Tuesday, and:
Pattern paper (or an alternative)
Pencil
Long ruler
Tape measure
French curve or dinner plate
Pattern weights or pins
On your measurements printable, for some of the measurements you need to divide them by 2 or by 4. If you haven’t done this yet, I’d do it now to avoid getting into a muddle later 🙂
Drafting the Bodice Front
1. Start off with a large piece of pattern paper. It will need to be about 10 cm (4 inches) longer and wider than your longest and widest measurements.
Draw a vertical line the same length as the distance from the top of your shoulder near your neck to your waist. This will be the centre line of the bodice. When you cut out your fabric, it will be this line that goes on the fold.
On this line, mark off the distance from your shoulder to your armpit and from your shoulder to bust.
2. At the top of the vertical line, draw another line at right angles to it the same length as half the distance across your collarbone.
You only need half the measurement because you’re drawing half of the bodice front. You’ll cut it out on the fold and this will ensure that it’s symmetrical.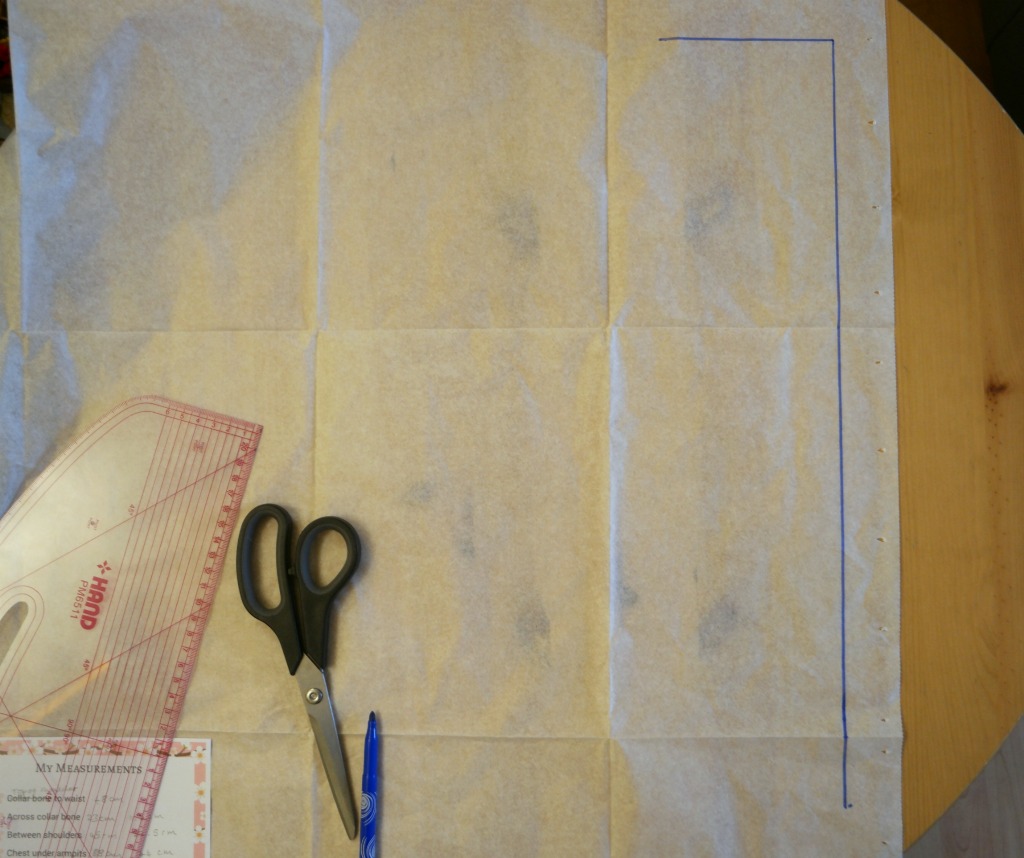
3. A couple of cm (about an inch) below and using the measurement across your shoulders divided by 2, draw another line below the first horizontal line.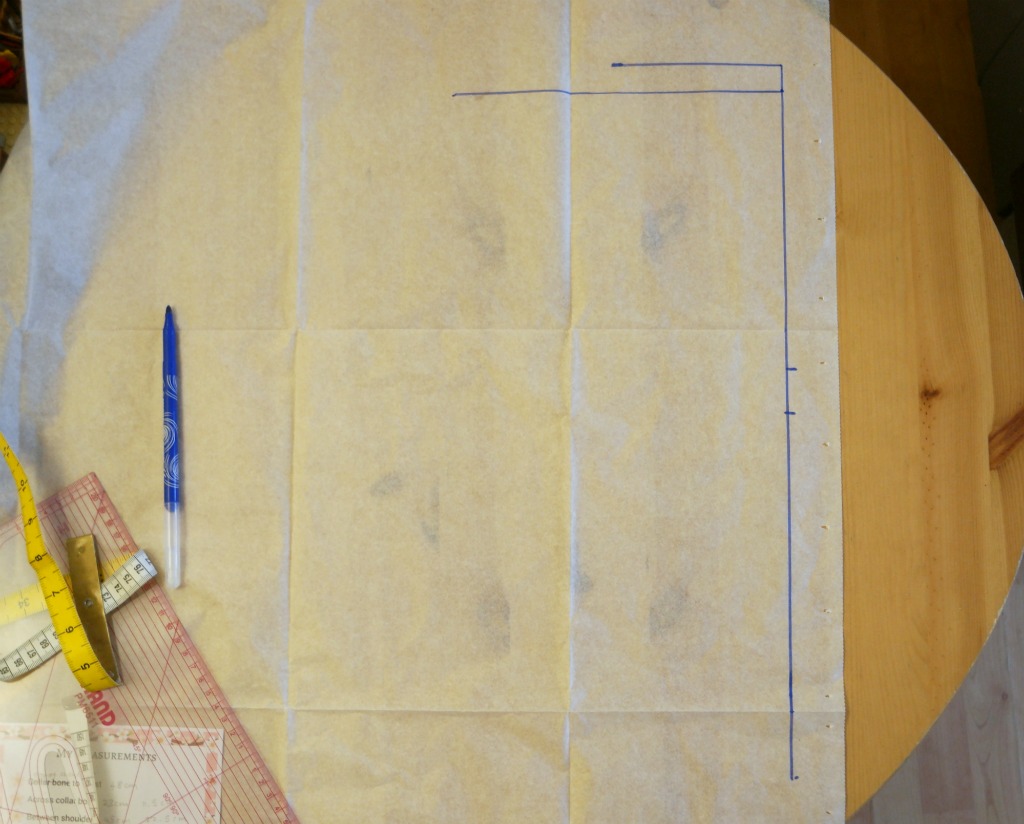
4. For the next horizontal line, find where you marked your shoulder to armpit measurement. Draw a horizontal line the same length as your chest measurement divided by 4.
5. Now find where you marked your shoulder to bust measurement. Draw another horizontal line the same length as your bust measurement divided by 4.
6. From the bottom end of the first vertical line, draw a horizontal line the same length as a quarter of your waist measurement, plus 2 cm (3/4 inch). The extra cm are to make allowances for the waist darts. We’ll come onto those in a minute!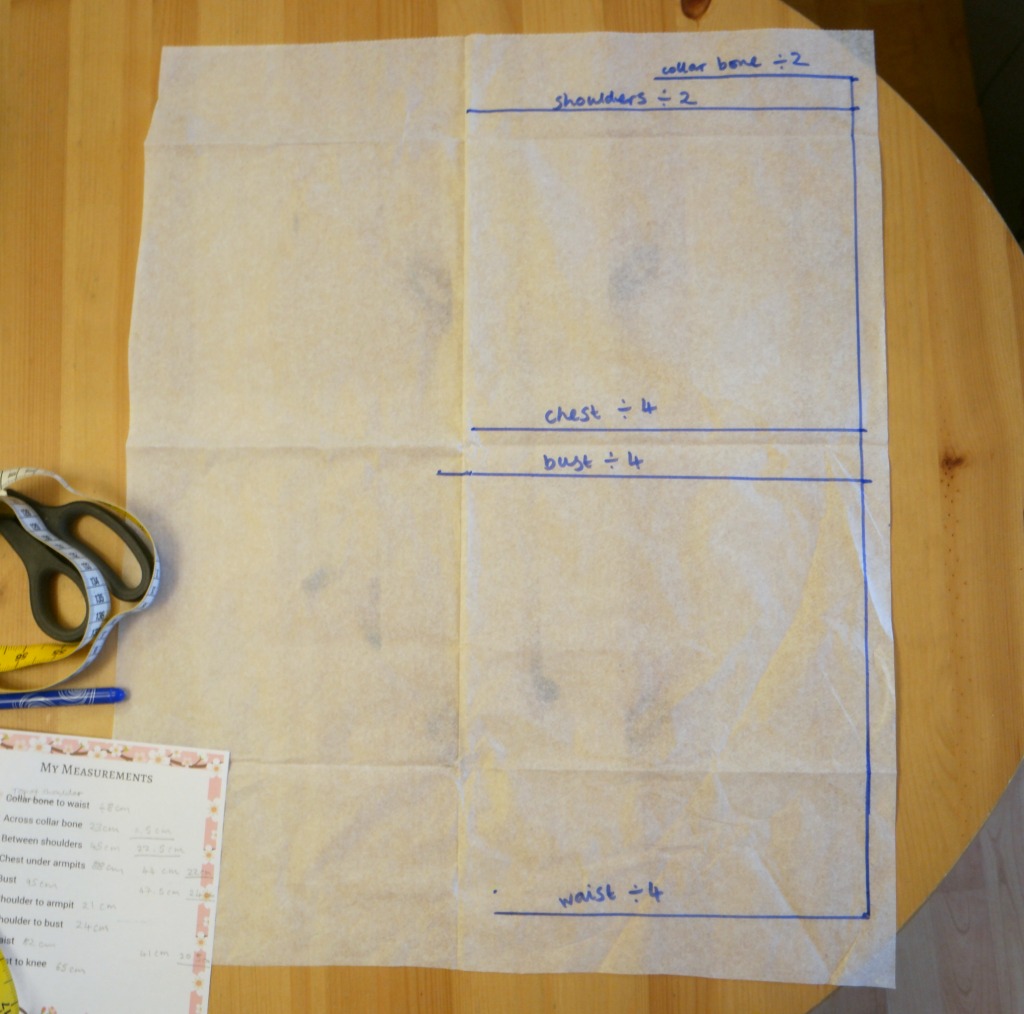
7. Now join the lines up! To get the curve of the armhole, you might like to use a French curve.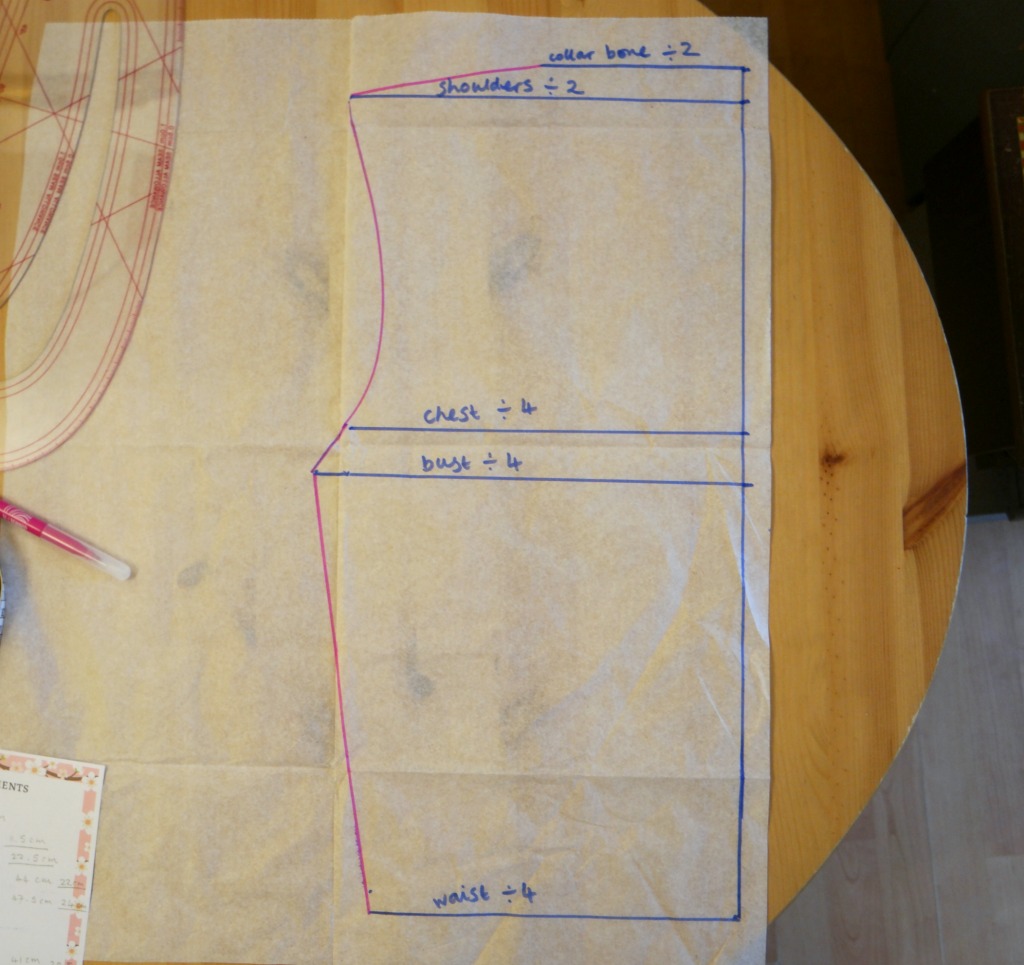
8. To draw the neckline, measure down about 15 cm (6 inches) from the top of the centre line. Using a French curve, join from here to the far end of the collarbone line.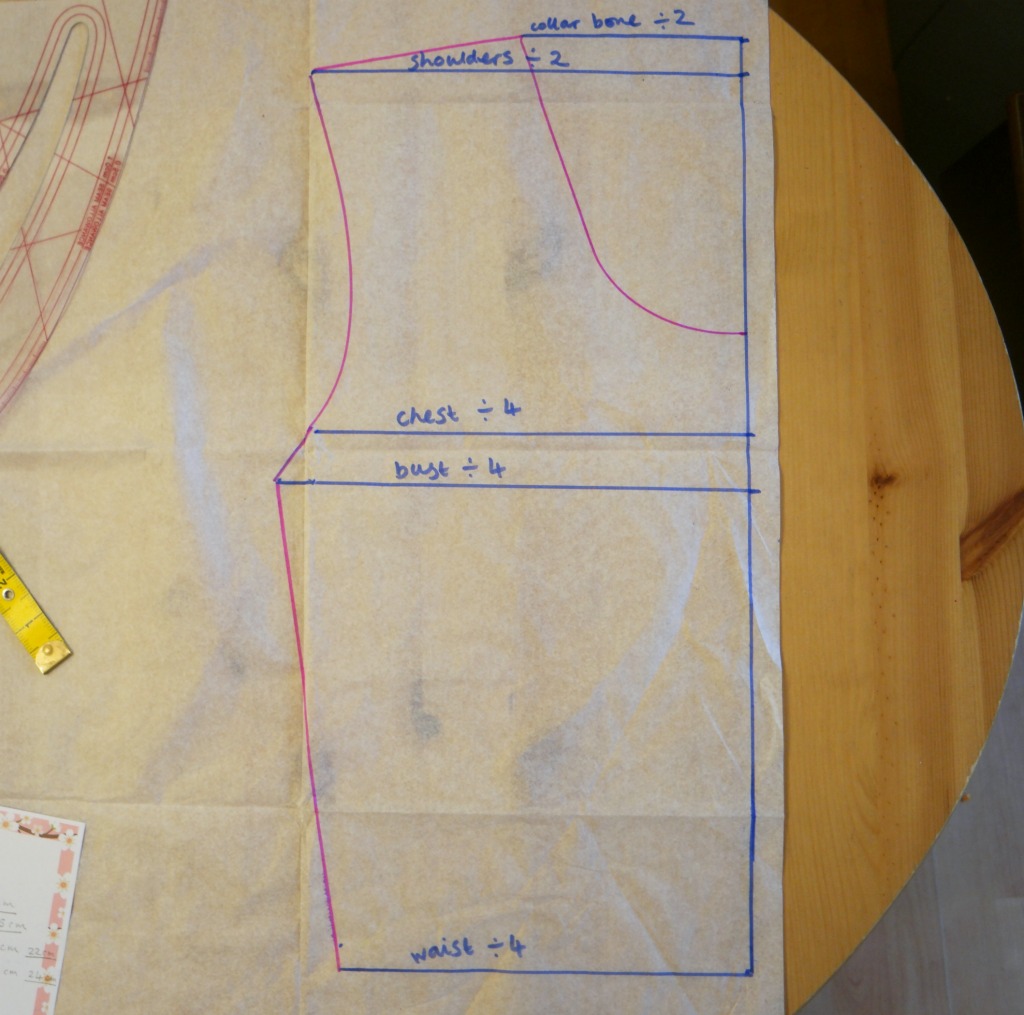
Next, pin your pattern piece to your dress form (or to yourself if you prefer). Check that the neckline is where you want it and redraw it if necessary.
9. To position the side darts, find the bust line and mark a couple of cm (3/4 inch) either side. Join these marks to a point about 8 cm (3 inches) along the bust line.
You will need to check this on yourself or on your dress form to determine whether the darts are in the right place, so pin the darts on your pattern piece and hold it onto yourself. If they’re not right, adjust them. You might need to make them wider or narrower, shorter or longer, or adjust the position a little bit.
10. To add darts at the bottom of the bodice, these will need to be a quarter of the way along the bottom of the bodice, so half way along the piece you have made.
They will need to be about 10 cm (4 inches) long and 2 cm (3/4 inch) wide in total, so 1 cm (3/8 inch) either side of the line. Check it on yourself to get them in the correct place.
11. Now add a 2 cm (3/4 inch) seam allowance to the bottom, the side and the shoulder edges. You won’t need a seam allowance for the neckline or armholes because we’re going to finish those with bias binding.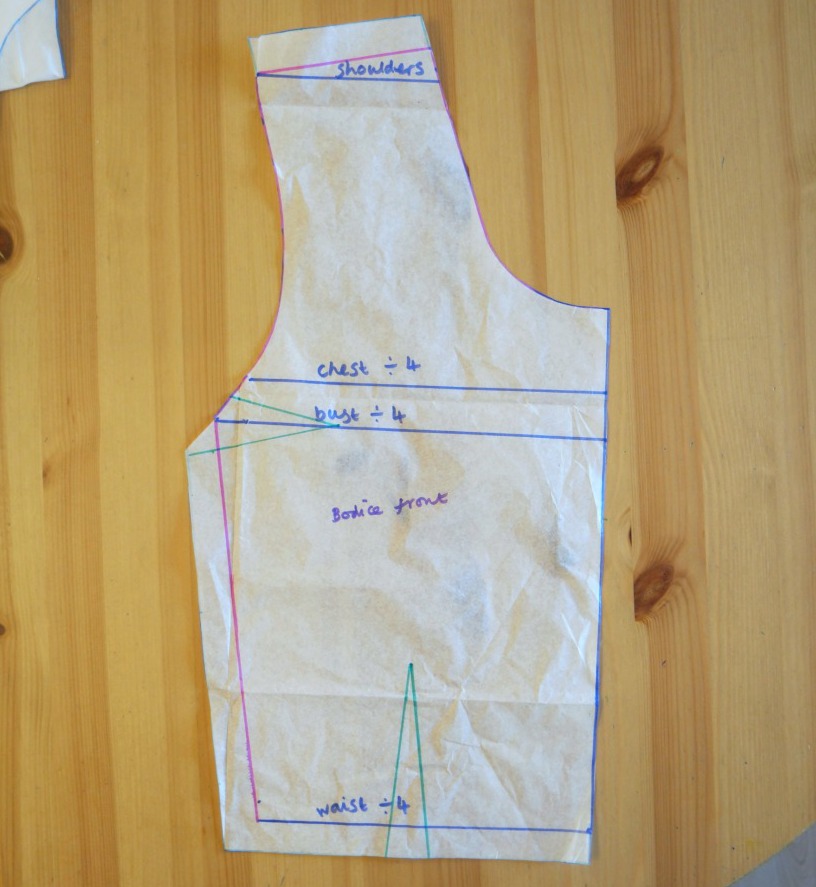
Drafting the Bodice Back
The official way to draft a bodice back is to take the same measurements from your back as you did for the front, then use these to draft the bodice back pattern piece.
The easiest way to draft a bodice back is to use the bodice front as a guide. Simply draw round the bodice front, then adjust the neckline so that it is shallower. The neckline only needs to be 10 cm (4 inches deep), not including the seam allowance.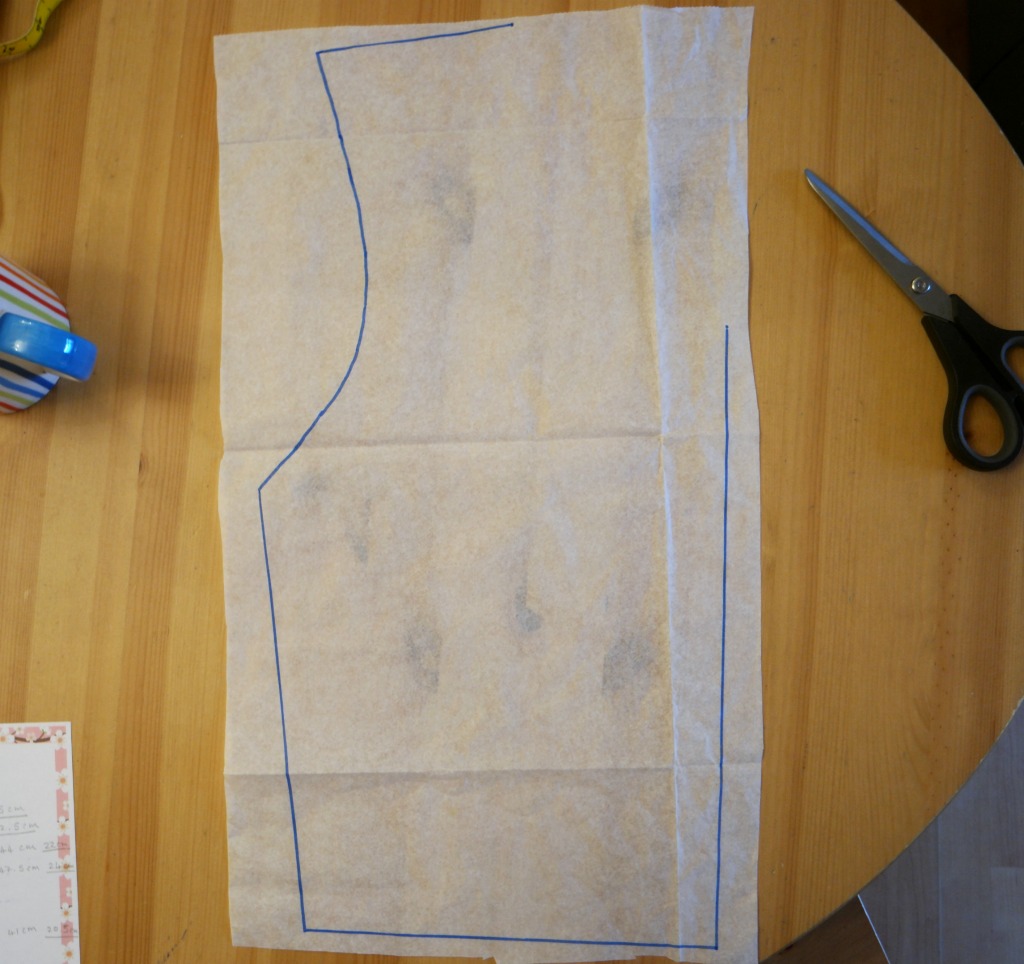
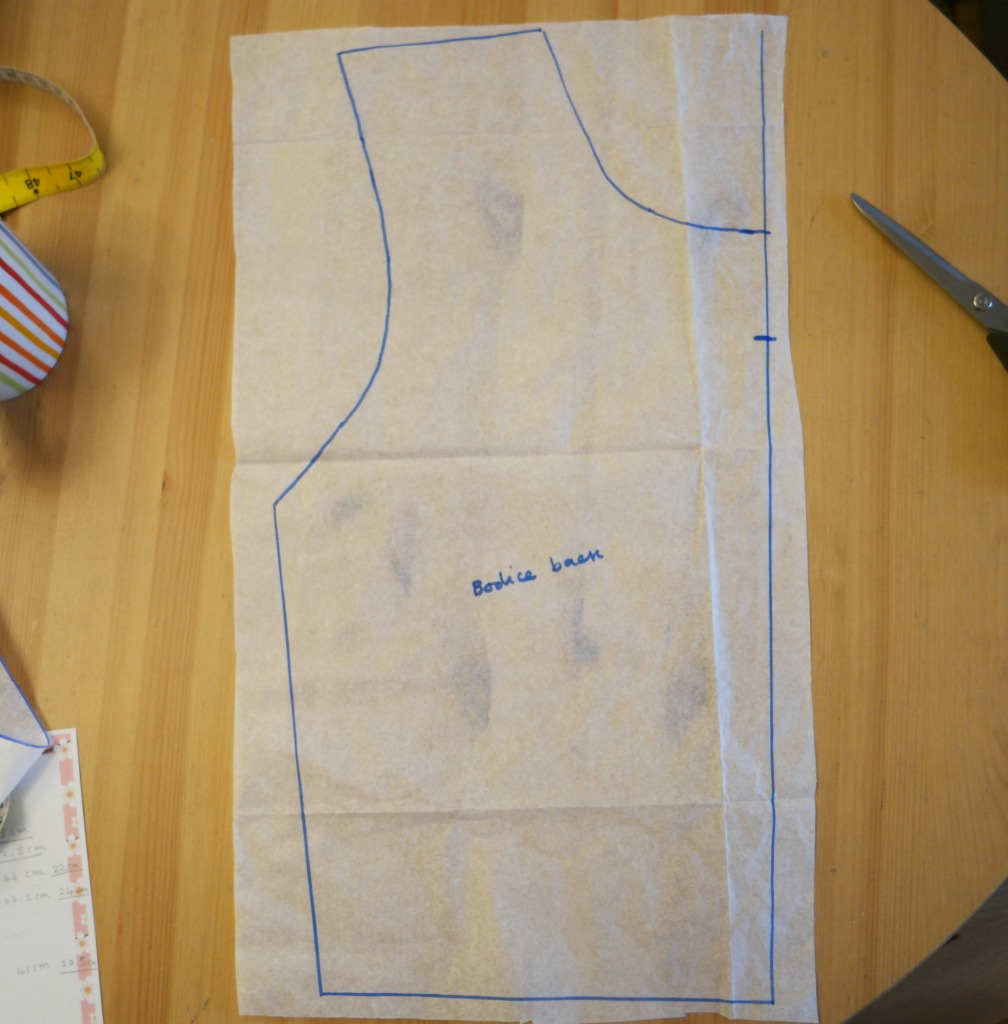
Now you can cut out the bodice pieces! Cut each piece on the fold with the grain running up and down. Put them to one side.
On Tuesday, you’ll be cutting out the skirt, then we can start sewing!



I do not understand dividing by ok. I went to the site to get the numbers and it ends up telling me 45 inch material will not work. Really. I bought 5 and 1\2 yes. I am a size 14. How what?
Hi Sheila, it should work fine. If you let me know your numbers I’ll work it out for you.
Thanks for sorting the video out. Bodice drafted. I’m a bit nervous about cutting it out because I’m not sure how much I need to leave for the skirt. Any advice would be welcome
If you’re worried, you could leave the cutting out for the moment until you’ve sorted out the skirt (that’s tomorrow’s post).
You genius!
Thanks Anna. Hoping to get to this point at the weekend. I’ve tried clicking oon the video but it says unavailable
I think it was an issue with the settings. I’ve changed them, hoping it works now!