A Guide to Pattern Pieces
Making your own clothes without a pattern can be a lot of fun. It always feels amazing to wear something that you have designed yourself and that fits as well as having chosen the fabric and made it up it yourself. This is something I have done a number of times and I have posted about my creations on here!
If you are considering having a go at making your own clothes without using a commercial pattern, it can be tricky knowing what the various pieces are supposed to look like.
Even if you use a pattern, often the shapes of the pieces do not look like how you would expect. Of course you can always find where it is written on the pattern piece, but it’s so much quicker to spot the bit you need and grab it! Also that only works if the piece it is is actually written on; if it is something you traced from a magazine or something a friend has lent you, they might not have written what each bit is.
As knowing what pattern pieces should look like is useful whether you use a commercial pattern or whether you make your own from scratch, here is a little guide!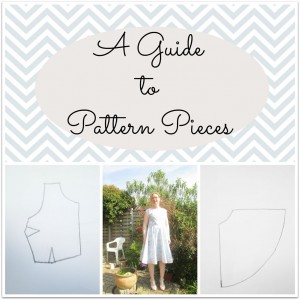
A Guide to Pattern Pieces
Sleeves
Sleeves are tricky because they look nothing at all like how you would expect.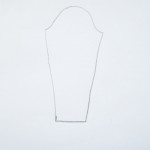
The top part needs to be curved because it needs to fit into the armhole, which is also curved.
If the sleeve is to be gathered at the top, it will be wider at the centre and the section to be gathered will be marked between two notches.
To get the length of your sleeve right, measure from your shoulder down to your wrist (or wherever you want the sleeve to end). Your sleeve piece should measure the same from the top of the curve down to the straight edge at the bottom, plus a couple of cm extra for the hem and seam allowance.
A tapered piece will give a more fitted sleeve; if it is less tapered the sleeve will be looser. Don’t forget to measure your wrist!
It can be difficult to get things symmetrical, so folding the piece in half and cutting on the fold can make things easier.
Don’t forget to check that the grain of the fabric is running up and down!
Skirt
This does depend on the kind of skirt you are making, but usually the piece will look something like this. Especially if it is the skirt section of a dress.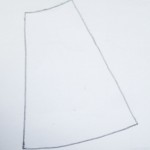
The vertical line will usually be cut on the fold. The bottom and top edges will be need to be slightly curved, otherwise you end up with weird points hanging down at the sides. Can you tell I’ve done this?!
Usually there will be either two or four pieces this shape to make the skirt. The degree of the angle of the other side will determine how full the skirt is.
For a more fitted skirt, the line will be more vertical.
Skirts can be made fuller by gathering or pleats. Where these need to go will usually be indicated by notches. However if you have some bulges around the middle that you would rather not draw attention to, making the skirt as full as you can without gathering is the best way to go. The best example of this is the circle skirt. The pattern piece will look like this.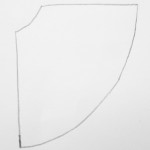
You would need four of these. However it is easy to make a circle skirt without making a paper pattern first.More on this in a week or two!
Bodice
The shape of the bodice pieces vary according to whether you are making something for a child or an adult.
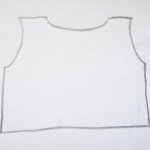
If you are making a dress for a little girl, the pieces will need to look something like this.
Again, symmetry can be an issue so it is usually best to cut it on the fold.
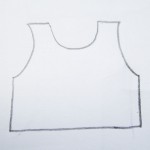
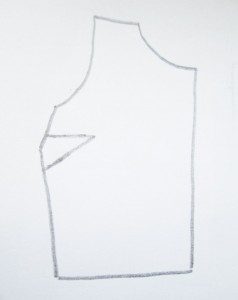
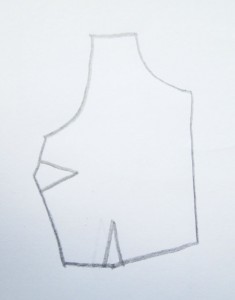
For an adult, the bodice pieces will usually look like this. Where the darts go may vary.
If you are new to sewing, don’t be scared of darts! They are what will give your dress or top some shape. The best thing to do is pin some old fabric to yourself and work out where the darts need to go.
The front will usually be one piece but occasionally it will be two. There are other ways of making bodices that use four pieces where each piece is shaped to allow for curves. The Sew La Di Da Sweetheart dress that I made last year was like this. It’s probably harder to do yourself though.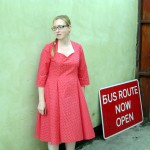
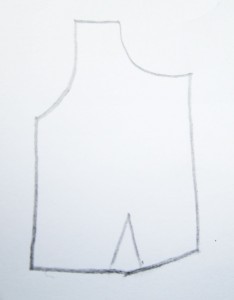
The back is usually a similar shape but the neckline comes up higher. Sometimes there will be darts at the bottom but often there will not be.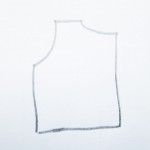
If you are making a dress or a top (or even if you buy one!) and it’s a bit shapeless, adding darts will often help.
Trousers
Trousers are also a weird shape.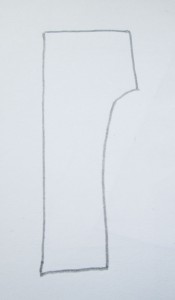
For loose fitting trousers, you might get away with cutting four bits the same. If you were making pyjamas or trackie style trousers for a child, you could even put the long vertical edge on the fold, then you would only need to cut two pieces.
The problem with cutting them like this is that they will either be baggy at the front or too tight in the seat. Not great if you have to bend over and then you discover that your beautiful handmade trousers have a huge rip in them!
Usually there will be more room at the back to accommodate bottoms and also nappies if you are making trousers for toddlers. These trousers that I made for Boy 4 (using a pattern) have more room in the seat, even though they are loose fitting.
As with sleeves, fitted trousers will taper towards the ankle whereas looser trousers will taper less.
Dresses
Dresses are often made as a separate skirt and a bodice which are then joined together. It’s easy to mix and match different skirt styles with different bodices, especially once you’ve made a few dresses.
Sometimes you might want the dress back and maybe the front to be one continuous piece, especially if you are making a shift style dress. The easiest way to do this is to pin the bodice section to the fabric then draw the skirt on underneath. This is what I did when I made my cross over dress.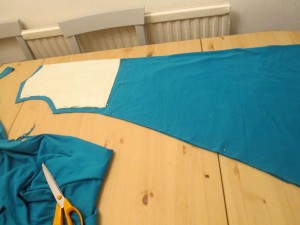
It will probably need darts in the waist area. On a commercial pattern the darts will probably be diamond shaped. 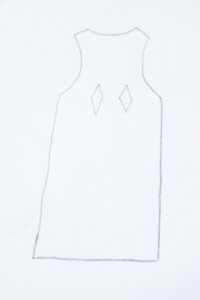 However you could just try the dress on inside out and pin it where it needs shaping.
One last tip: the grain, which runs parallel with the selvedge, usually runs up and down. So shoulder to wrist on sleeves, neck to waist on bodices, waist to ankle on trousers.
Happy sewing! xx
PS If you want to sew clothes without using a pattern, you might like my ebook!


What great advice, I get very easily baffled with patterns
I think sometimes they are unnecessarily complicated!
This is so useful Anna! I wish I had found it when I was making a pattern for a top. I ended up making it a bit too tight, even though I went by my measurements and used a book on making your own patterns. You’ve made it look a lot more simple!
Thanks Clare! It’s so easy to end up with stuff that’s too small and it’s much harder to put right.