Adding Fibres to Handmade Felt
I love making felt!
It is easy to do, you can get pleasing results easily and it’s a lovely, tactile thing to work with.
Making felt doesn’t require expensive speciallist equipment. Some wool rovings, a bamboo mat (like the table mats people had in the 80s), soap and hot water, a foam tube, a piece of fabric (old net curtain is perfect) and maybe some bubble wrap are all you need. There are kits available to buy on Amazon (affiliate link) or you can source the stuff yourself.
Adding fibres to handmade felt is also easy and it’s a nice way to add some interest to a piece of handmade felt.

Making Felt
I have posted about this before, so this isn’t a massively detailed tutorial. If you want one of those, please take a look at this post here.
Felt is made in 3 layers. For the first layer, the rovings are placed in one direction. For the second layer, they are placed in the other direction. For the top layer, the rovings need to be in the same direction as the first layer.

The first 2 layers are usually white. The third layer makes the picture, so you can add whichever colours you like!
When layering up the rovings, pull small amounts off and spread them out onto the bamboo mat.
Last time I made felt, the layers were quite thick and I had difficulty actually getting the wool to felt. It took a long time and lots of effort. It’s much easier if the layers are thin!
So only pull off a small amount, not more than 10 cm in length, and spread it right out so that it is very thin. It will still make a sufficiently sturdy fabric even though it is thin.
Adding Fibres
All kinds of things can be added to the top layer as part of the feting process.
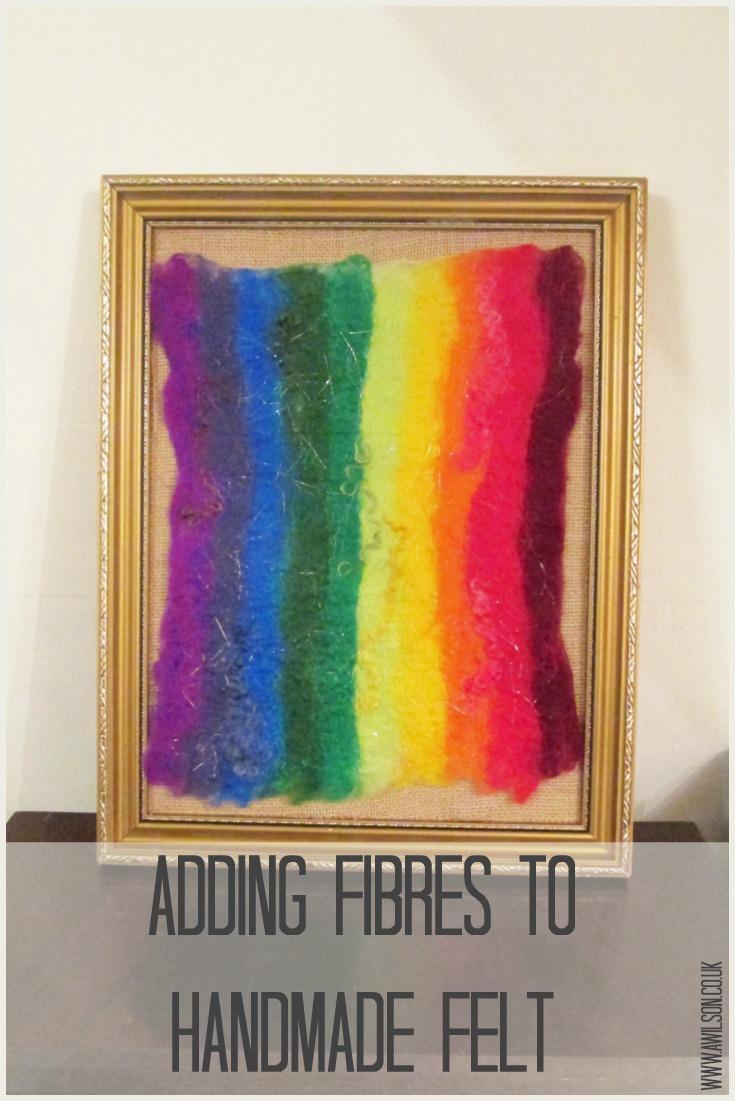
I used some curly locks from Teesdale sheep, fibres upcycled from sari fabric and angelina fibres
(affiliate links).

The curly locks probably would felt eventually, but the sari silk and the angelina fibres would not.
So after adding the fibres to the top layer, it is necessary to cover them with a thin layer of wool so that they stay put when it’s all felted together. I thought perhaps this would mean that they wouldn’t show properly when the felt was finished, but all it needs is a very thin layer. Just a tiny bit is enough.
Once the fibres are covered, then you can begin felting them.
The Felting Process
This can take a little while!
Cover your project with the piece of net curtain. Then you need to soak it with warm water. A towel under the bamboo mat is a good idea! Rub a piece of soap all over it until it is all soapy.
Next, rub it with your fingers in a circular motion until the fibres start to felt together. This will probably take a few minutes.
Once it starts to feel like the bits of it are not going to move around too much, it’s time to get rolling!
If you have some bubble wrap, put some between your felt and the bamboo mat and over the top of the net curtain. If not it doesn’t matter, it just speeds things up a bit.
Wrap it all round the foam tube and roll backwards and forwards. You might want to count to 50 (or 100) or time yourself. Turn it round and go again. Keep turning it so that you roll it in all 4 directions.
When it starts to felt it will shrink, so if you haven’t timed yourself, don’t worry. You will be able to see which bits you need to have a go at a bit more.
The fibres will have felted when they don’t move about when you rub them with a finger. It will also have shrunk a bit and it will look dimpled.
Finishing Off the Felting
Once you are nearly there with it, you can put the felt in hot water to help to finish the process. Putting some vinegar in it will help to remove the traces of soap. I wouldn’t recommend using malt vinegar or balsamic though! I use the same white vinegar in a squirty bottle that I use for cleaning.
Once you’ve rinsed it, pop it somewhere to dry. The felt dries out surprisingly quickly. I put mine on the radiator and it was dry within about 15 minutes.
Displaying Your Felted Picture
I attached the finished rainbow to a piece of hessian.
To do this, use some invisible thread and sew a few stitches through the back of the felt into the hessian.
I wanted to put the finished rainbow in a frame but I didn’t want to loose the woolly effect of the felt, so I removed the glass.
I’m happy with how it turned out!

Tips
Thinner layers make the felting process easier.
Warm water really helps things along. If your felt starts to feel cold, put some more warm water on it.
Soap also helps so don’t be afraid to rub on plenty!
If you don’t manage to get it finished in one go, don’t worry. You can come back to it later with more soap and warm water and start again where you left off.
Why I Made This
A few weeks ago our pastor set us all the challenge of creating something to represent the Bible and why it is special.
The most important thing to me about the Bible is that it is a book showing that God keeps his promises. And the sign that God keeps his promises is the rainbow.
So I decided to make a rainbow.
Obviously I didn’t want it to look like a child had made it! So I focused on making the most beautiful rainbow that I could, and felt was the obvious medium to choose. I decided that adding fibres to handmade felt would make it even more beautiful.
If you liked this post, you might also like these:
Linking up here.


This is beautiful!! Love the colors, so vibrant! Thanks for sharing at our party! I couldn’t find our logo or link anywhere on your blog, do you have a specific place where you mention the parties you link to. Would you kindly link back to us? Thank you!! Hope to see you again this Thursday at 7pm EST.!
Sorry Denise, that was an oversight!
great tutorial and love your felt rainbow art! thanks for sharing on craft schooling Sunday!
Thank you!