As a little girl, I used to enjoy rummaging through my mum’s blanket box full of left over fabric and the cubby of her sewing machine where she kept other bits and bobs.
I can remember finding masses of bias binding, wondering what on earth it was for and why my mum had so much of it!
Now of course I know that bias binding has lots of uses!
One way in which it can be used is to finish the raw edge on a skirt instead of hemming. It is actually my favourite way of finishing the hem on a circle skirt because the curve of the circle actually makes it quite difficult to hem neatly. This is what I did to finish this circle skirt and my favourite summer dress.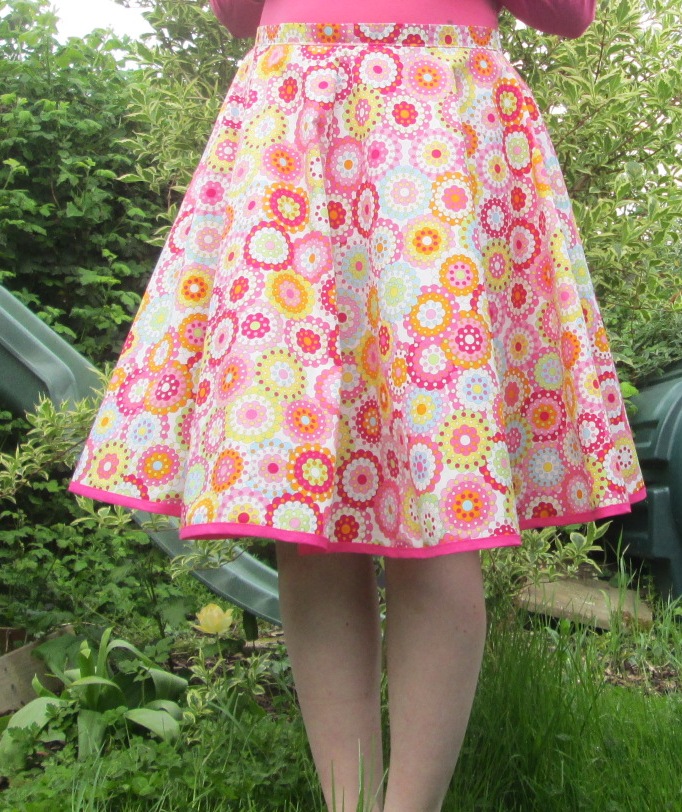
It can also be used to finish necklines. I have said before in this post how I try to avoid using facings. They never stay put! Using bias binding to finish a neckline is much easier, neater and quicker! This is how I finished the neckline of this dress.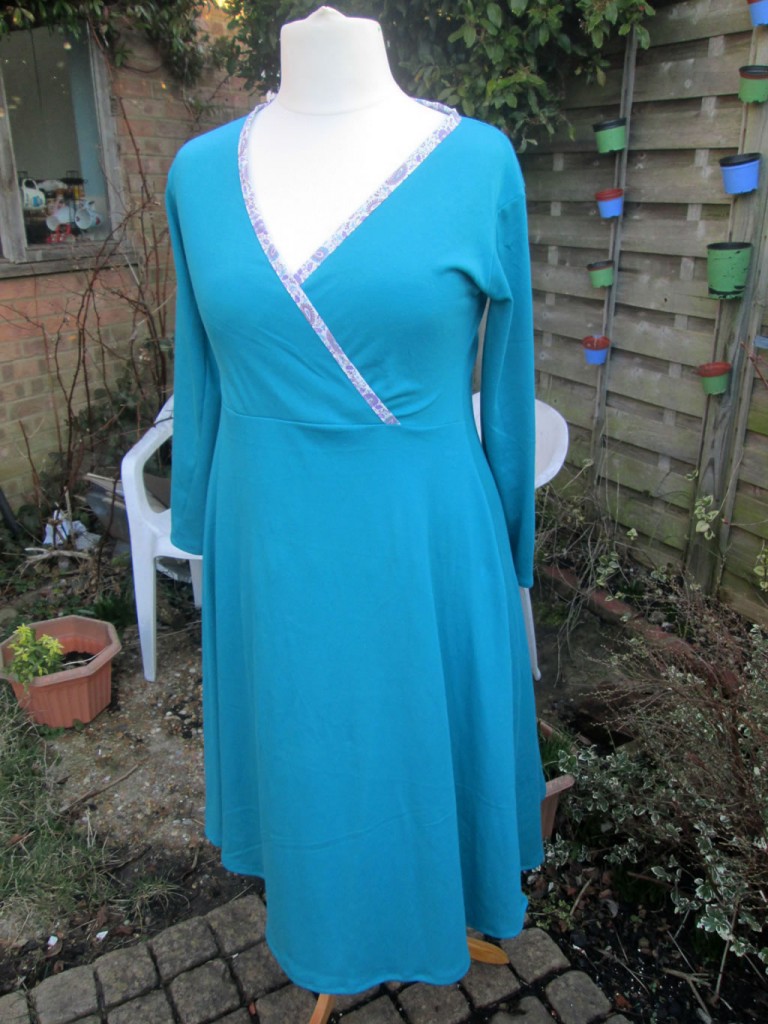
Bias binding can also be used to hold side seams together and, if sewn to the right side of an item, add a decorative finish. I have also used it to finish raw edges on bags and purses.
With all kinds of colours, widths and even prints, there is no reason not to use it! And if you can’t find some that you like, it is very easy to make your own!
How to Sew On Bias Binding
1. When you buy bias binding, it will usually come with the raw edges pressed lengthways inwards to the middle.
When you sew it, one of the raw edges will be sewn to the wrong side. The other raw edge will be tucked underneath and sewn onto the other side.
So the first thing to do is to fold the bias binding in half lengthways. If you will be sewing only a small piece, cut it off the roll first, allowing a few extra cm. If you are sewing several metres of it, leave it on the roll and fold it as you go.
2. Unfold the bias binding and pin one of the raw edges to the raw edge of your garment, on the wrong side. Neatly fold the short end over. 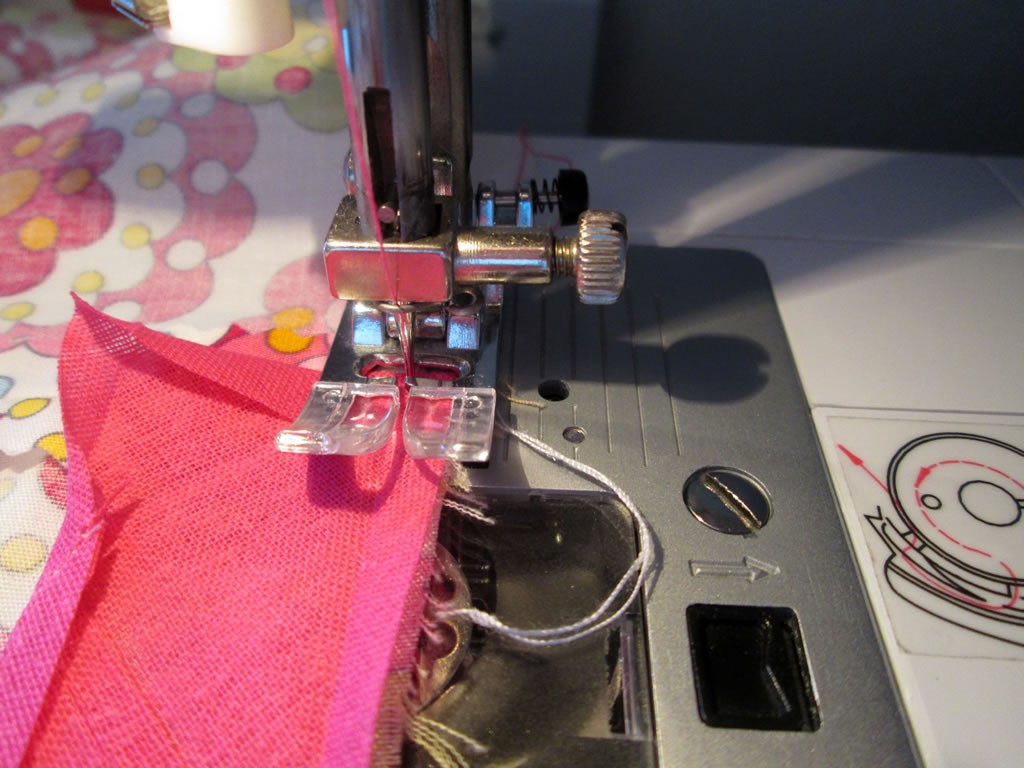
If you start at a seam, the folded end of the bias binding will be less obvious.
If you are going to be sewing masses of it, just pin the at the start and line up the raw edges as you sew.
3. Sew all the way around, keeping close to the raw edge. If your fabric looks like it might fray, use a zigzag or an overcasting stitch.
Cut the bias binding so that the ends overlap by about a cm. You don’t need to bother with folding the end over.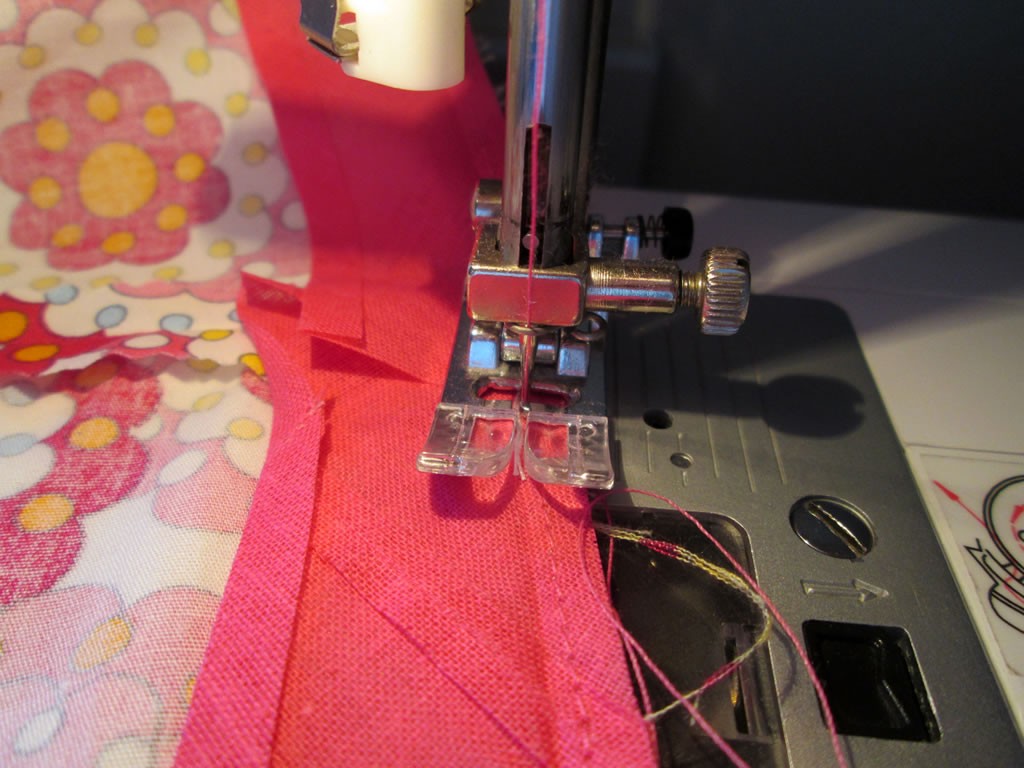
4. Fold the bias binding over so that the raw edges are enclosed. This is where having already folded it in half lengthways will really help! 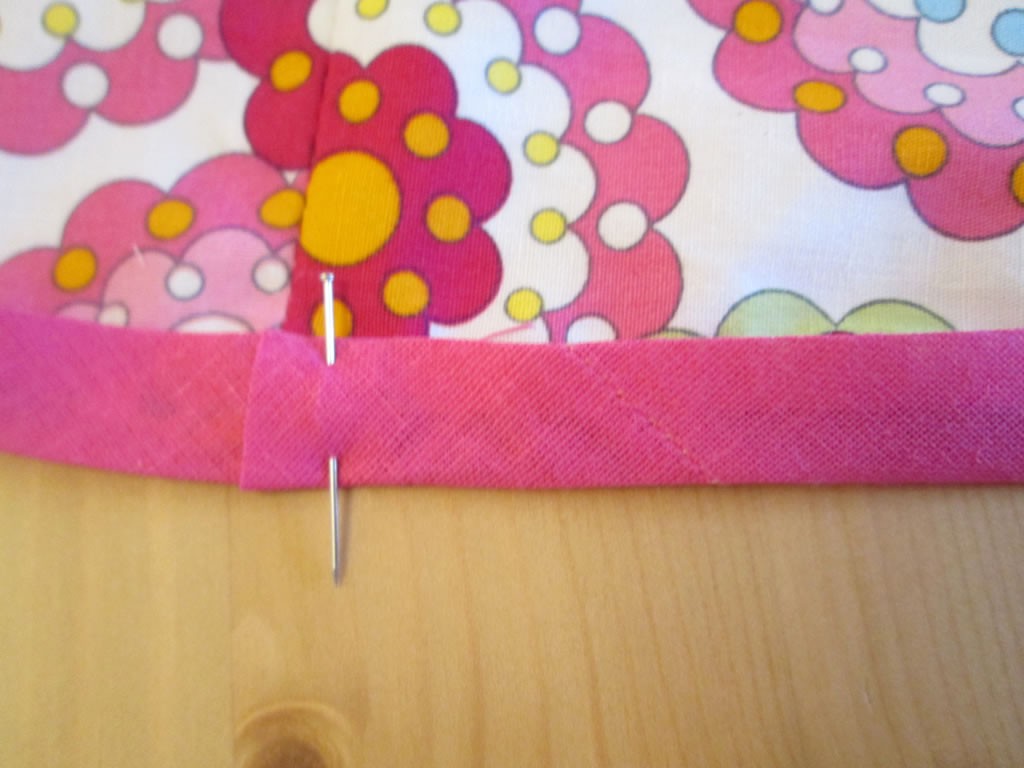
5. Pin it in place, then sew all the way round, keeping close to the edge of the bias binding.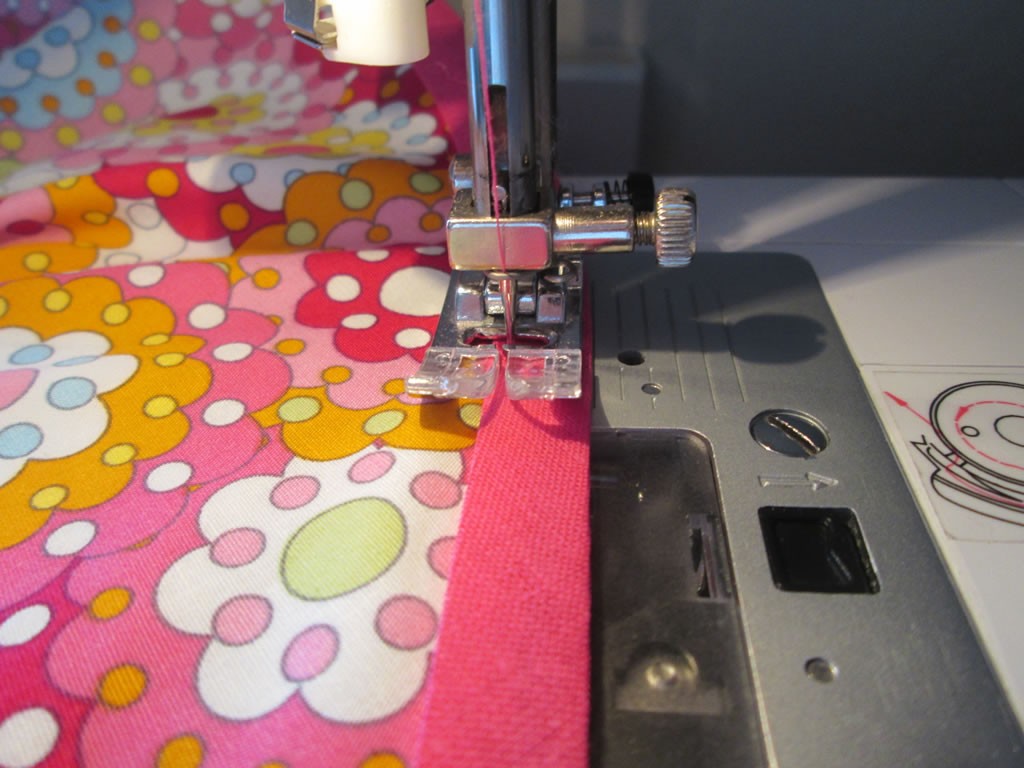
6. When you are a couple of cm away from being back to where you started, check that the end is tucked under neatly, then sew over it. You might need to add a couple of stitches by hand, although I don’t usually!
If you want to make your own bias binding, there’s a gadget you can use.
If you enjoyed this post, you might also like these!
How to Finish a Neckline How to Finish Seams
 How to Attach a Waistband
 How to Alter a Dress
 !0 Tips to Make Sewing Projects Easier


I’ve always wondered what the correct way to use bias binding in – and now I know, thank you
I hope it’s helpful xx
Great tips here, I tend to rush and end up with things a bit uneven and rucked. Your work is so neat.
Thank you 🙂
My Mum used bias binding on everything too, I wish her flaire for sewing had rubed off on me, it does look great on things today too and would transform clothing I’m bored of!
Have a go! You can always unpick it if it doesn’t work.