Scandi Flowers Cushion Cover: Planning a Project and a Tutorial
Every year, September is National Sewing Month, and over on All Free Sewing during September there’s a month’s worth of sewing tutorials, tips and giveaways.
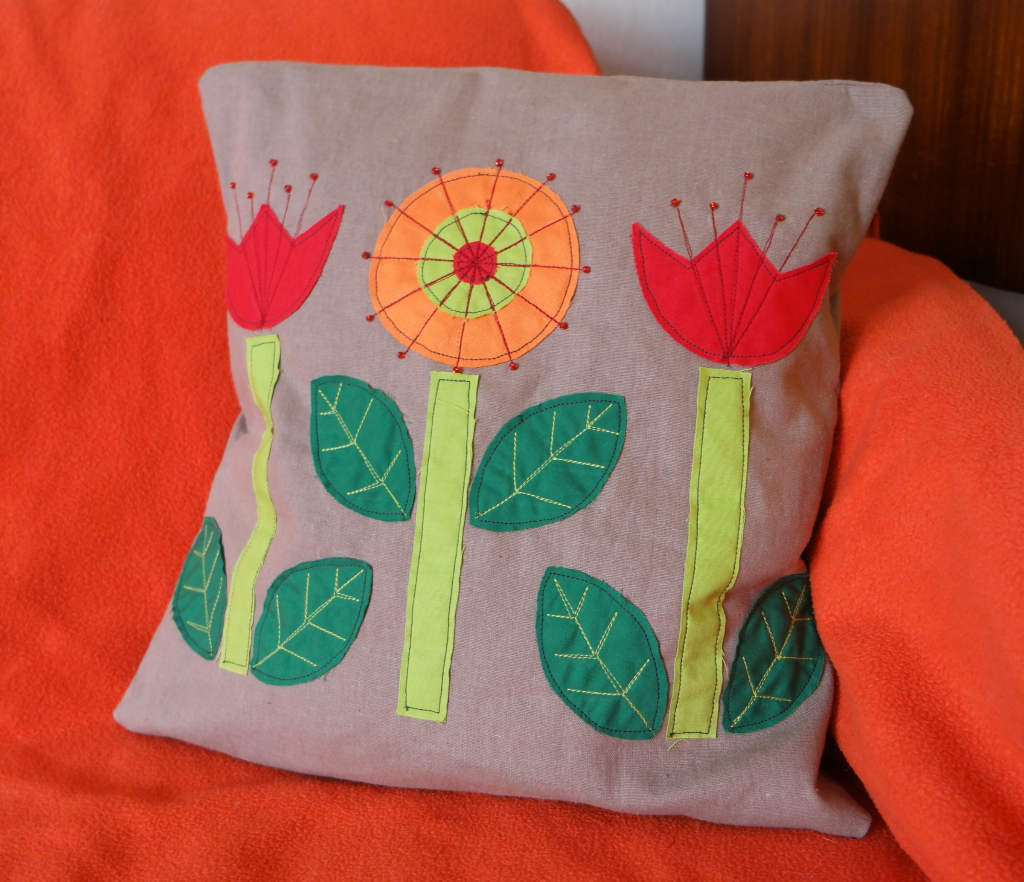
I’ve contributed to this for the last few years, and this year I wrote a tutorial for a Scandinavian inspired cushion cover.
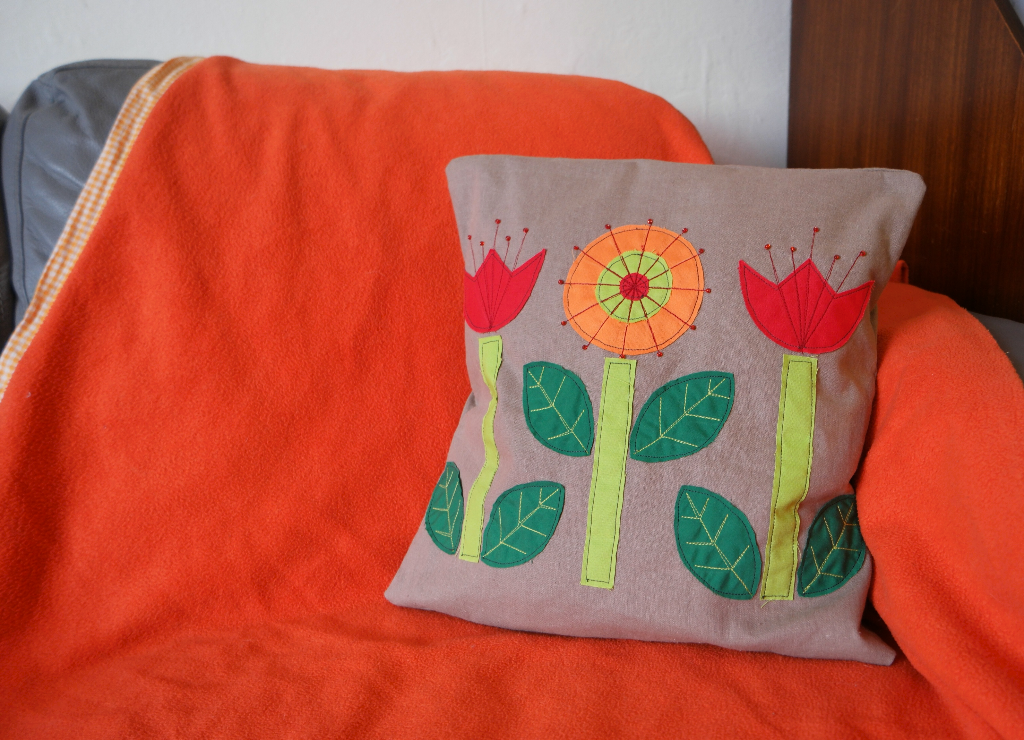
One of the reasons why I love bold, geometric flowers is because being easy to make from simple shapes, they lend themselves nicely to applique.
The tutorial is here if you fancy having a go. There are templates for the flowers which you can download and print out. I used the sewing machine for the embroidery, but you could sew it by hand if you preferred. The design includes seed beads, but French knots could be used instead.
The cushion cover itself has an envelope back. I always make them like this because it’s easy! If you find that the back gapes, you could always add a couple of buttons or some velcro.
As I’ve already written the tutorial, there’s not much point in me recreating here! So I thought that instead I’d share with you my process for designing a project.
Designing a Project
I usually have plenty of ideas, so being able to think of something to make isn’t normally a problem!
What requires more thought is how to turn the idea in my head into a finished item.
This involves refining and clarifying the ideas I have and deciding on the steps needed to make the idea into reality.
Collecting Ideas
The first thing I needed to do for my Scandi flowers cushion cover was to design the flowers.
I’d already decided that the cushion would have appliqued flowers made up of geometric shapes. So I had a look and added some ideas to my Pinterest board.
Drawing the Design
This is the part that can cause non drawers like myself some stress!
The purpose of the drawing is not to make a perfect work of art, but to sort out your ideas so that you get some sense of how it will look. It’s also useful in helping to get an idea of how you will make the thing and the steps involved.
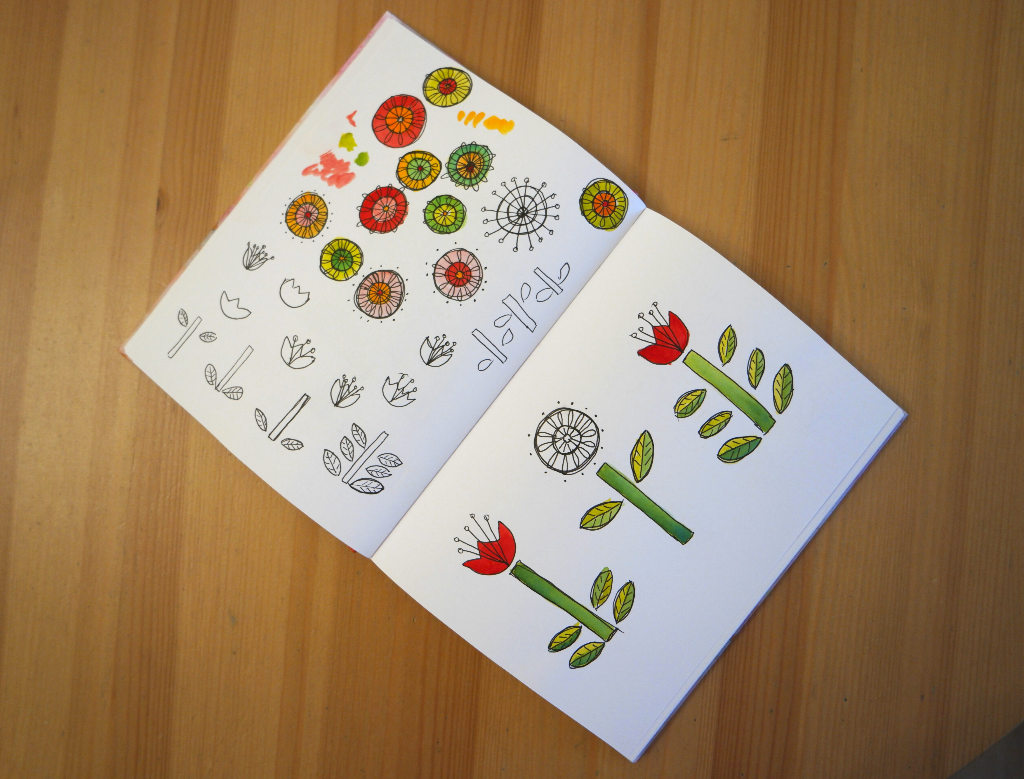
For my scandi flowers cushion cover, I tried out some different flower designs in different colour combinations. I’d already decided more or less on the colours I would be using, because the cushion would be living in my front room and I needed it to go with everything else that was already in there!
Once I’d finalised the flowers, I drew the design and coloured it in.
The Cushion Pattern
I’ve made lots of cushion covers over the years, so I already knew how I was going to make it. What needed clarifying here was the size of the pieces. The cover was intended for a pad I already had (pads come in standard sizes), so I measured it up and added the seam allowance.
Deciding on the sizes of the back pieces required some consideration, as it needed to be possible to get the pad into the cover, but at the same time keep the pad covered even when boys/ the cat were illegally leaping about on the sofa.
The Flower Templates
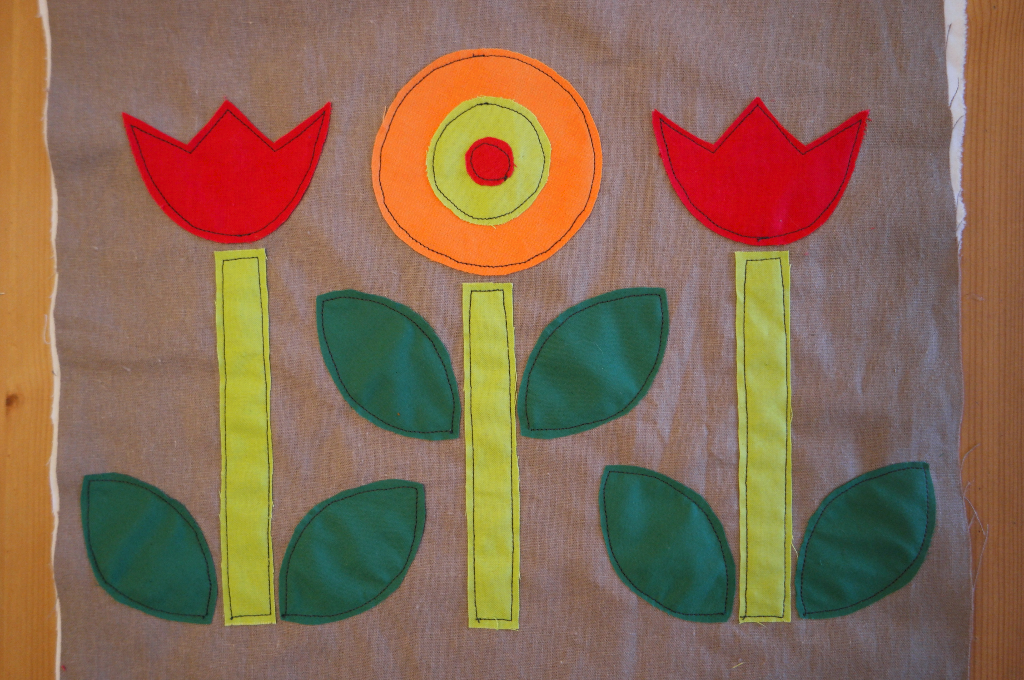
Having sorted out the size of the cushion cover, the next step was to decide on the size of the flowers, allowing not just for the flowers but for the leaves too.
The design changed a little bit at this stage in order to accommodate all the bits. I also simplified it to make it easier to make.
Once the flower pieces had been finalised, I made the pattern pieces. I was then able to use these to make the templates.
Deciding On the Steps and What Order They Need To Be In
Figuring out what needs doing and in what order needs to happen before I start. If I don’t, I’ll find myself in a pickle later on, as I did when I was still new to designing my own projects!
So first of all the pieces needed cutting out. The next step was to applique the flower design to the cushion front. The embroidery was next, followed by the beads.
The cushion was then ready to be made up. The back pieces needed hemming, then they would be ready to be sewn to the front section.
I also decided that interfacing would be necessary for the cushion front.
Making Up the Cushion
Having decided on the steps, it was time to make the cushion!
As this was going to be a tutorial, I needed to remember to take step photos and photograph the finished cushion.
Writing the Tutorial
Over the years I’ve written dozens of sewing tutorials, most of them here on Tea and a Sewing Machine and some for in books and magazines.
When writing a tutorial, being very clear is the most important thing. Clear language and steps that make sense are vitally important.
Step photos help too. Not only is it easier sometimes to see how something should be, photos also break up the text and make the whole thing easier to follow.
Headings also help, as they organise the instructions up into clear stages.
Finishing It All Off
To finish it off, I read through the tutorial and check that it makes sense. Sometimes errors do get through but I do my best to catch them!
I make customised images using my blog colours and fonts for social media.
Templates need to be uploaded, either to my site or to Dropbox if they’re too big and there needs to be a link in the post.
Then it’s all ready to go!
If you want to read the tutorial for the scandi flowers cushion cover but you don’t want to scroll back up, the link’s here.
And if you liked this post, you might also like this tutorial showing how to make a laptop case with a similar flower design.


Leave a Reply